Create a License Using the Creation Form
In this guide, you’ll learn how to manually create a license by filling out the necessary fields in the License Creation Form.
AssetLoom allows you to create new licenses in two ways:
- Bulk Import: Upload multiple licenses at once via CSV file.
- Manual Setup: Create licenses individually by filling out the License Creation Form.
In this guide, you’ll learn how to manually create a license by filling out the necessary fields in the License Creation Form.
Step 1: Access the License Form
- Navigate to Resources -> Licenses in the side menu.
- Click on the Create button at the top right of the screen to open the License Form.

Step 2: Fill Out the License Details
The form consists of several sections that need to be filled out to create the license.

Below is an overview of the key fields:
1. Summary
This section summarizes key license information from other sections and images.

2. License Information
This section is for the core details that define the license.

- Name: Enter a name for the license. (e.g.:
Microsoft Teams). - Seats: Enter the number of licenses or user seats available for this software.
- Category: Categories help group your licenses for easy management.
- Select a category that best describes the license, such as
Design Tool,Communication Software, etc - You can also type to create a new category if it does not already exist in the system.
- Select a category that best describes the license, such as
- Serial: Enter the license serial number used to identify or activate the license.
- Inventory: Select the inventory where the license belongs, such as Base Stock, or add other locations configured in your system.
- Manufacturer: Manufacturers help identify the brand or maker of the license. Select a manufacturer for your license from the dropdown list or simply type to create a new one if the model is not yet in the system.
3. Purchase & Cost Information
This section is essential for tracking the financial details and lifecycle of your license.

- Order Number: Enter the order number associated with the license’s purchase.
- Purchase Order Number: Enter the purchase order number linked to the license purchase. This helps connect the license record with your procurement or finance records.
- Supplier: The supplier from which the license was purchased
- Purchase Date: Select the date when the license was purchased. The purchase date helps track the license lifecycle, renewal planning, and cost history.
- Purchase Cost: Enter the license’s purchase cost. This is crucial for AssetLoom to track the license performance and depreciation value over time.
- Expiration Date: Select the date when the license expires. This helps you monitor renewals, avoid service interruptions, and maintain compliance.
- Termination Date: Select the date when the license agreement or subscription ends. This is useful for tracking canceled, retired, or non-renewed licenses.
4. Depreciation Information
This section is essential for tracking the license’s value over time.
You can only edit the Depreciation field in this form. Other fields update automatically after you enter the purchase information and select the depreciation rule.

- Depreciation Policy: Select the depreciation rule applied to the license. This determines how the license value decreases over time.
- You can select an existing depreciation rule created in the reference data.
- Or you can create a new rule here. Note that the new depreciation rule created in this form only has 12 months duration.
Learn more about Depreciation.
- Method: Specifies the depreciation calculation method used to determine the license’s value over time. Common methods include:
- Straight-Line, where the value decreases evenly over the useful life
- Double-Declining Balance, where the value decreases more rapidly in the early periods.
- Useful Life: Shows the depreciation period for the selected rule.
- Salvage Value: Displays the minimum value the license should retain after depreciation. The license value will not depreciate below this amount.
- Current Expense: Shows the license’s estimated depreciation expense for this month
- Residual Value: Displays the license’s current estimated value after depreciation has been applied.
- Residual Date: Shows the date when the asset will reach its salvage value.
5. Other information
This section includes additional details about the licenses. You can either select from the dropdown list of existing values or type to create a new one if needed.

- Department: The department that is responsible for or using the license (e.g.,
Engineering,Sales). - License to name: Enter the name of the person or team the license is managed by.
- License to email: Enter the email address associated with the license holder.
- Reassignable: Mark the license as reassignable if it can be checked in and assigned again to another user or asset. If this option is not selected, the license cannot be checked in after it has been assigned.
- Notes: Add any additional information or remarks related to the licenses( internal references, conditions, or handling instructions).
6. Custom Fields
If you need to track additional information specific to this license, click Add to include extra fields for tracking unique data about the license (e.g., condition, version, or any other specific details).
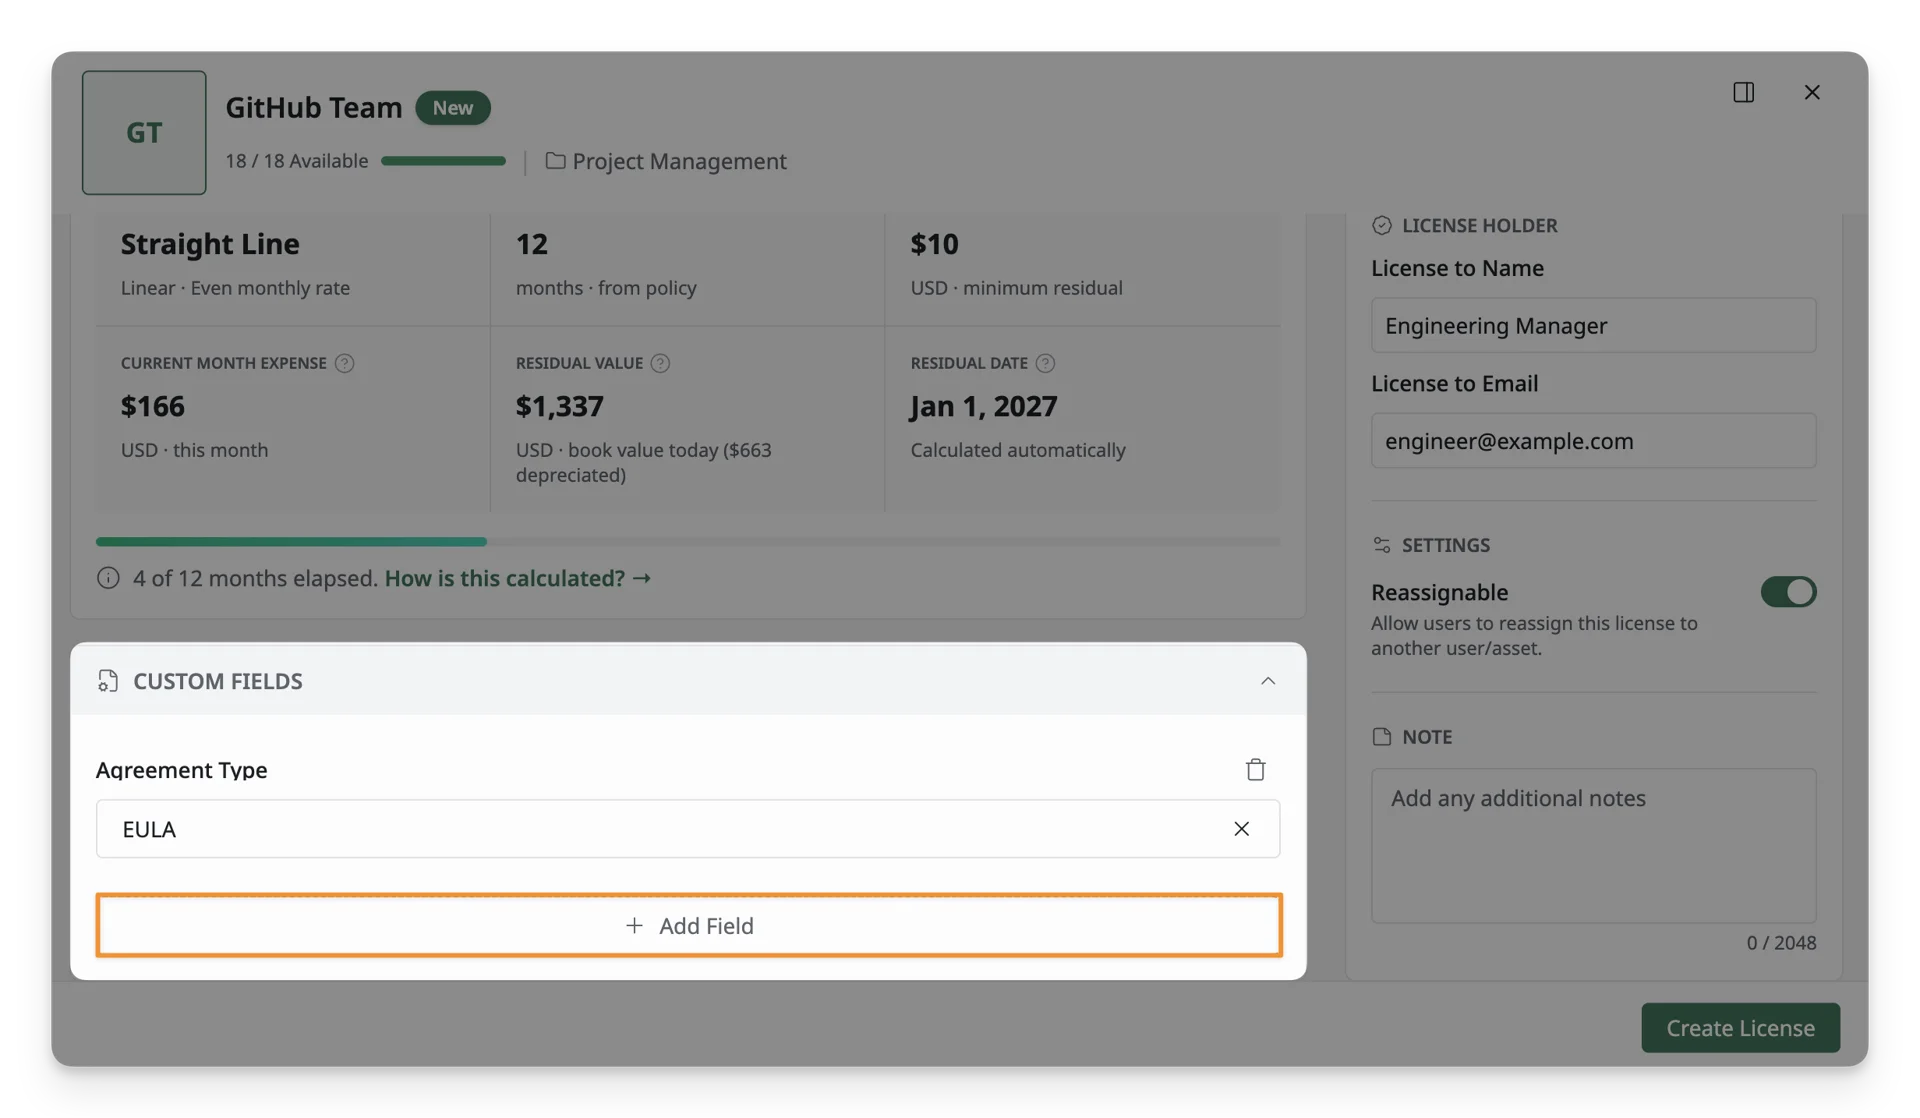
Custom fields must be created in advance in Reference Data > Custom Fields. If no custom fields have been set up, you won’t see any options to add them in this form.
Step 3: Save the License
Once all required fields are filled, click the Create button at the bottom of the form to save the license to the system.

Step 4: Review Your License
After creating the license, you will be redirected to the License List, where you can view and manage all your licenses. If any information needs to be updated, simply click on the license and modify the details as needed.
What’s Next?
- Import New Licenses: Bulk import your licenses to AssetLoom with CSV files