Manage Scan Results
Learn how to review, organize, and work with AssetLoom Network Scanner results, including understanding discovered device information, exported files, and scan output formats.
After saving your scan result file, you can review the generated result file and capture scanner logs for troubleshooting when needed.
View Result File
On macOS and Linux, if you run the scanner with sudo, the generated CSV or JSON file may also be created with admin permissions. As a result, opening or reading the file as a normal user may return a permission error.
To review the output directly from Terminal, use sudo when reading or processing the file.
- For CSV files:
sudo python3 - <<'PY'
import csv

columns = [
    "IP",
    "MAC",
    "Hostname",
    "DeviceType",
    "Confidence",
    "OpenPorts",
    "DiscoveredBy",
    "DiscoveryLimited",
]

with open("devices.csv", newline="") as f:
    rows = sorted(csv.DictReader(f), key=lambda row: row["IP"])

widths = {col: len(col) for col in columns}

for row in rows:
    for col in columns:
        widths[col] = max(widths[col], len(row[col]))

print(" | ".join(col.ljust(widths[col]) for col in columns))
print("-+-".join("-" * widths[col] for col in columns))

for row in rows:
    print(" | ".join(row[col].ljust(widths[col]) for col in columns))
PY- For JSON files:
sudo python3 - <<'PY'
import json

columns = [
    ("IP", "ip"),
    ("MAC", "mac"),
    ("Hostname", "hostname"),
    ("DeviceType", "device_type"),
    ("Confidence", "confidence"),
    ("OpenPorts", "open_ports"),
    ("DiscoveredBy", "discovered_by"),
    ("DiscoveryLimited", "discovery_limited"),
]

with open("devices.json") as f:
    rows = json.load(f)

if not rows:
    print("No devices found in devices.json")
    raise SystemExit

rows = sorted(rows, key=lambda row: row.get("ip", ""))

def format_value(value):
    if isinstance(value, list):
        return ", ".join(str(v) for v in value)
    if value is None:
        return ""
    return str(value)

widths = {}
for label, key in columns:
    widths[label] = max(
        [len(label)] +
        [len(format_value(row.get(key, ""))) for row in rows]
    )

print(" | ".join(label.ljust(widths[label]) for label, _ in columns))
print("-+-".join("-" * widths[label] for label, _ in columns))

for row in rows:
    print(" | ".join(
        format_value(row.get(key, "")).ljust(widths[label])
        for label, key in columns
    ))
PY
You can see the result in the table-view format:
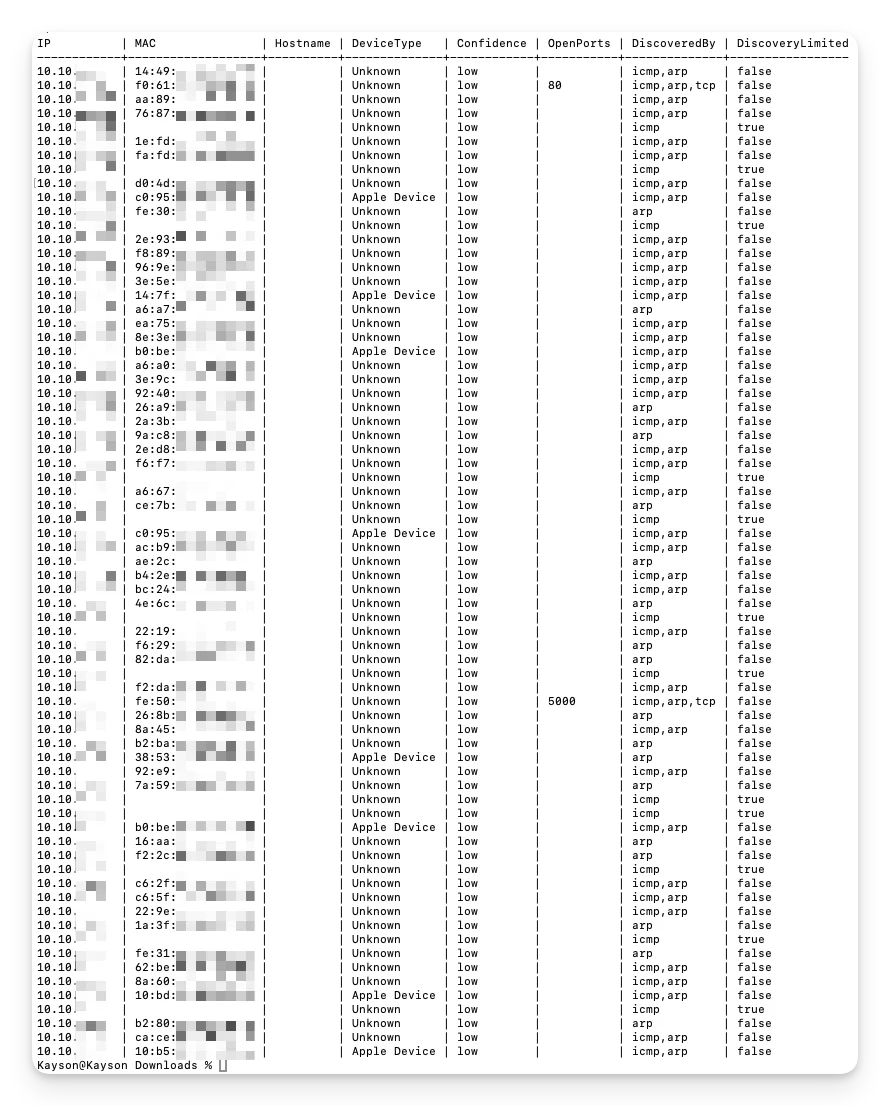
On **Windows**, the output file follows the access permissions of the folder where it is saved. If you ran the scanner from an Administrator PowerShell or Command Prompt, you can normally open the CSV or JSON file from that folder with your usual application.
Capture Logs
You can save the scanner’s activity log files for troubleshooting or support review. It is useful when a scan fails, returns unexpected results, or when you need to share diagnostic information with support.
The scan results are still saved separately to the file specified with --output

Save terminal output into separate log files
To save the standard output and scanner messages into separate log files, use this command:
sudo ./assetloom-scanner --config ./config.json --output ./devices.csv --force-output target scanner.stdout.log 2>scanner.stderr.log
This creates
- a
scanner.stderr.logfor scanner logs and scan messages, and - a
scanner.stdout.logfor standard command output, such as output from--help,--version,--init-config, or--dry-run.
Save terminal output into one single log file
To save all terminal output into a single log file instead, use this command:
sudo ./assetloom-scanner --config ./config.json --output ./devices.csv --force-output target >scanner.log 2>&1
You will receive a scanner.log that combines all the scanner logs, messages and standard command output.
Which log option should you use?
- Separate log files: Use this when you want to troubleshoot in more detail. It keeps normal command output and scanner warnings/errors separate, making it easier to identify where an issue occurred.
- Single log file: Use this when you want one complete terminal record that is easier to review or share with AssetLoom Support.