Make certain items visible to certain people
Explore how to make certain items visible to certain people
Not every team member needs access to everything in AssetLoom. With Roles and Permissions, you as the site admin can control what users are allowed to see or do in the system.
For example, you may want:
- IT staff to manage assets and perform maintenance
- Team members to only view the assets assigned to them
- Finance staff to view reports but not edit inventory
Roles allow you to define these permissions and apply them to specific users.
Make sure:
- You are a Site Admin. Only site administrators can create or modify roles and permissions.
- Your team members have already been invited to the site. Roles can only be assigned to users who are part of your workspace.
How to Configure Roles & Permissions in AssetLoom
To configure roles and permissions, follow these steps:
1. Locate Permission in Settings
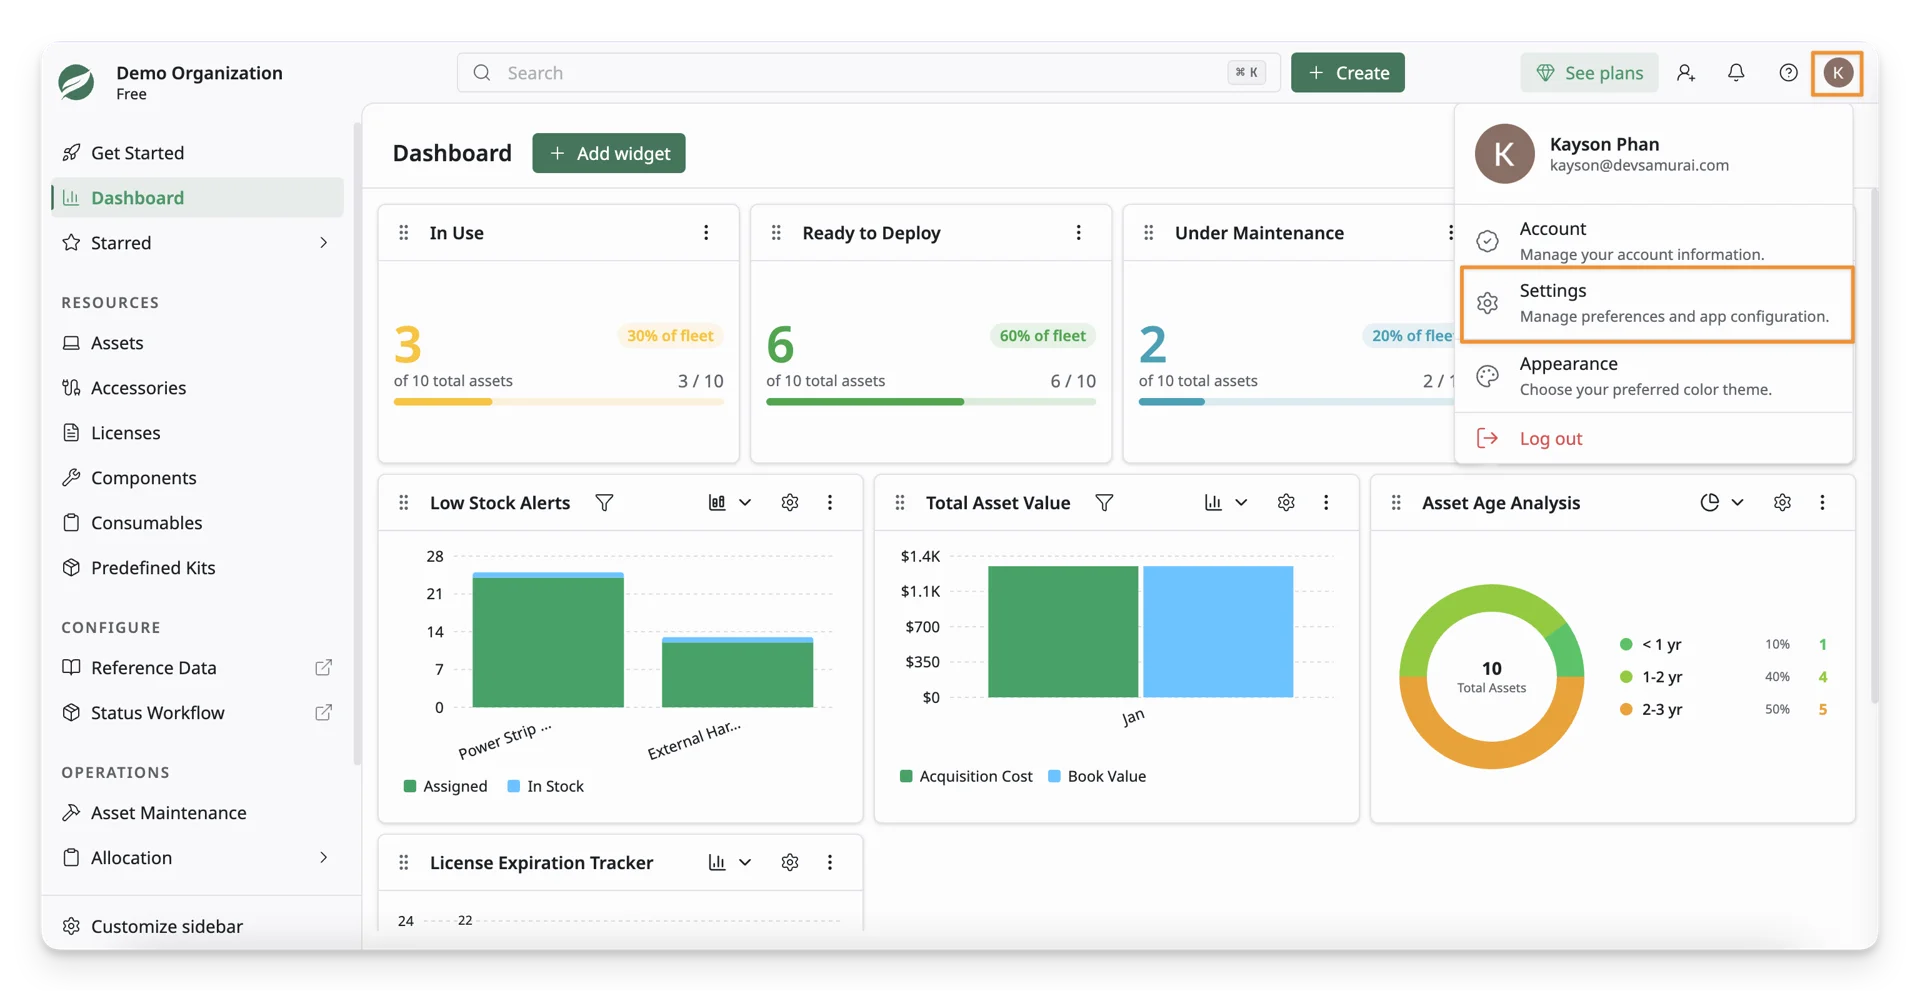
- Click the Avatar icon at the top-right corner and select Settings to access the Admin Settings.
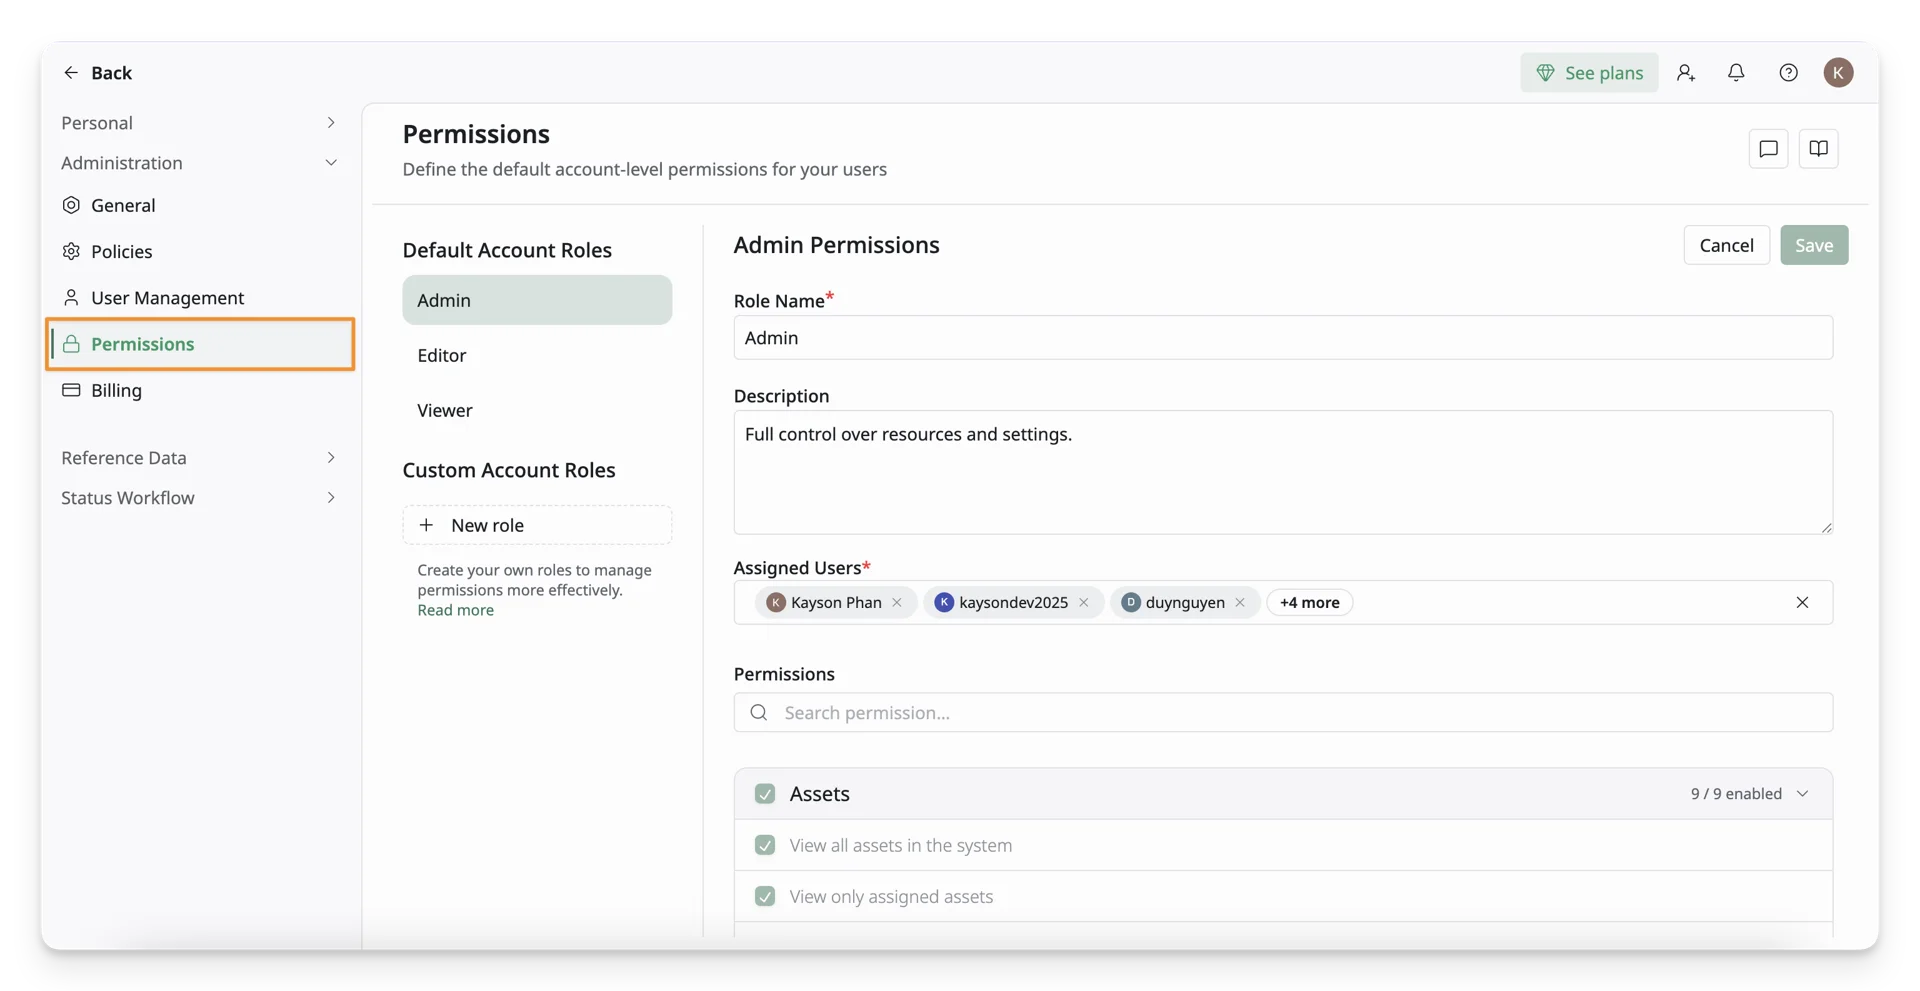
- From the Admin Settings screen, select Permissions. You will be redirected to the Permissions section.
2. Review Default Roles in AssetLoom
On the Permissions screen, you will find three default roles:
- Admin — Full access to all features and settings
- Editor — Can manage resources but cannot modify system settings
- Viewer — Read-only access
You can assign users to these roles directly by selecting them from the user list.
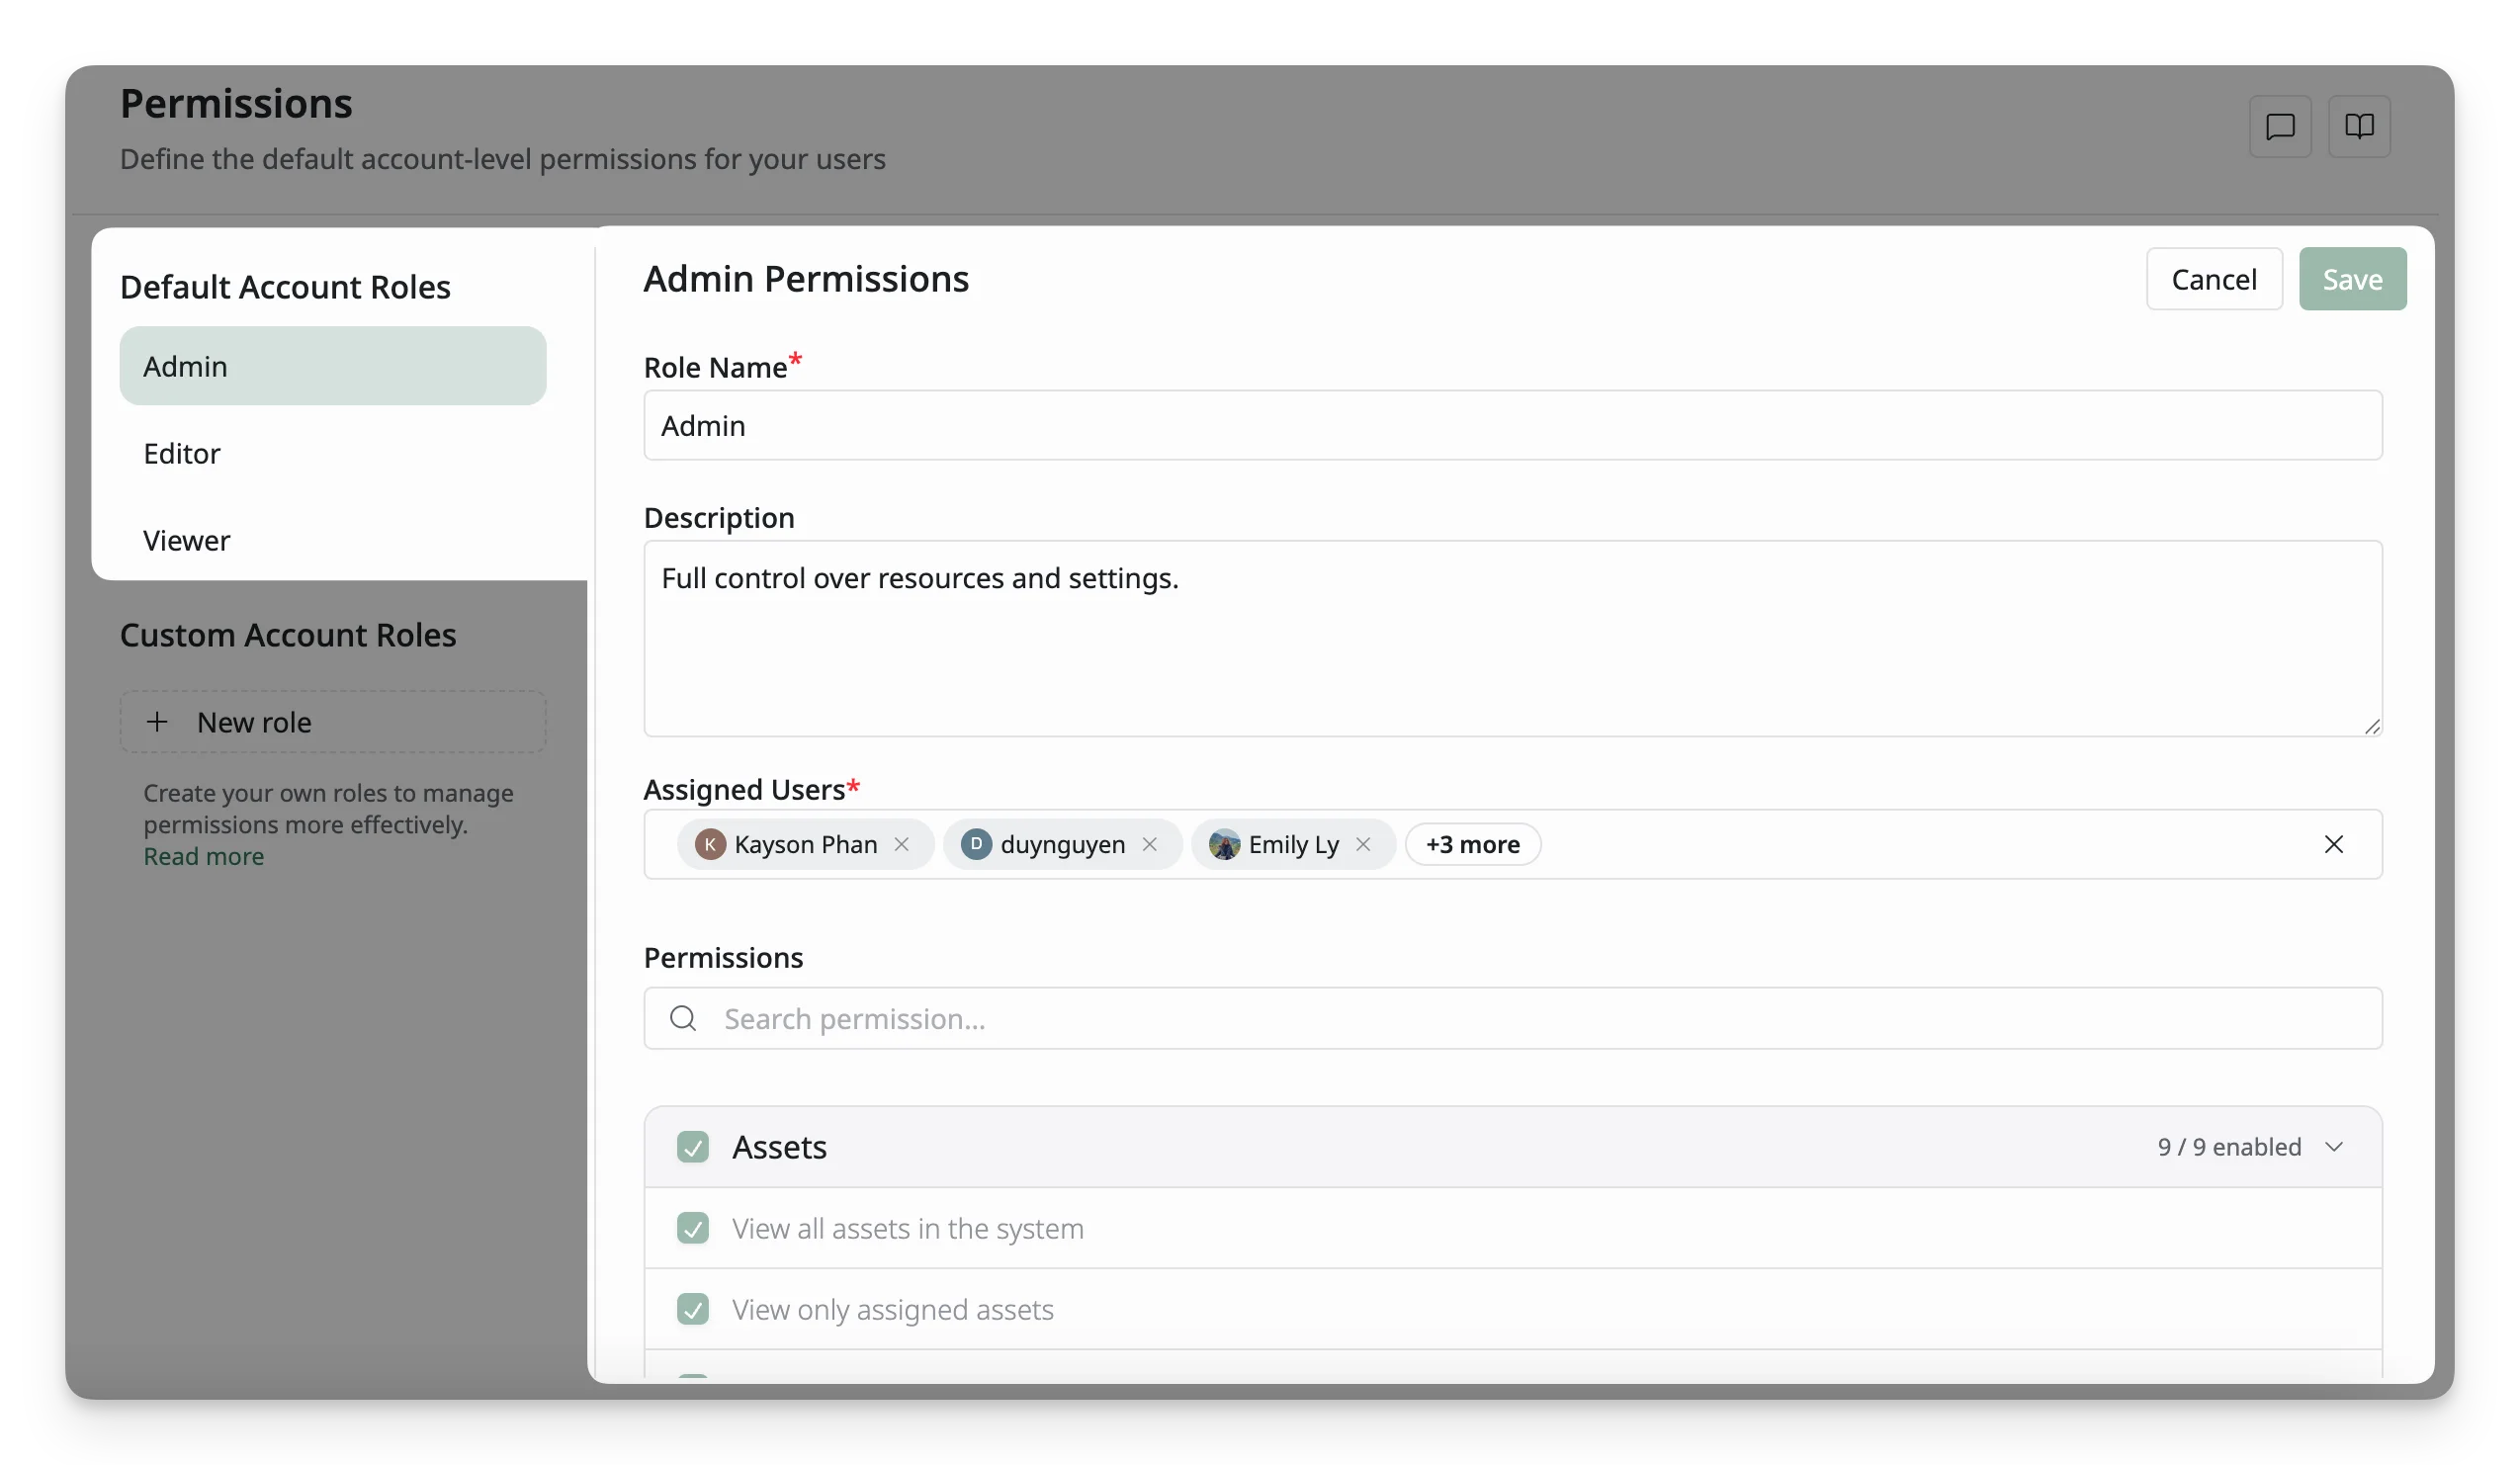
Permissions set in Default Roles (Admin, Editor, Viewer) are fixed and cannot be modified. If you need custom permissions, consider creating a Custom Role tailored to your team’s needs.
3. Create a Custom Role
If the default roles do not match your needs, you can create a custom role.
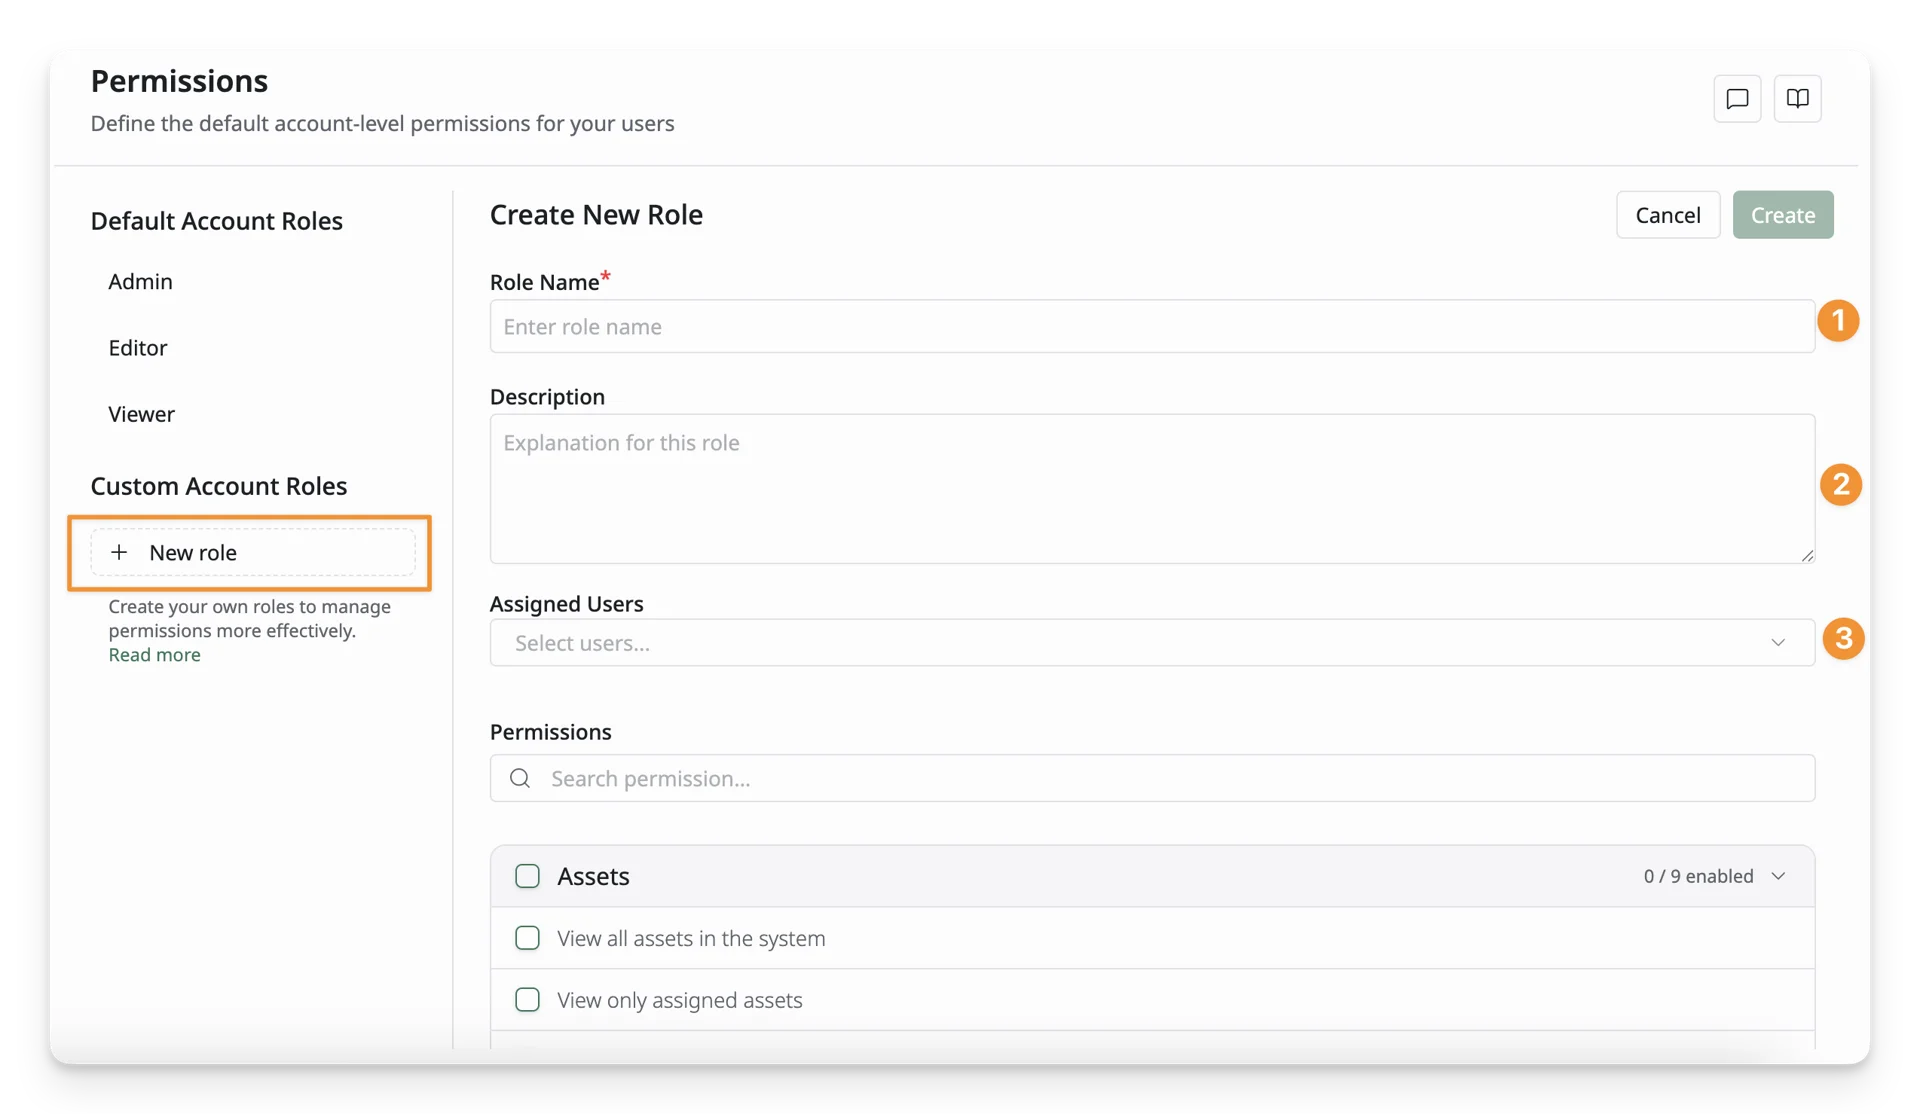
- Click + New Role.
- Enter a Role Name and description.
- Select the users or groups that should belong to this role.
4. Configure Access & Permissions
The Access & Permissions Configuration section allows you to define what actions users assigned to this role can perform. Simply enable the permissions that the users assigned to this role should be allowed to perform.
Permissions can be configured across different resources in AssetLoom, including:
- Main resource types: Assets, Accessories, Licenses, Components, Consumables
- Reference data: Categories, Asset Models, Suppliers, Locations
- Resource Allocation: People and asset reservation management.
The available actions for each resource are summarized in the table below.
| Resources | Actions to Control |
|---|---|
| Assets | View all assets in the system |
| Assets | View only assigned assets |
| Assets | Create new assets |
| Assets | Edit existing assets |
| Assets | Delete assets from the system |
| Assets | Restore deleted assets |
| Assets | Import assets from external sources |
| Assets | Export assets data |
| Assets | Check in assets from users |
| Assets | Check out assets to users |
| Assets | Perform maintenance on assets |
| Accessories | View all accessories in the system |
| Accessories | View only assigned accessories |
| Accessories | Create new accessories |
| Accessories | Edit existing accessories |
| Accessories | Delete accessories from the system |
| Accessories | Import accessories from external sources |
| Accessories | Export accessories data |
| Accessories | Check in accessories from users |
| Accessories | Check out accessories to users |
| Licenses | View all licenses in the system |
| Licenses | View only assigned licenses |
| Licenses | Create new licenses |
| Licenses | Edit existing licenses |
| Licenses | Delete licenses from the system |
| Licenses | Import licenses from external sources |
| Licenses | Export licenses data |
| Licenses | Check in licenses from users |
| Licenses | Check out licenses to users |
| Components | View all components in the system |
| Components | Create new components |
| Components | Edit existing components |
| Components | Delete components from the system |
| Components | Import components from external sources |
| Components | Export components data |
| Components | Check in components from users |
| Components | Check out components to users |
| Consumables | View all consumables in the system |
| Consumables | View only assigned consumables |
| Consumables | Create new consumables |
| Consumables | Edit existing consumables |
| Consumables | Delete consumables from the system |
| Consumables | Import consumables from external sources |
| Consumables | Export consumables data |
| Consumables | Check out consumables to users |
| Custom Fields | View all custom fields in the system |
| Custom Fields | Create new custom fields |
| Custom Fields | Edit existing custom fields |
| Custom Fields | Delete custom fields from the system |
| Custom Fields | Export custom fields data |
| Asset Models | View all asset models in the system |
| Asset Models | Create new asset models |
| Asset Models | Edit existing asset models |
| Asset Models | Delete asset models from the system |
| Asset Models | Import asset models from external sources |
| Asset Models | Export asset models data |
| Departments | View all departments in the system |
| Departments | Create new departments |
| Departments | Edit existing departments |
| Departments | Delete departments from the system |
| Departments | Import departments from external sources |
| Departments | Export departments data |
| Categories | View all categories in the system |
| Categories | Create new categories |
| Categories | Edit existing categories |
| Categories | Delete categories from the system |
| Categories | Export categories data |
| Depreciations | View all depreciations in the system |
| Depreciations | Create new depreciations |
| Depreciations | Edit existing depreciations |
| Depreciations | Delete depreciations from the system |
| Locations | View all locations in the system |
| Locations | Create new locations |
| Locations | Edit existing locations |
| Locations | Delete locations from the system |
| Locations | Import locations from external sources |
| Locations | Export locations data |
| Suppliers | View all suppliers in the system |
| Suppliers | Create new suppliers |
| Suppliers | Edit existing suppliers |
| Suppliers | Delete suppliers from the system |
| Suppliers | Import suppliers from external sources |
| Suppliers | Export suppliers data |
| Manufacturers | View all manufacturers in the system |
| Manufacturers | Create new manufacturers |
| Manufacturers | Edit existing manufacturers |
| Manufacturers | Delete manufacturers from the system |
| Manufacturers | Import manufacturers from external sources |
| Manufacturers | Export manufacturers data |
| Statuses | View all statuses in the system |
| Statuses | Create new statuses |
| Statuses | Edit existing statuses |
| Statuses | Delete statuses from the system |
| Statuses | Export statuses data |
| Reservations | Check out reservations to users |
| Reservations | Decline reservation requests |
| Reservations | Remove reservation assignments |
| People | View all people in the system |
5. Save the Role
Once the permissions are configured:
- Click Create.
- The role will be applied to the selected users.
Those users will now only be able to access the features allowed by that role.
What’s Next? Common Actions for Team Members
- Join a site: Accept a collaboration invitation from a site creator and join their site.
- Request an asset: Submit a request when you need equipment such as a laptop or a monitor.
- Check asset information: Review warranty details and assignment records for transparency.