General Settings
Learn how to manage your General Settings
The General Settings page contains basic information and site-wide preferences for your AssetLoom site. Site administrators can use this page to manage the site identity, invitation behavior, and site lifecycle settings.
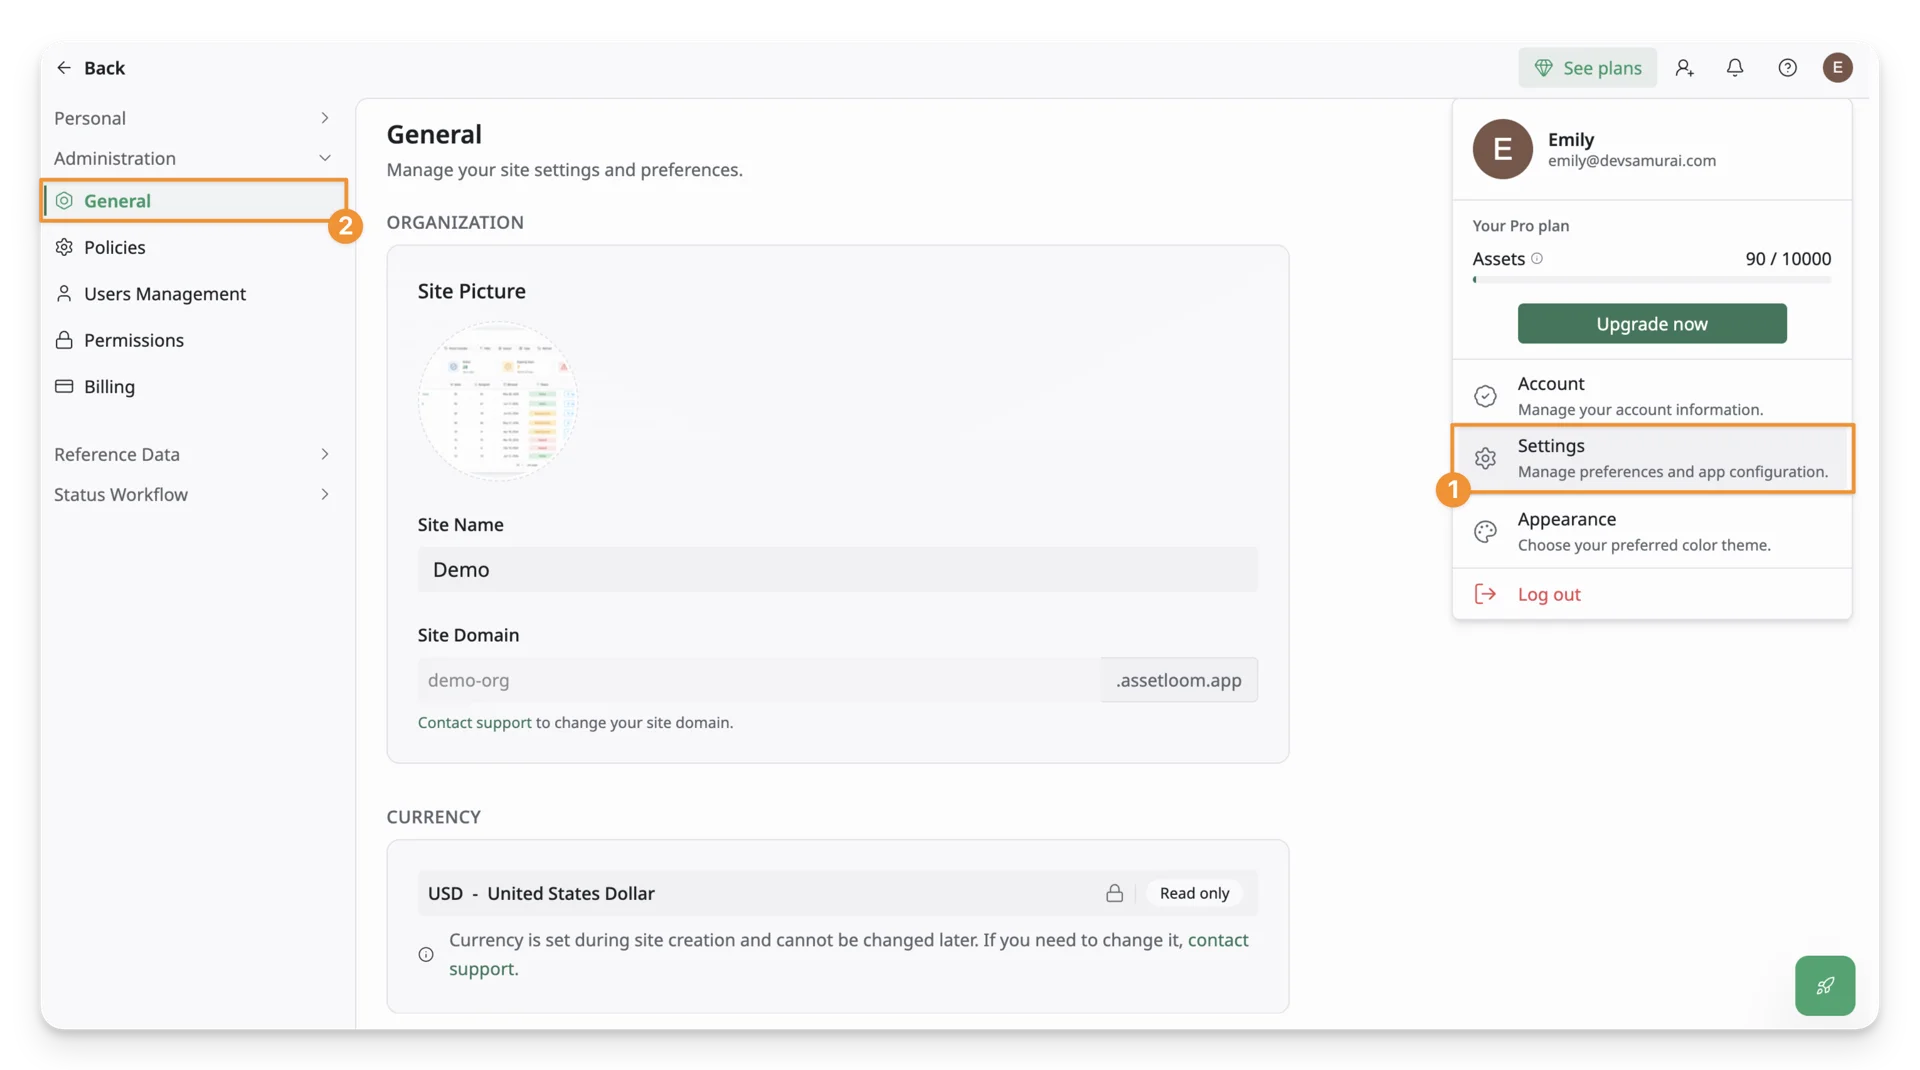
The General Settings are located under Administration in Settings.
Only users with the Site Admin or Site Owner account type can access and manage General Settings.
Organization Settings
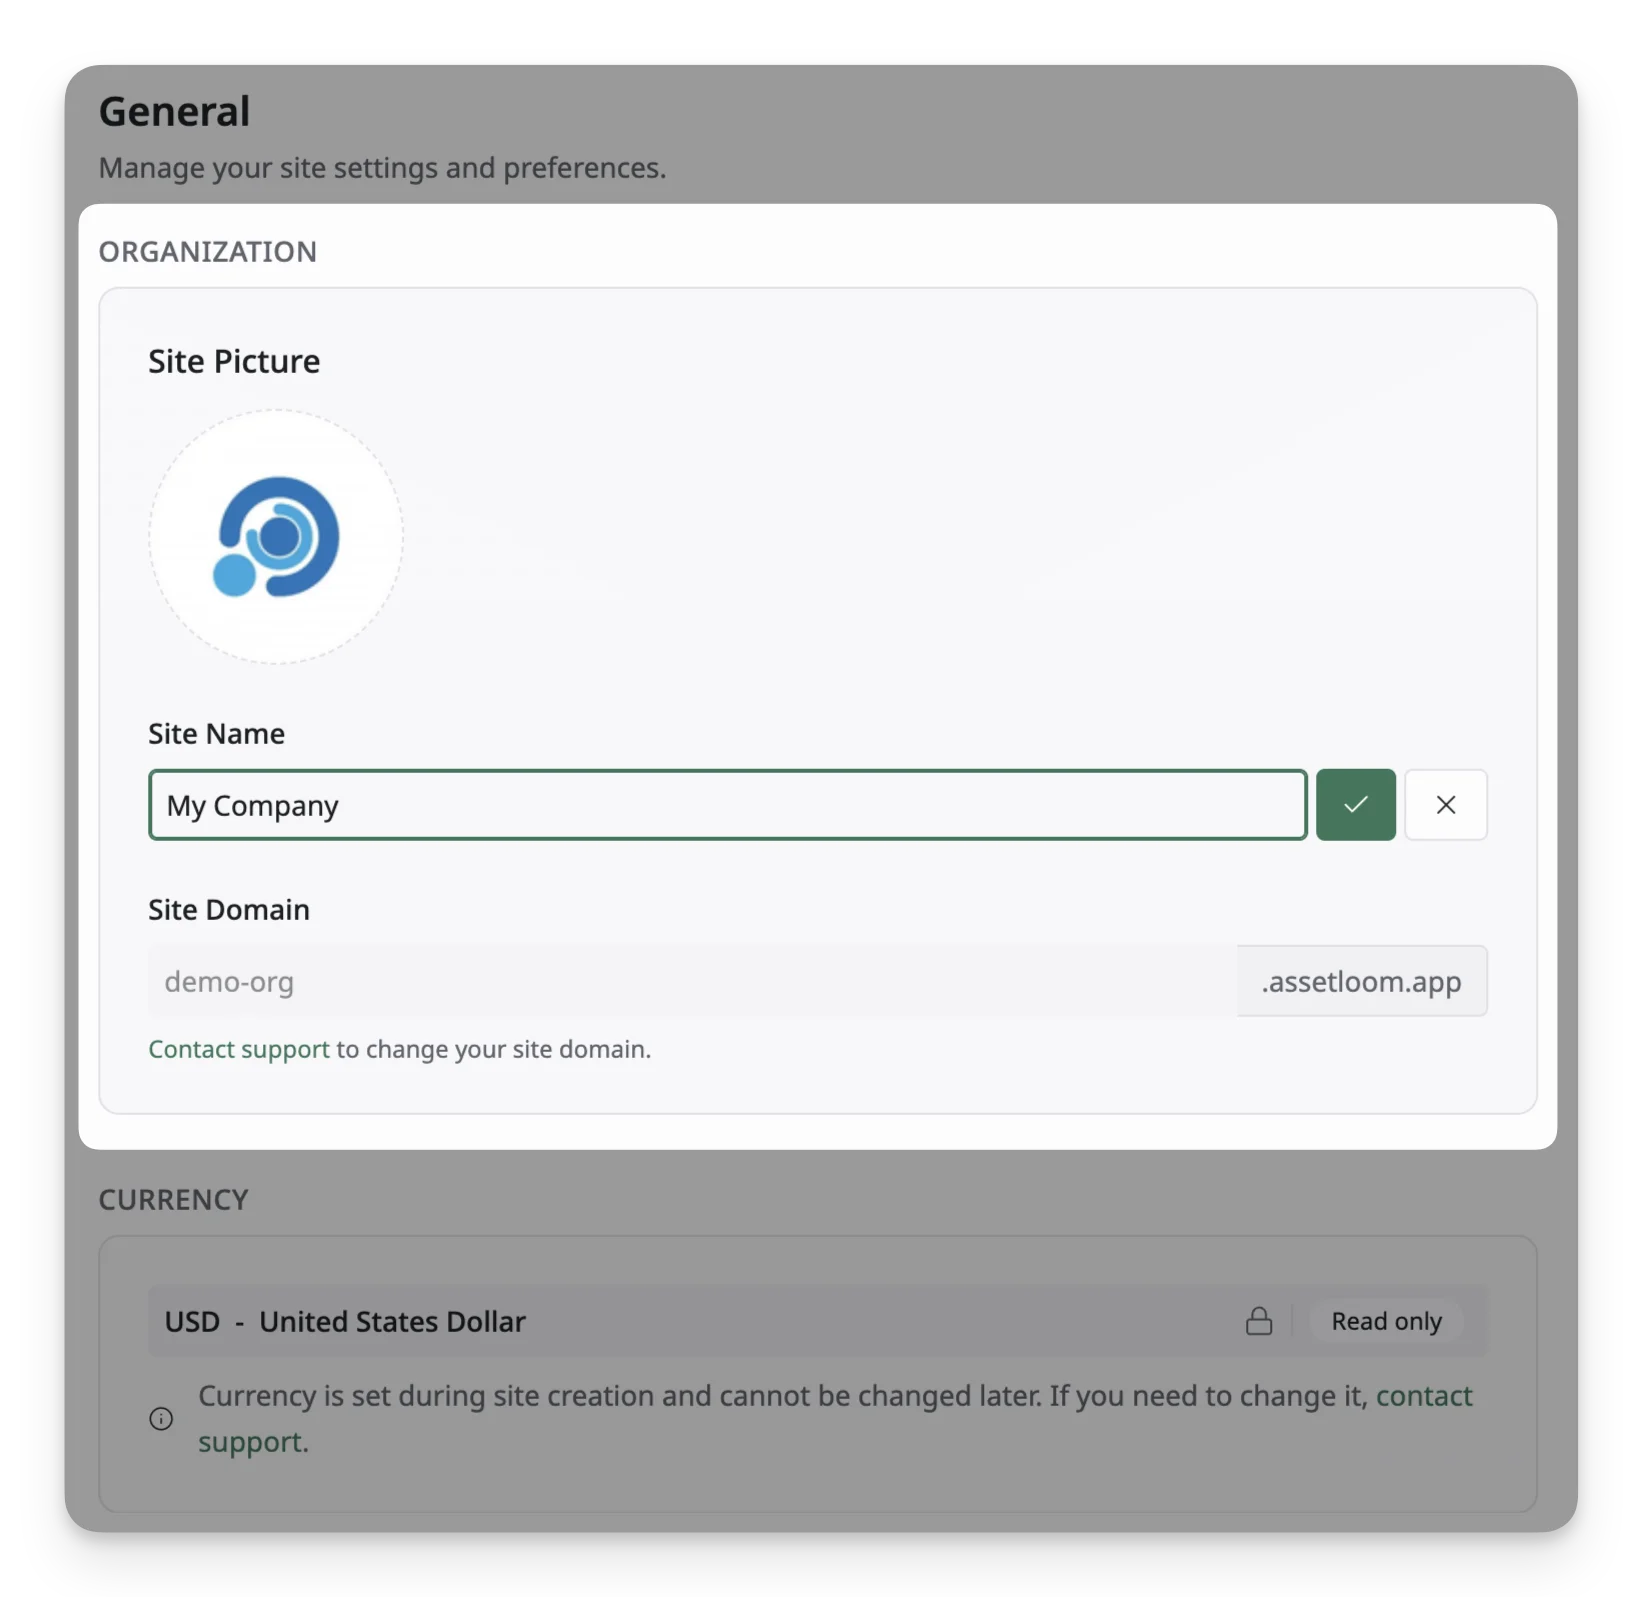
The Organization section is where you manage the basic identity of your site. This includes the site picture, site name, and site domain. These details help users recognize which workspace they are using in AssetLoom.
Site Logo
The site logo is where you upload the image used to represent your site, such as a company logo, team icon, or project symbol.
To change the site logo:
- Go to Settings > Administration > General.
- Click the site picture area in the Organization section.
- Select an image from your device.
- Click Upload site logo.
The image must be 2 MB or smaller. Supported formats are PNG, JPEG, WebP, or GIF.
Site Name
The Site Name is the display name of your site in AssetLoom. This is usually your company name, department name, project name, or any other name that helps users identify the workspace they are accessing.
To change the site name, simply click the Site Name field, update the new name, and press Enter to save changes.
Site Domain
The Site Domain is the unique web address used to access your AssetLoom site, such as yourcompany.assetloom.app. Each site has its own domain, which users use to sign in and access the workspace.
The site domain cannot be changed from General Settings after the site is created. If you need to change your site domain, contact the AssetLoom support team for assistance.
Currency
The Currency setting determines the default currency used throughout your site for financial information, such as purchase costs, asset values, depreciation records, and reports. This currency is selected when the site is created and applies across the entire site.
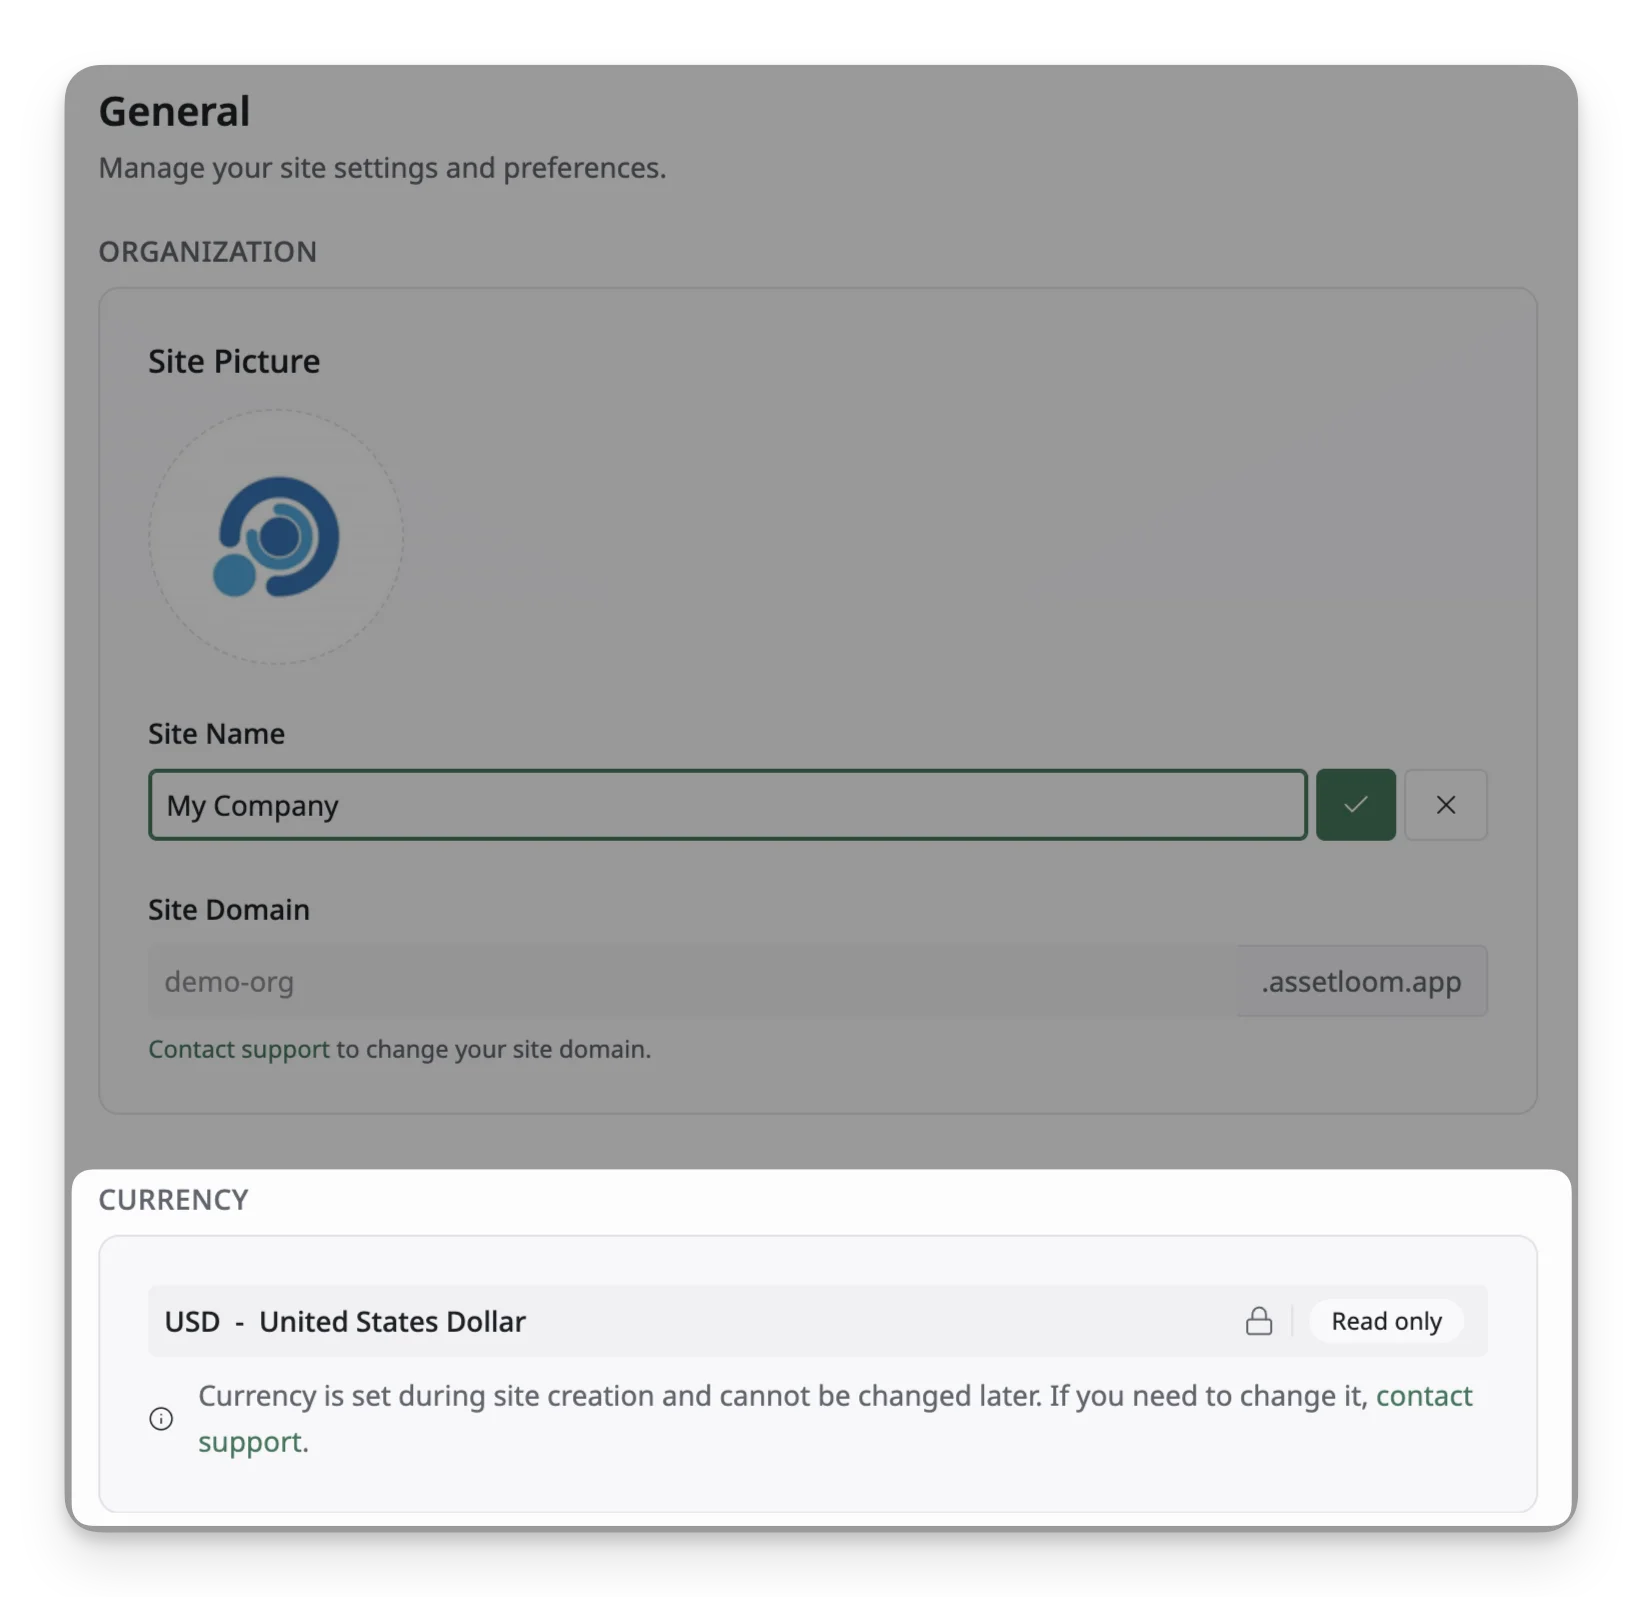
The currency cannot be changed from General Settings after site creation. If a change is required, contact the AssetLoom support team.
Invitation & Access
The Invitations & Access section controls how invitations are processed before they are sent to users in AssetLoom. It defines when an invitation can be sent directly and when it requires approval from a site admin or site owner.
Trusted Email Domains
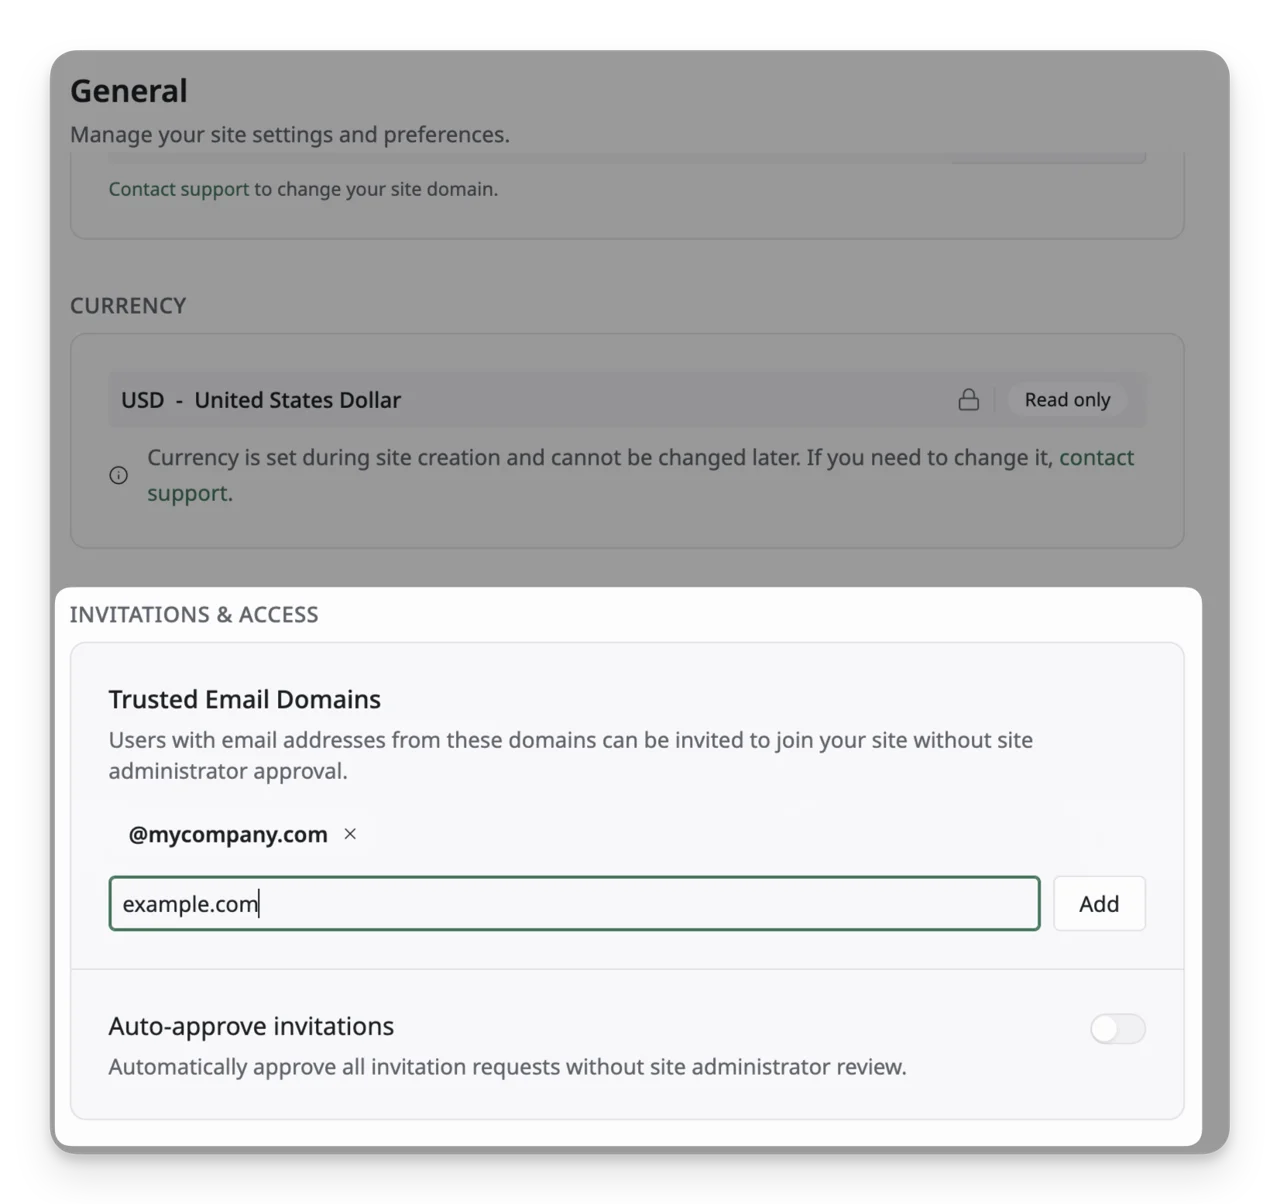
Trusted Email Domains define which email domains are allowed to be invited without requiring site admin approval.
In other words:
- When an email domain is added to this list: Users from that domain can be invited by non-admin members (such as Regular Members or Billing Managers), and the invitation is sent immediately without requiring approval from a Site Admin or a Site Owner.
- When an email domain is not in this list: Invitations sent by non-admin members require approval from a Site Admin or Site Owner before being sent.
To add a trusted email domain:
- Go to Settings > Administration > General.
- In the General Settings screen, scroll to Invitations & Access.
- Enter the domain name.
- Click Add.
To remove a trusted email domain, click the remove icon next to the domain.
You can only add trusted email domains when Auto-Approve Invitations is turned off.
Auto-Approve Invitations
The Auto-approve Invitations setting controls whether invitation requests require approval before being sent.
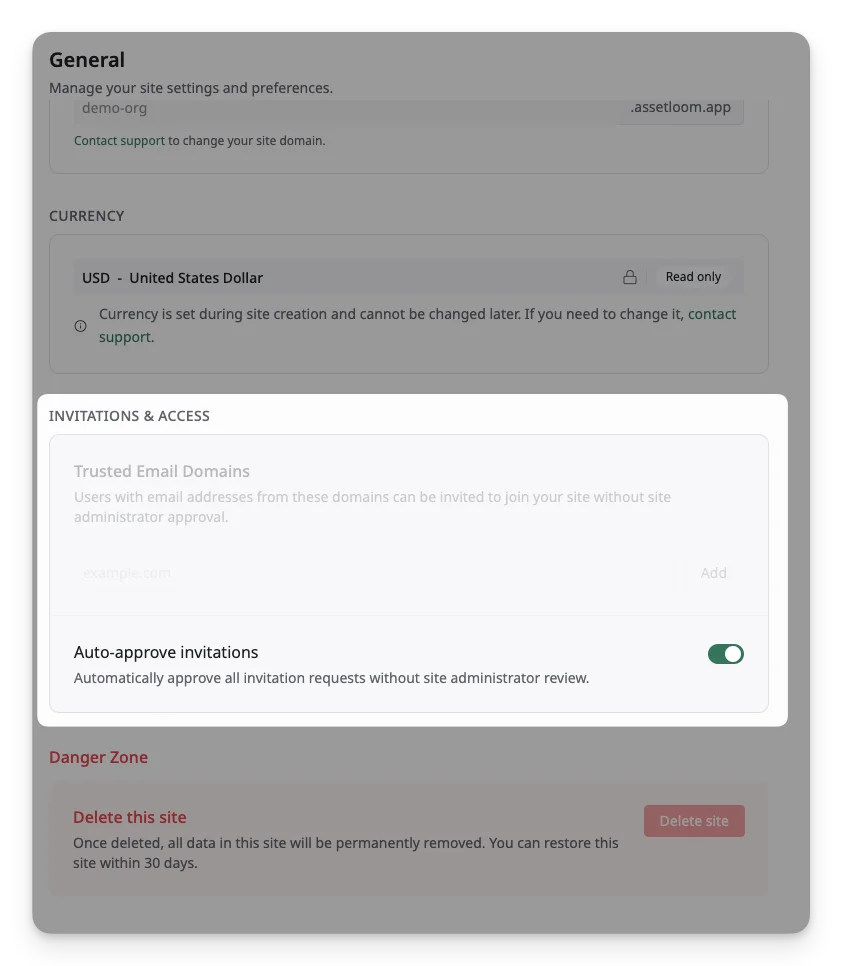
When enabled, all invitation requests are sent immediately without requiring approval.
When disabled:
- Invitations are subject to approval rules based on inviter role and email domain
- Invitations from non-admin members to non-trusted domains require approval from a site admin or site owner before being sent
Delete Site
In AssetLoom, deleting a site schedules all site data for deletion, including resources, users, records, and settings.
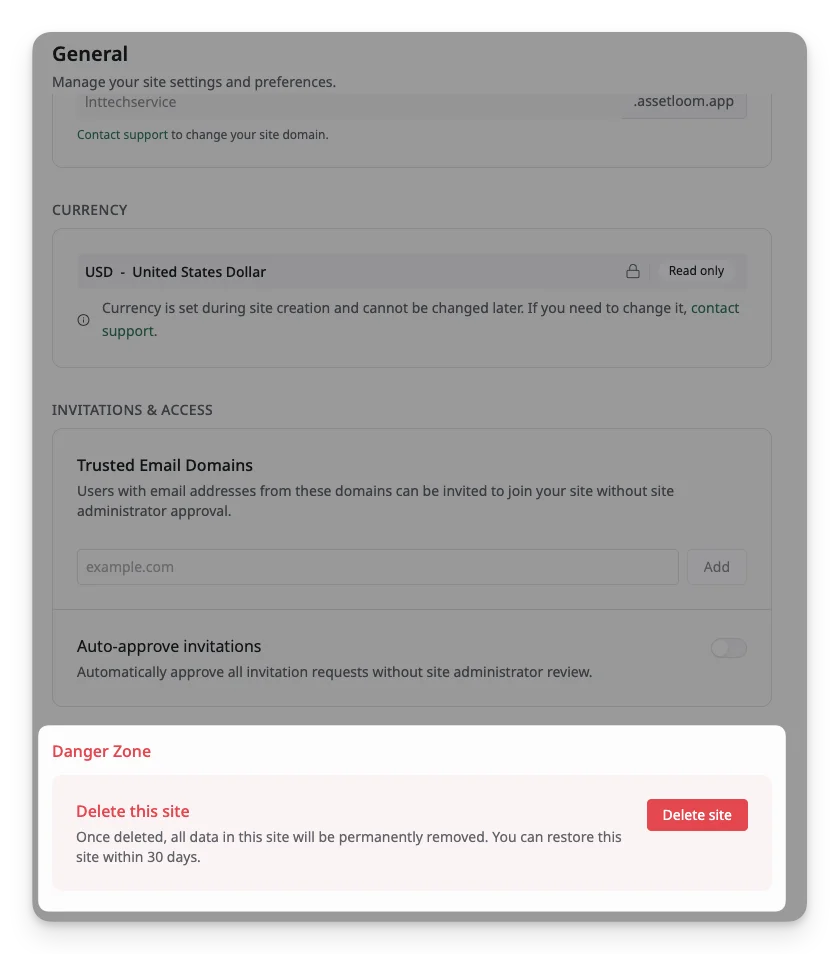
During the 30-day recovery period, you can still restore the site. After this period, the site will be permanently deleted and can no longer be recovered. The site owner can also choose to permanently delete the site immediately, without waiting for the recovery period to end.
To delete a site:
- Go to Settings > Administration > General.
- Scroll to the Danger Zone section.
- Click Delete Site and follow the confirmation steps to finish.