Connecting Jamf Pro with AssetLoom
Follow this guide to connect Jamf Pro with AssetLoom and set up automatic device synchronization for accurate Apple device tracking.
To integrate Jamf Pro with AssetLoom, you’ll first register an API role and client in your Jamf Pro environment to obtain a Client ID and Client Secret. Once you have these credentials, you’ll enter them into AssetLoom to complete the connection.
Make sure you have:
- Access to the Jamf Pro instance you want to connect.
- Sufficient Jamf Pro permissions to create an API Role and API Client.
- Your Jamf Pro instance URL, for example
https://company.jamfcloud.com. - Permission to grant the API role read access to the device inventory you want to sync, such as Computers and Mobile Devices.
1. Create a Client ID and Client Secret in Jamf Pro
Follow these steps in your Jamf Pro environment to generate the credentials AssetLoom needs.
1.1 Create an API Role
- Log in to your Jamf Pro instance.
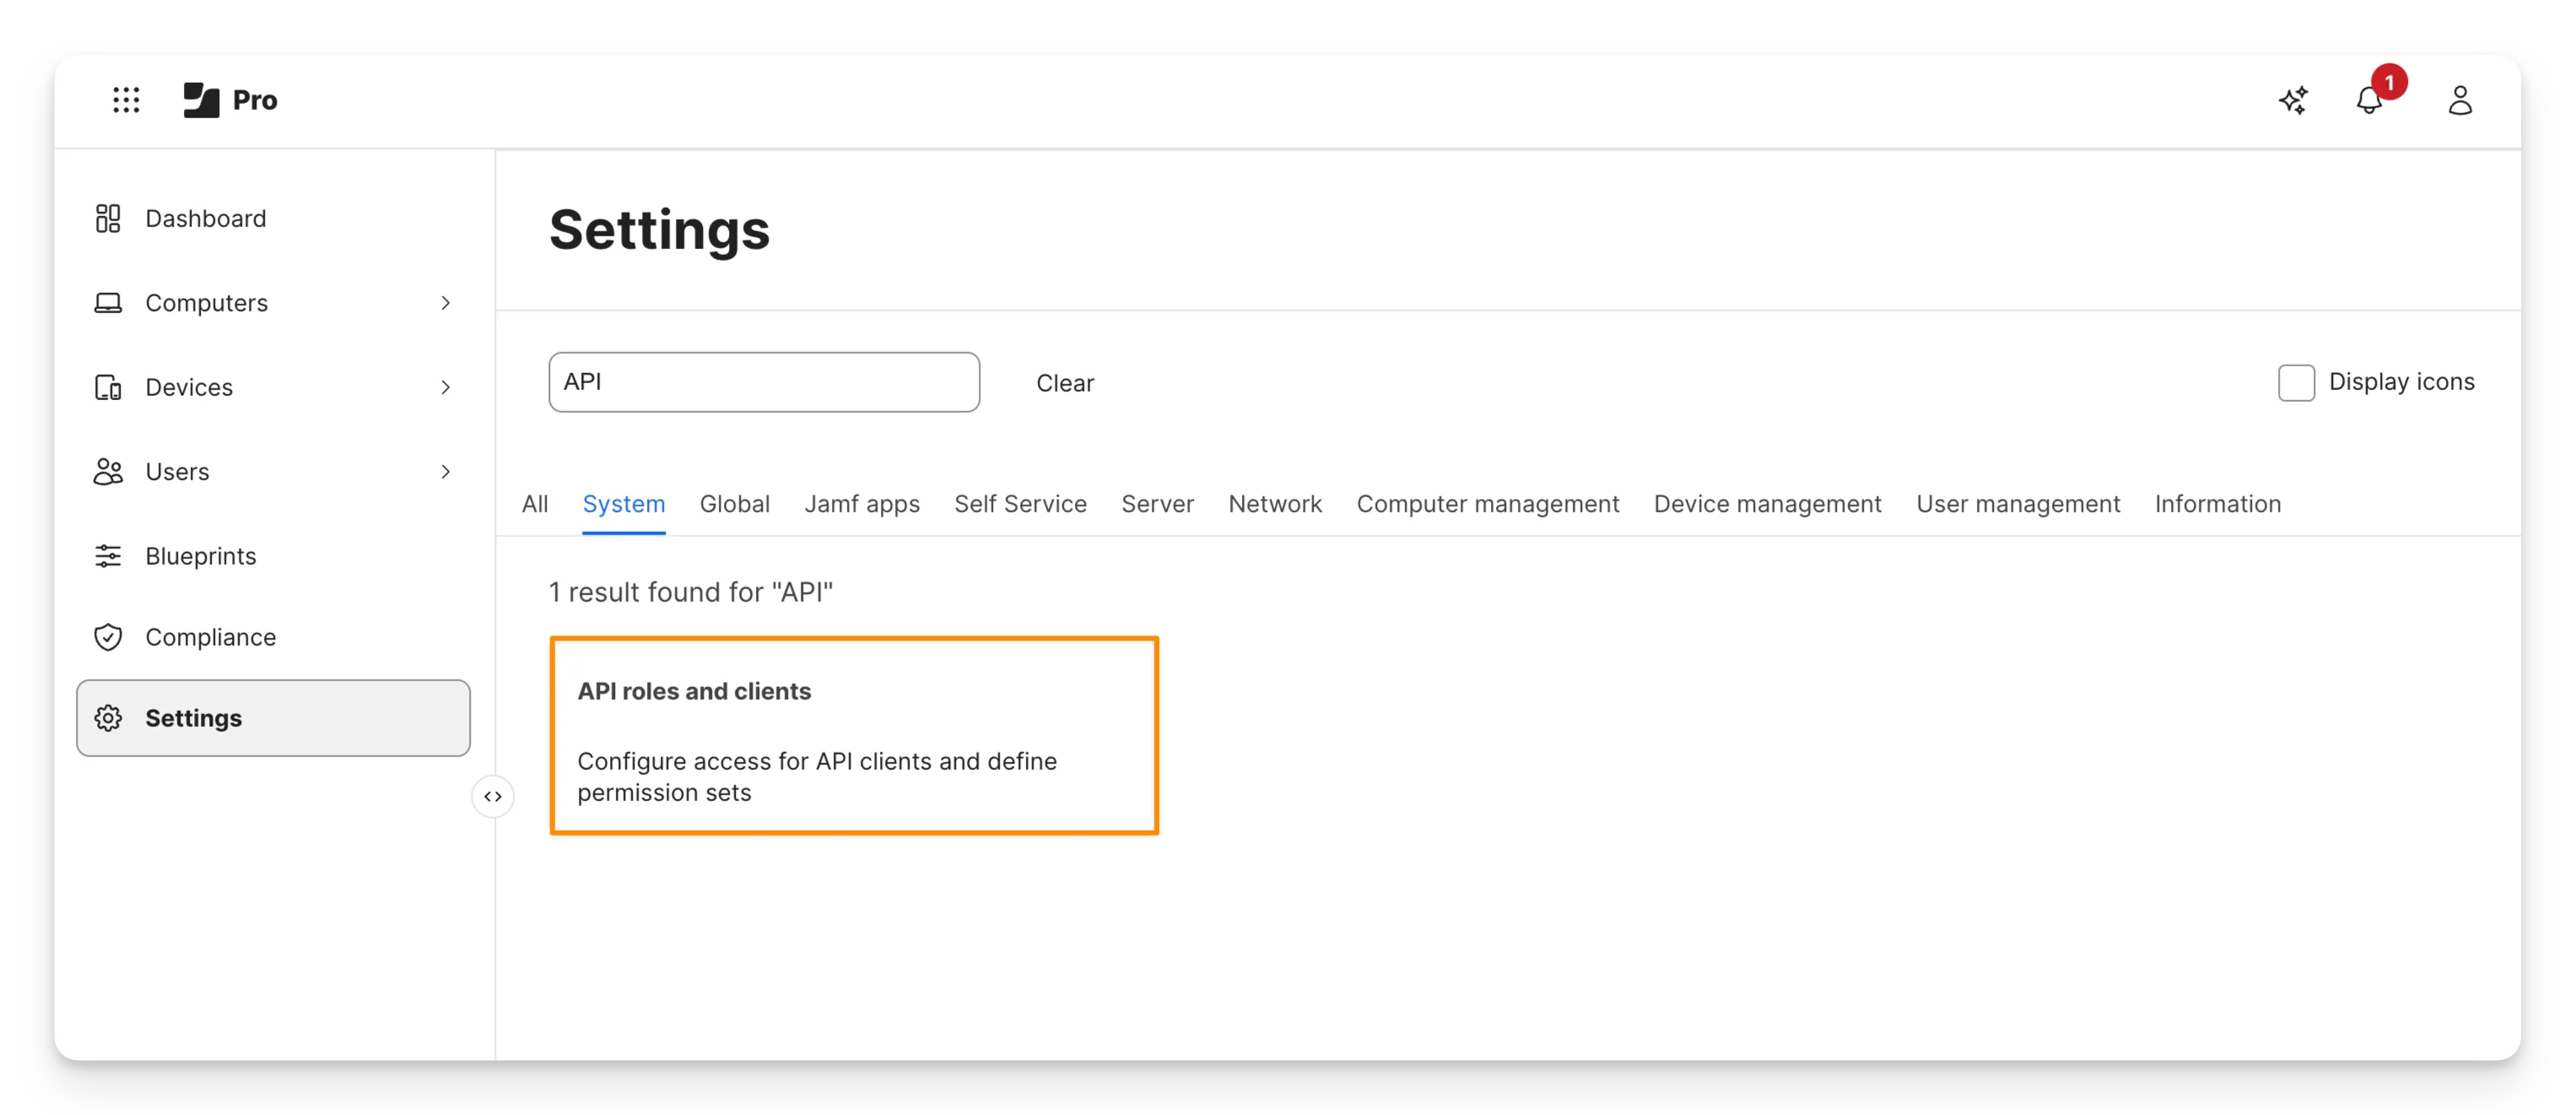
- In the left sidebar of your Jamf Pro, go to Settings and look for API Roles and Clients.
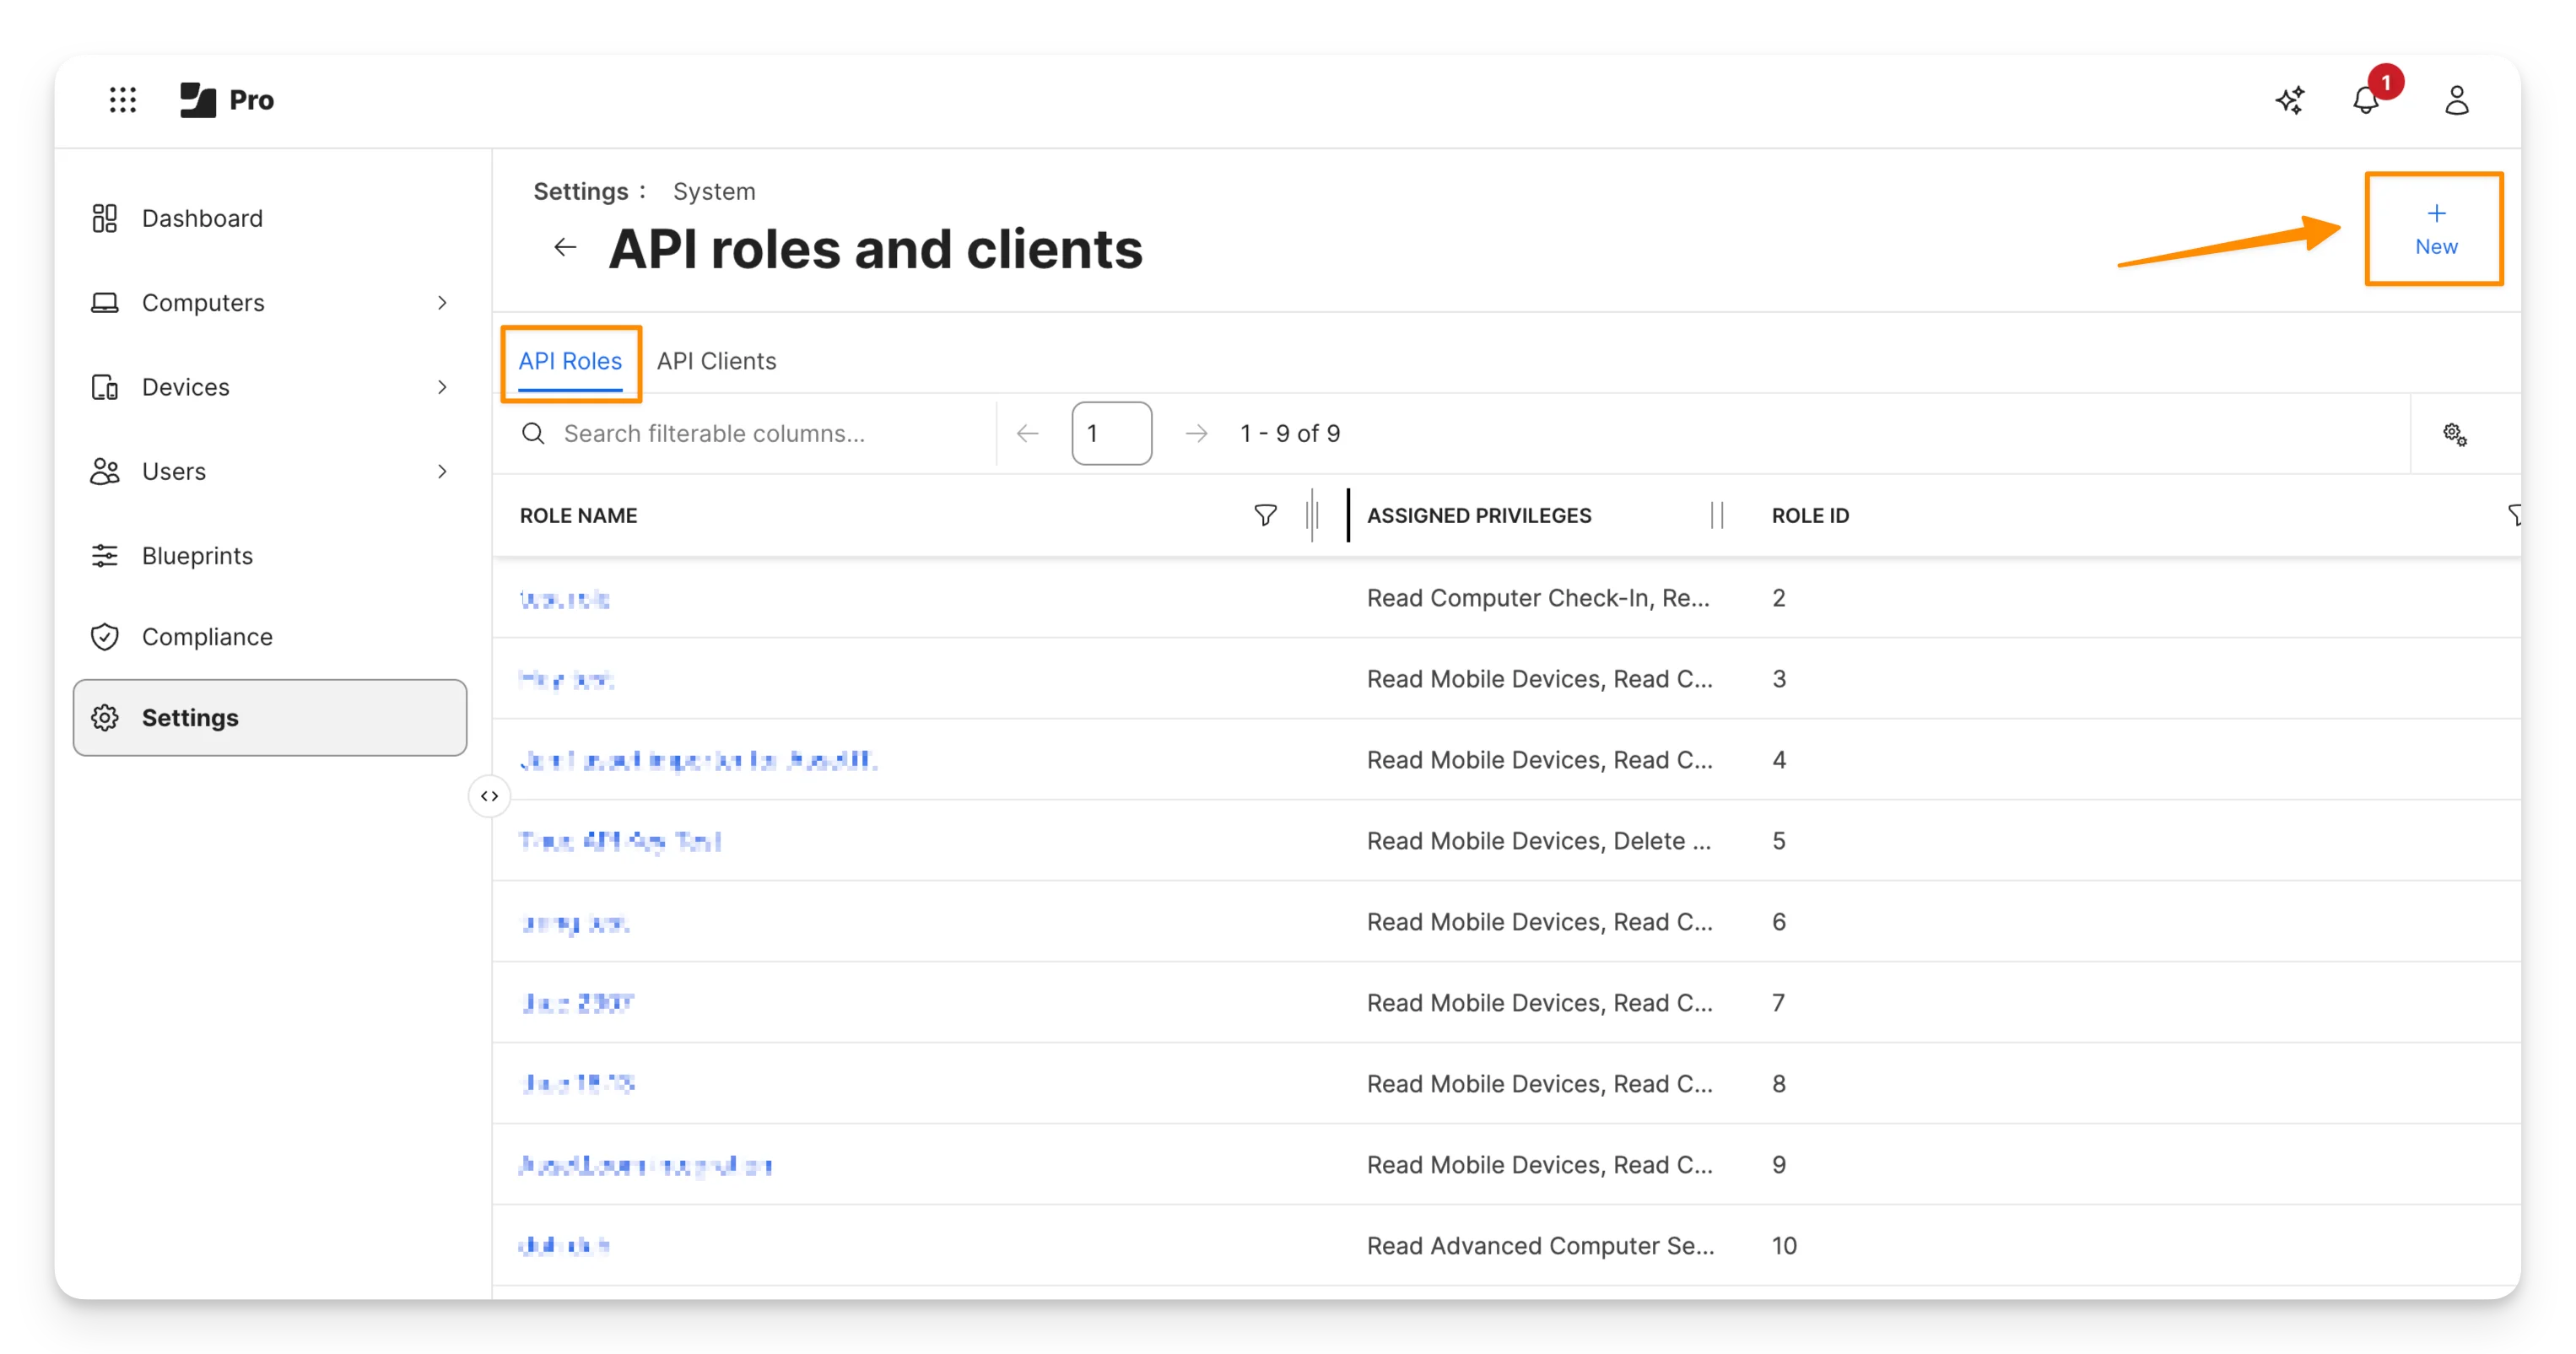
- On the API Roles and Clients screen, select the API Roles tab, then click New to create a new API role.
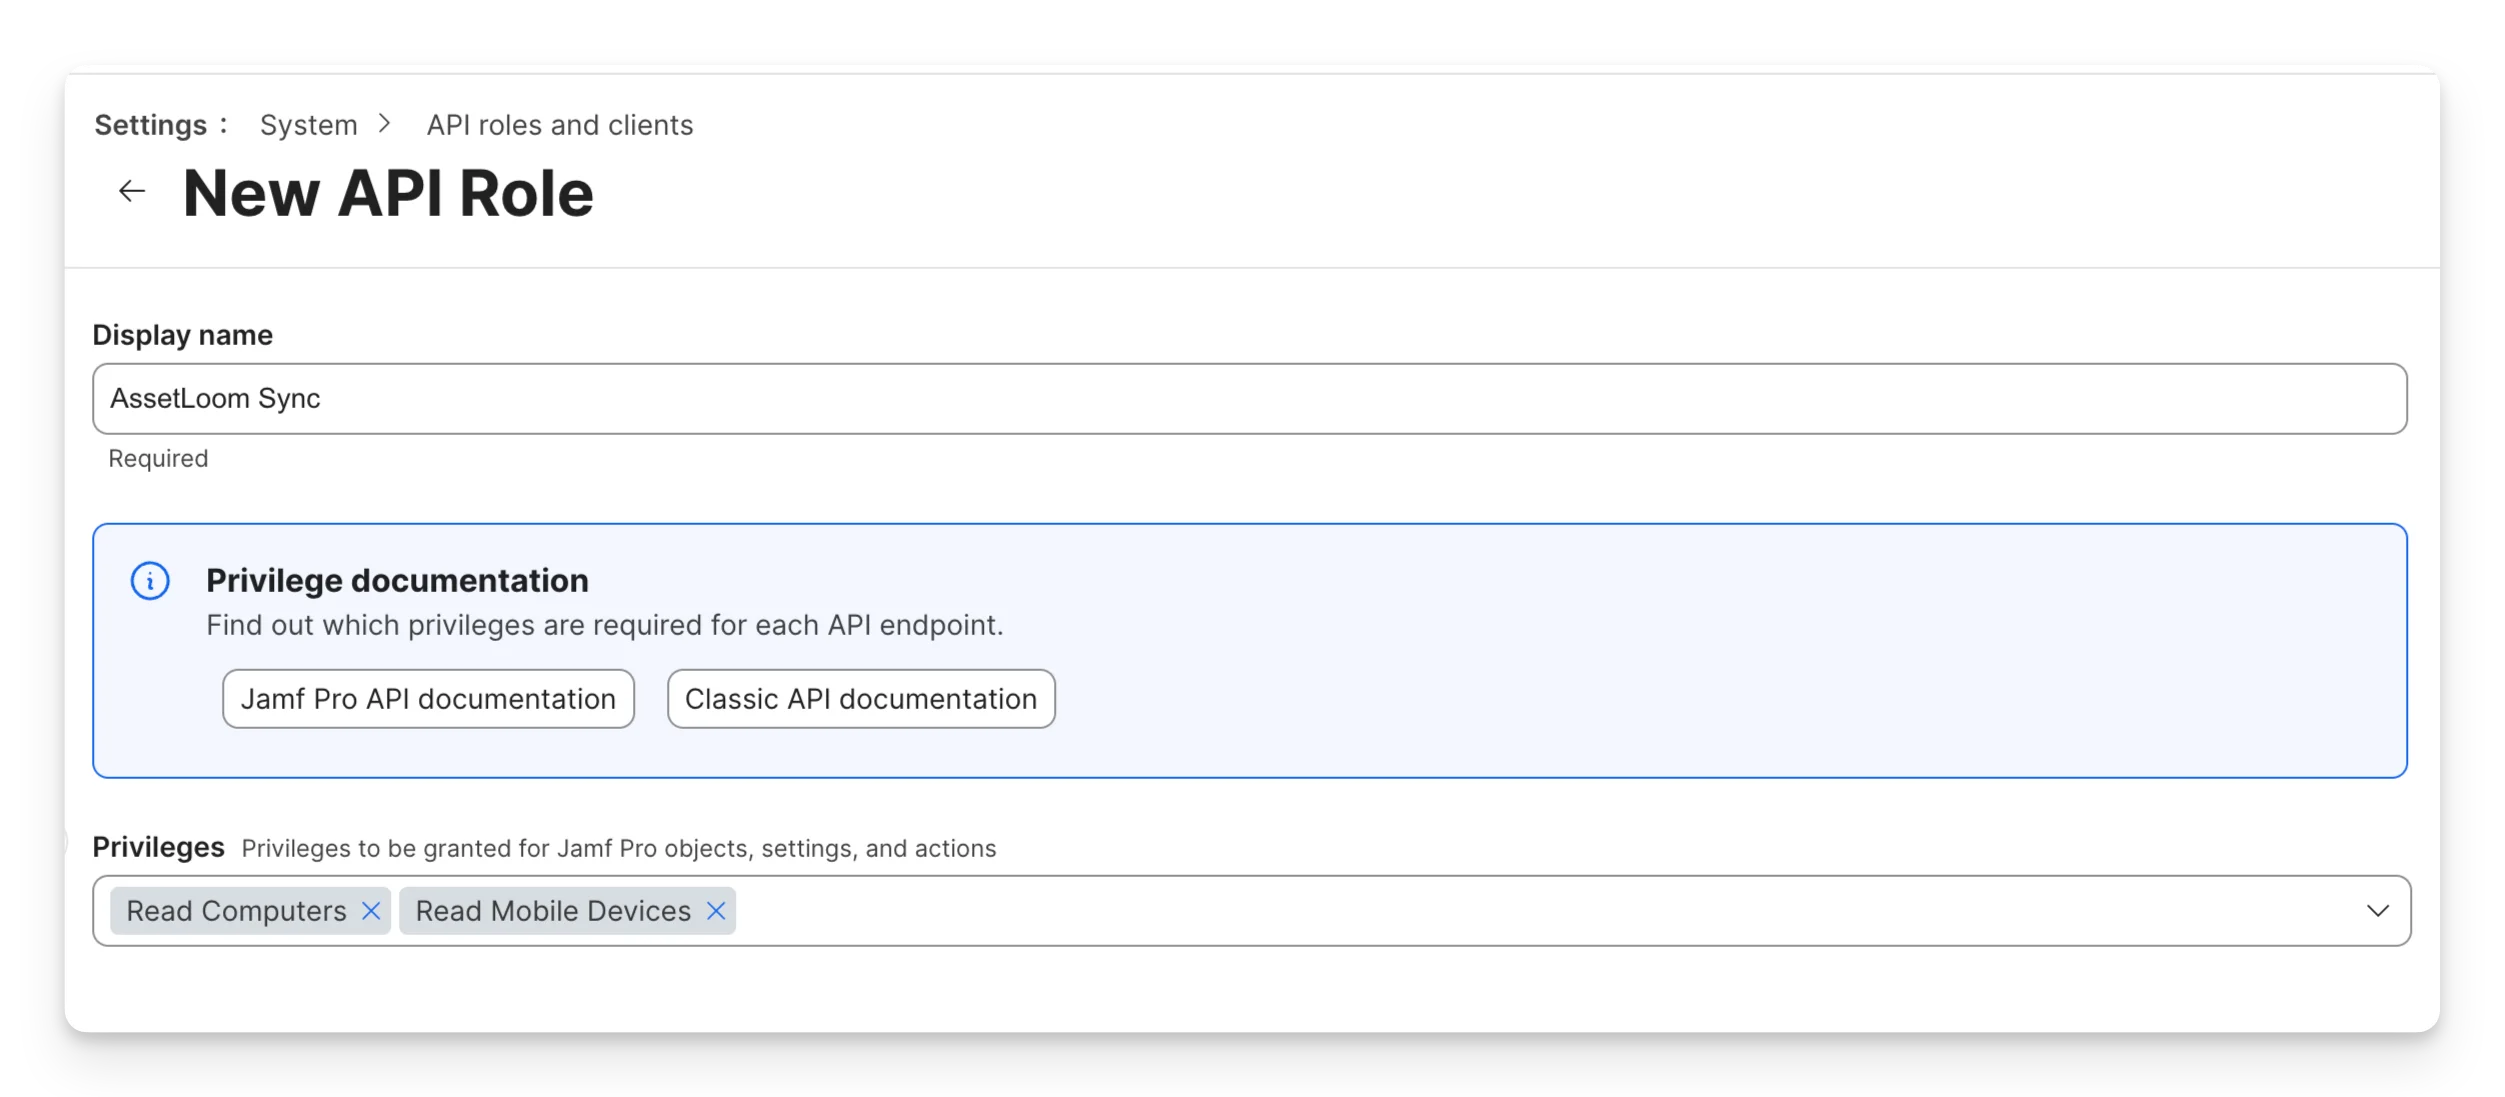
- Fill in the required information:
- Display Name: enter a name for the role (e.g.,
AssetLoom Sync) - Privileges: select
Read Mobile DevicesandRead Computers
- Display Name: enter a name for the role (e.g.,
- Click Save to create the API role.
1.2 Create an API Client
Once the API role is created, create an API client and assign it that role.
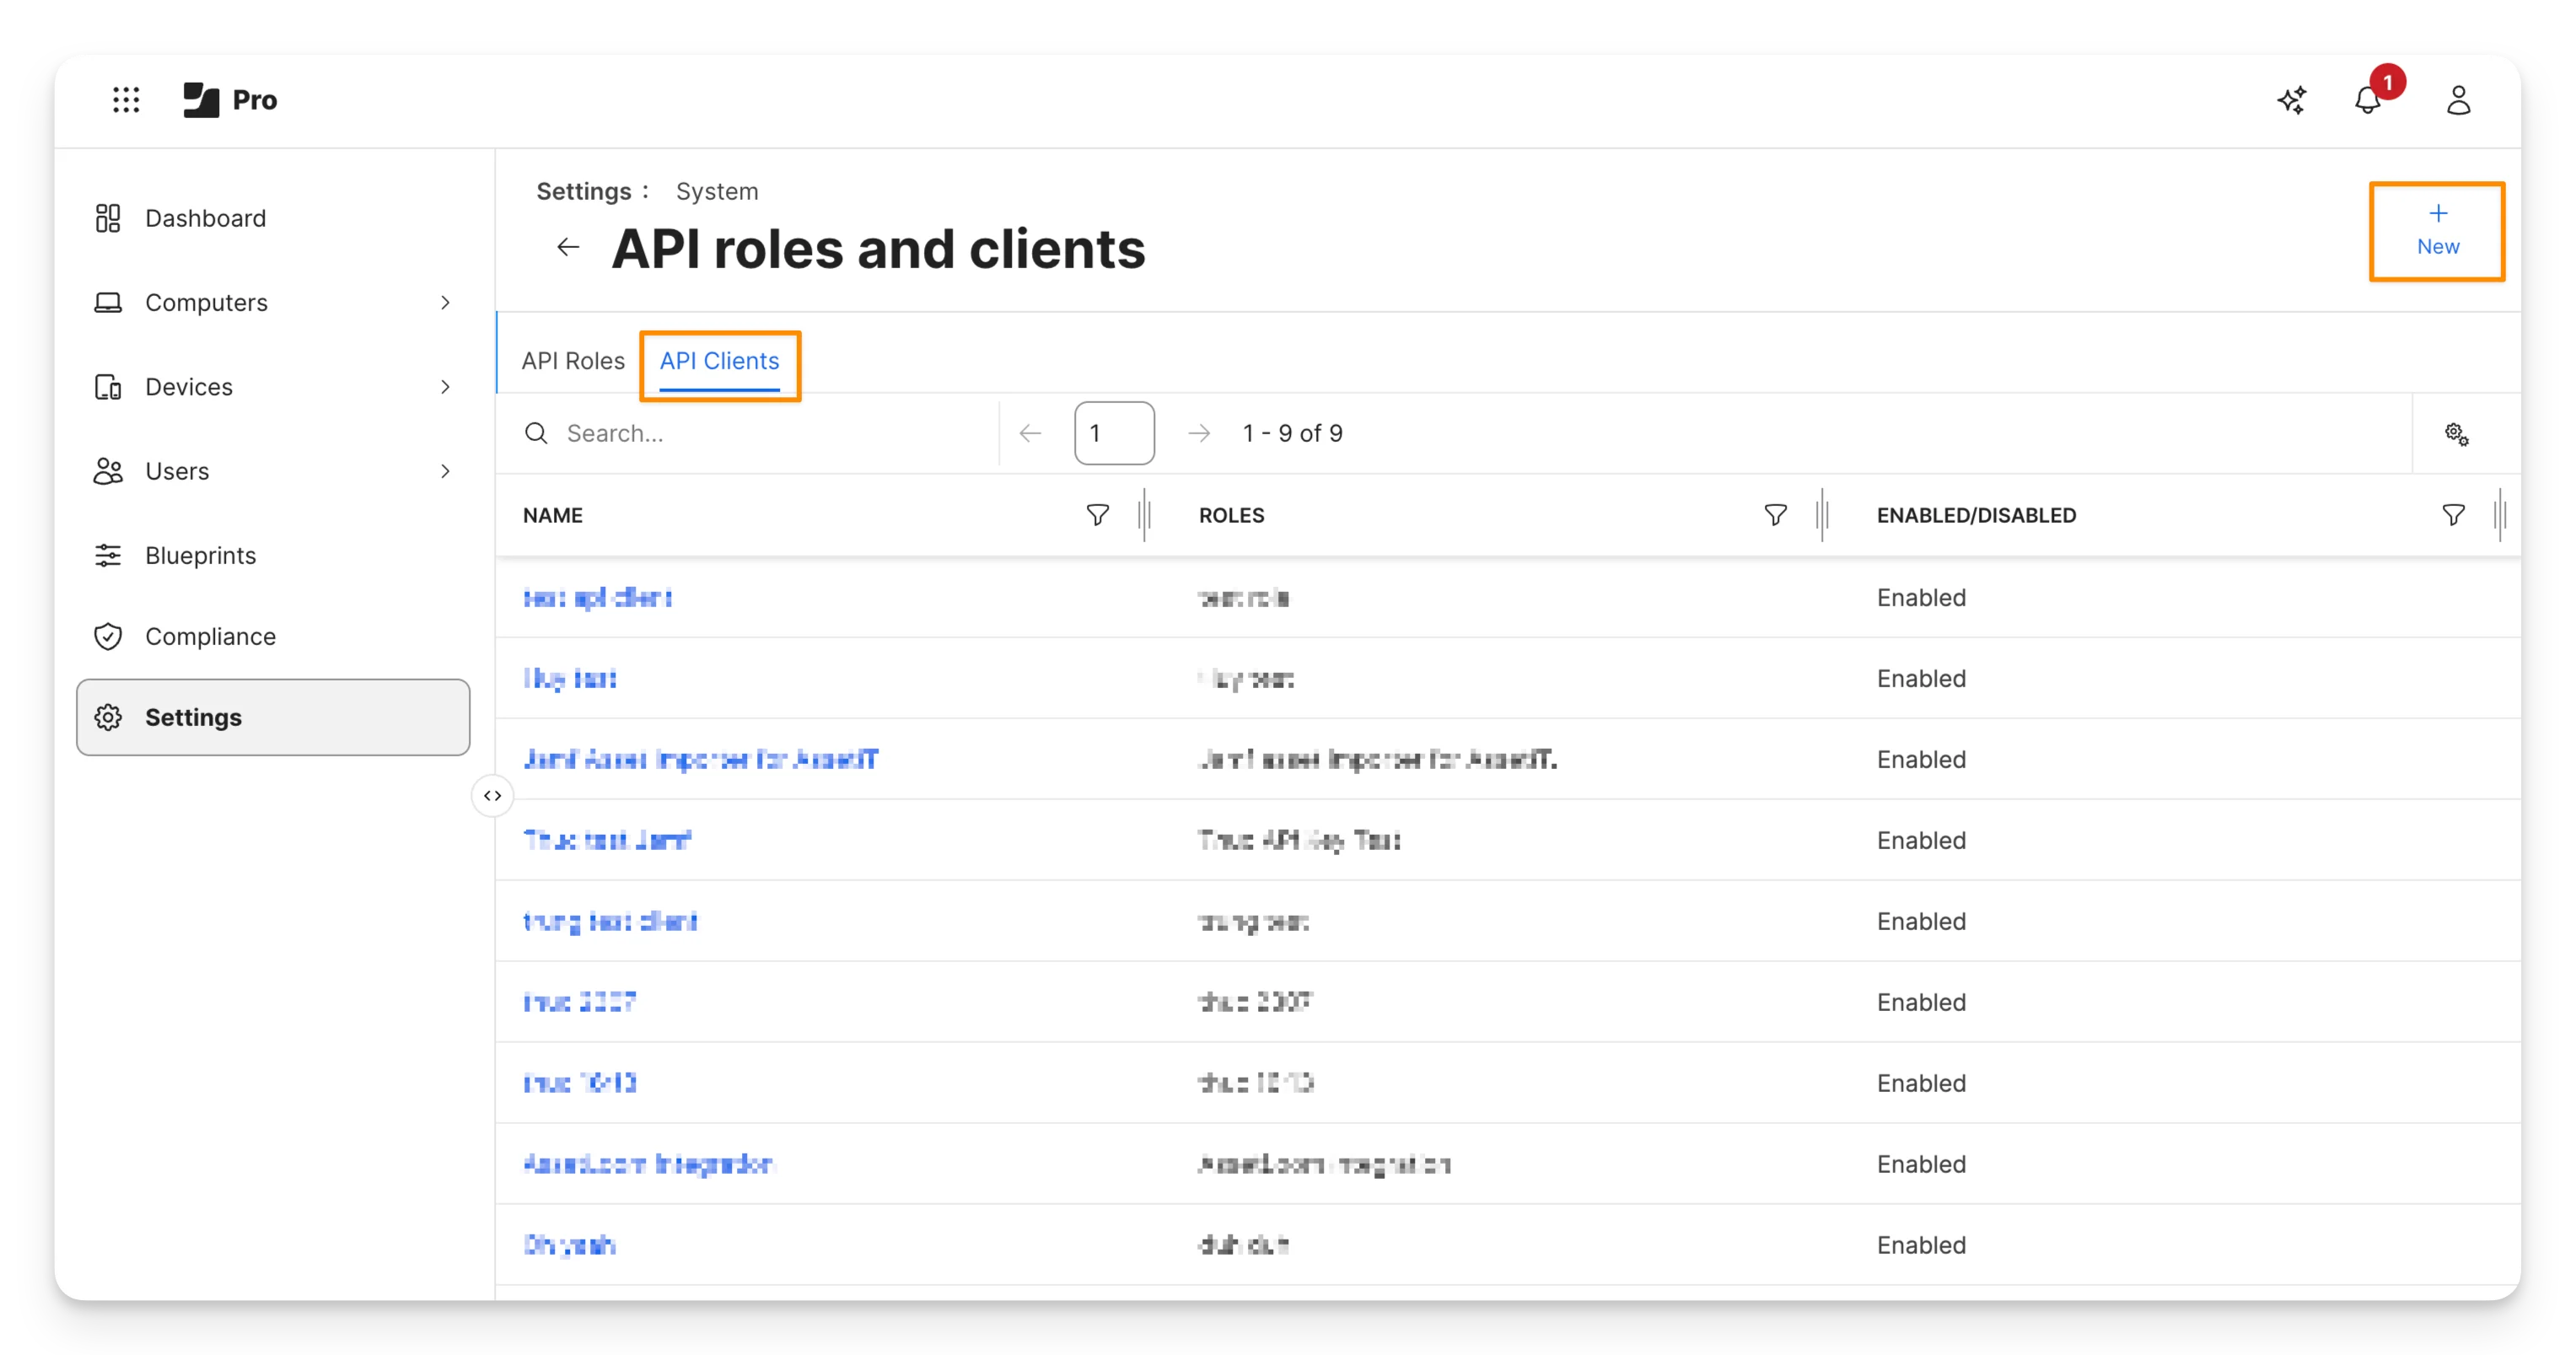
- From the API Roles and Clients screen, select the API Clients tab and click New.
- Fill in the required information:
- Display Name: enter a name for the client (e.g.,
AssetLoom Sync) - API Role: select the role you created in step 1.1 (with
Read Mobile DevicesandRead Computers privileges) - Access Token Lifetime: set the token expiration time, in seconds
- Display Name: enter a name for the client (e.g.,
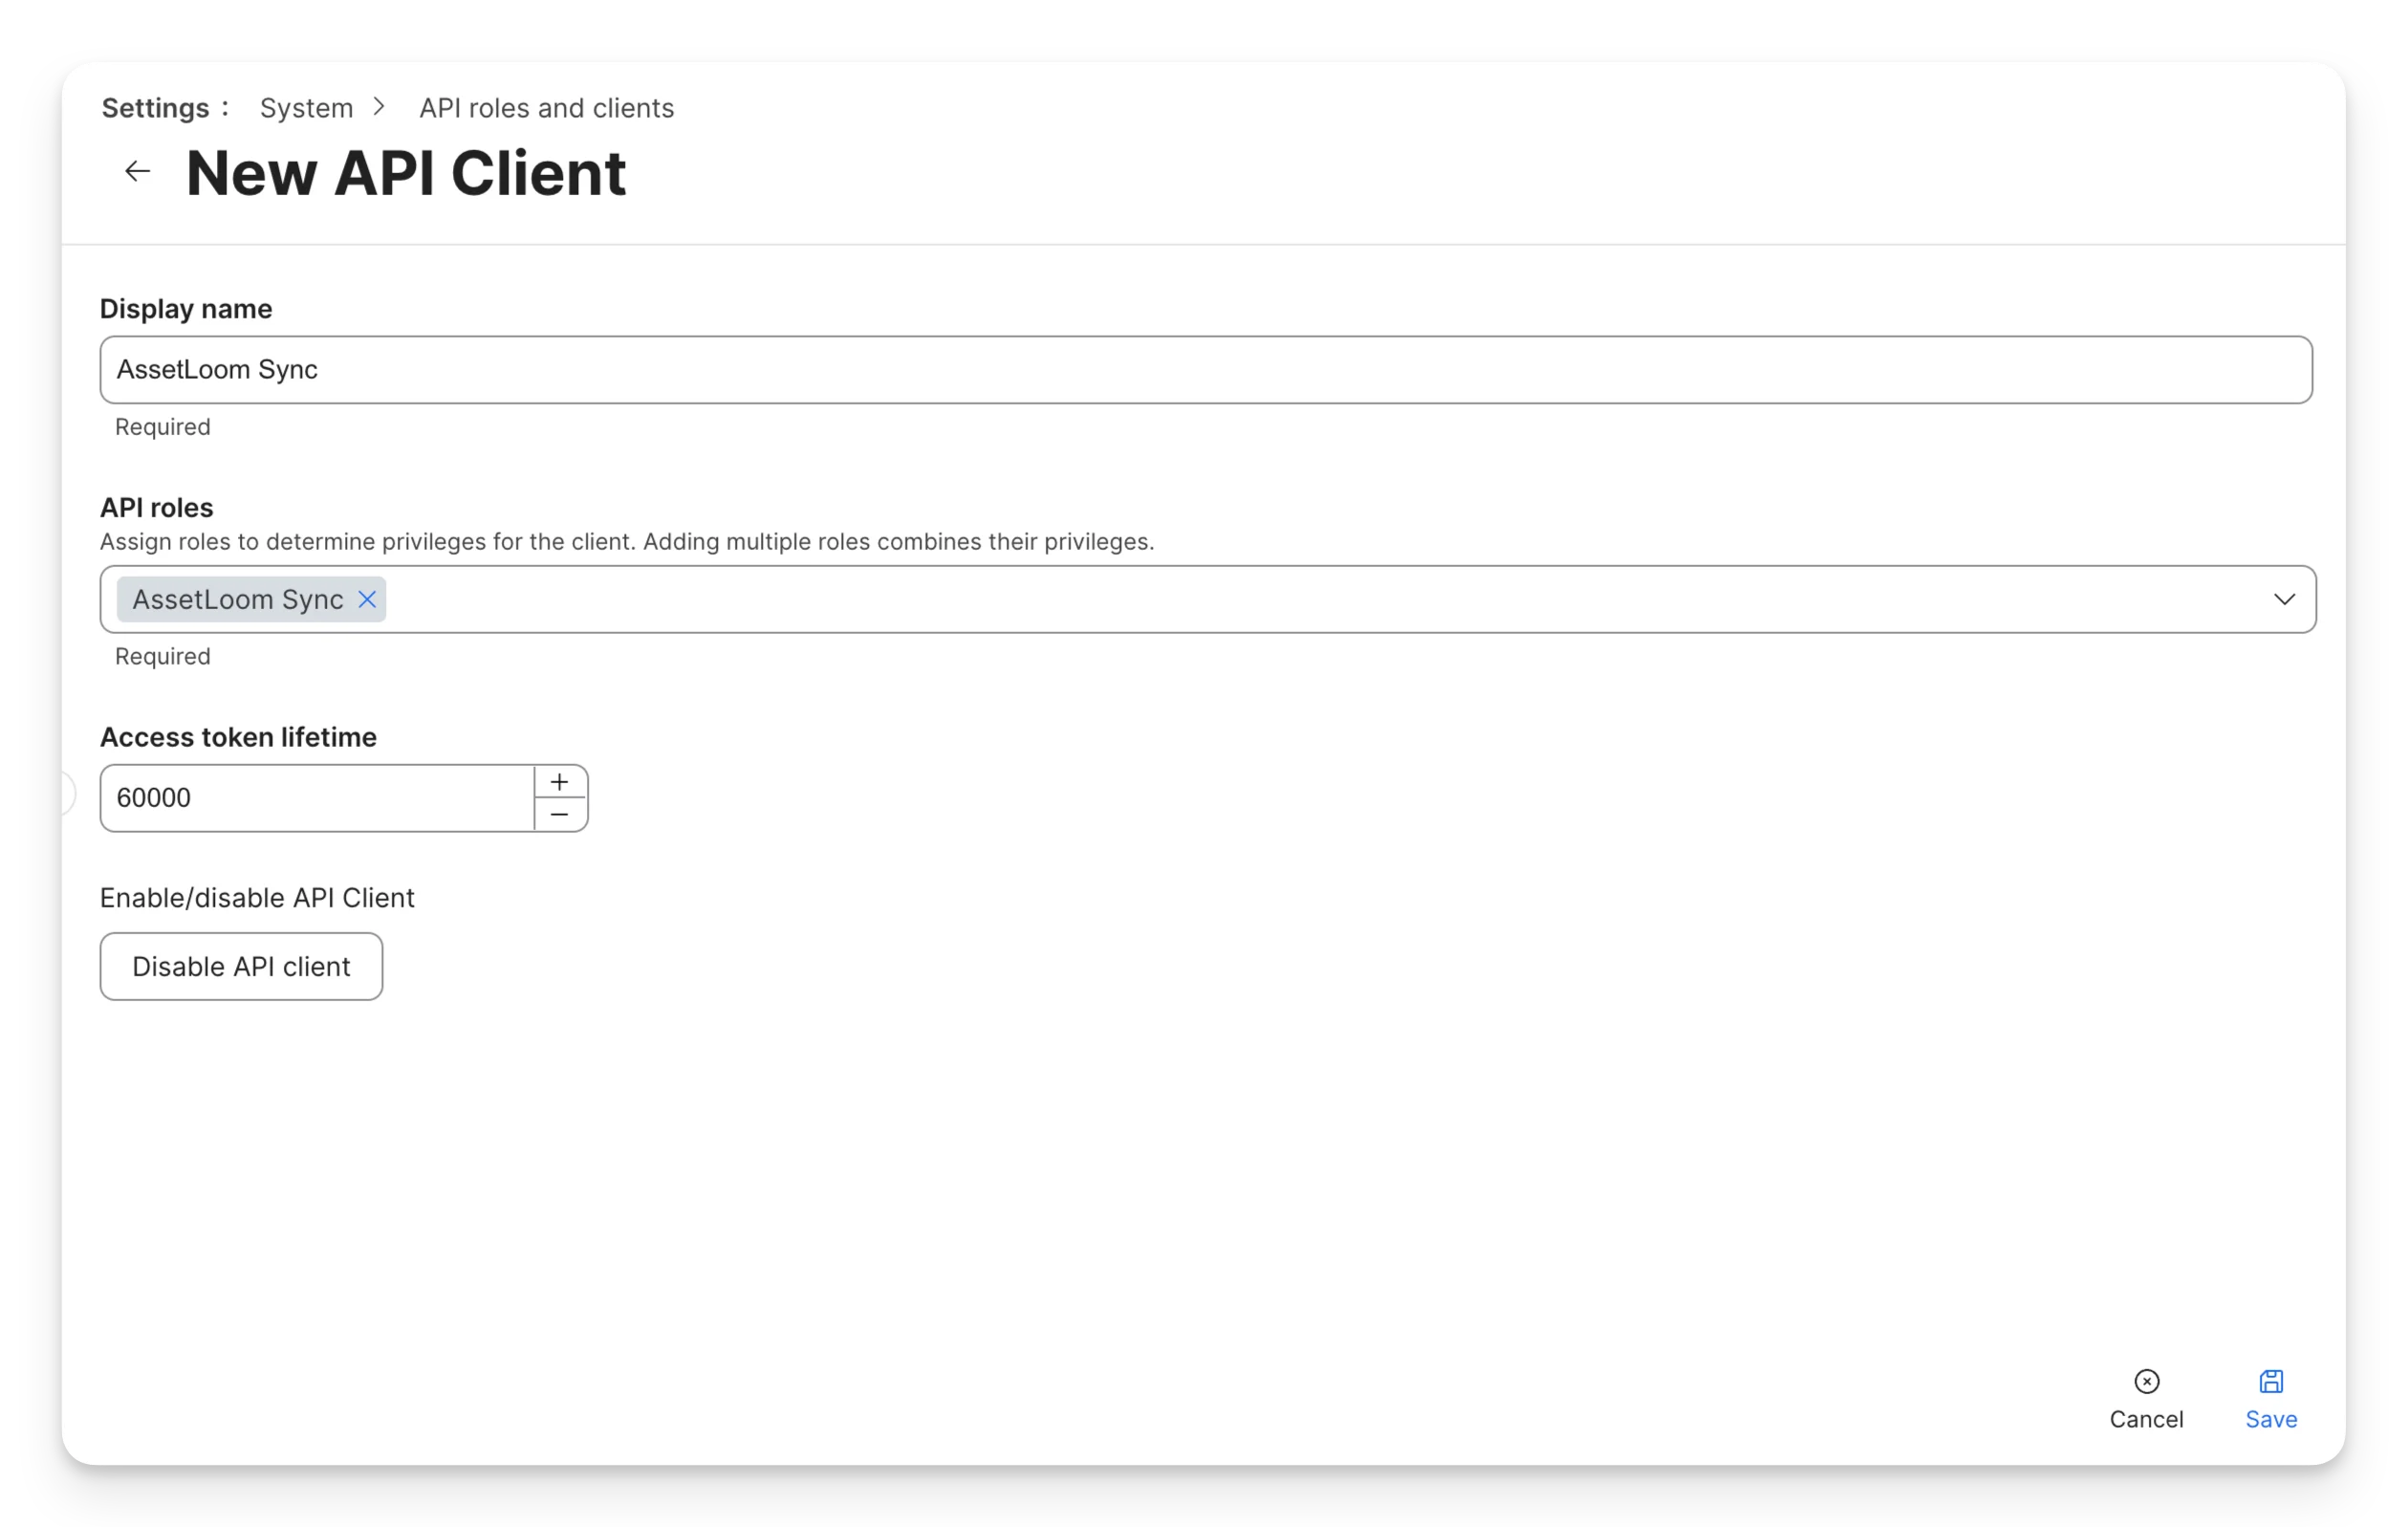
- Click Save to finish creating the API client.
1.3 Generate the Client Secret
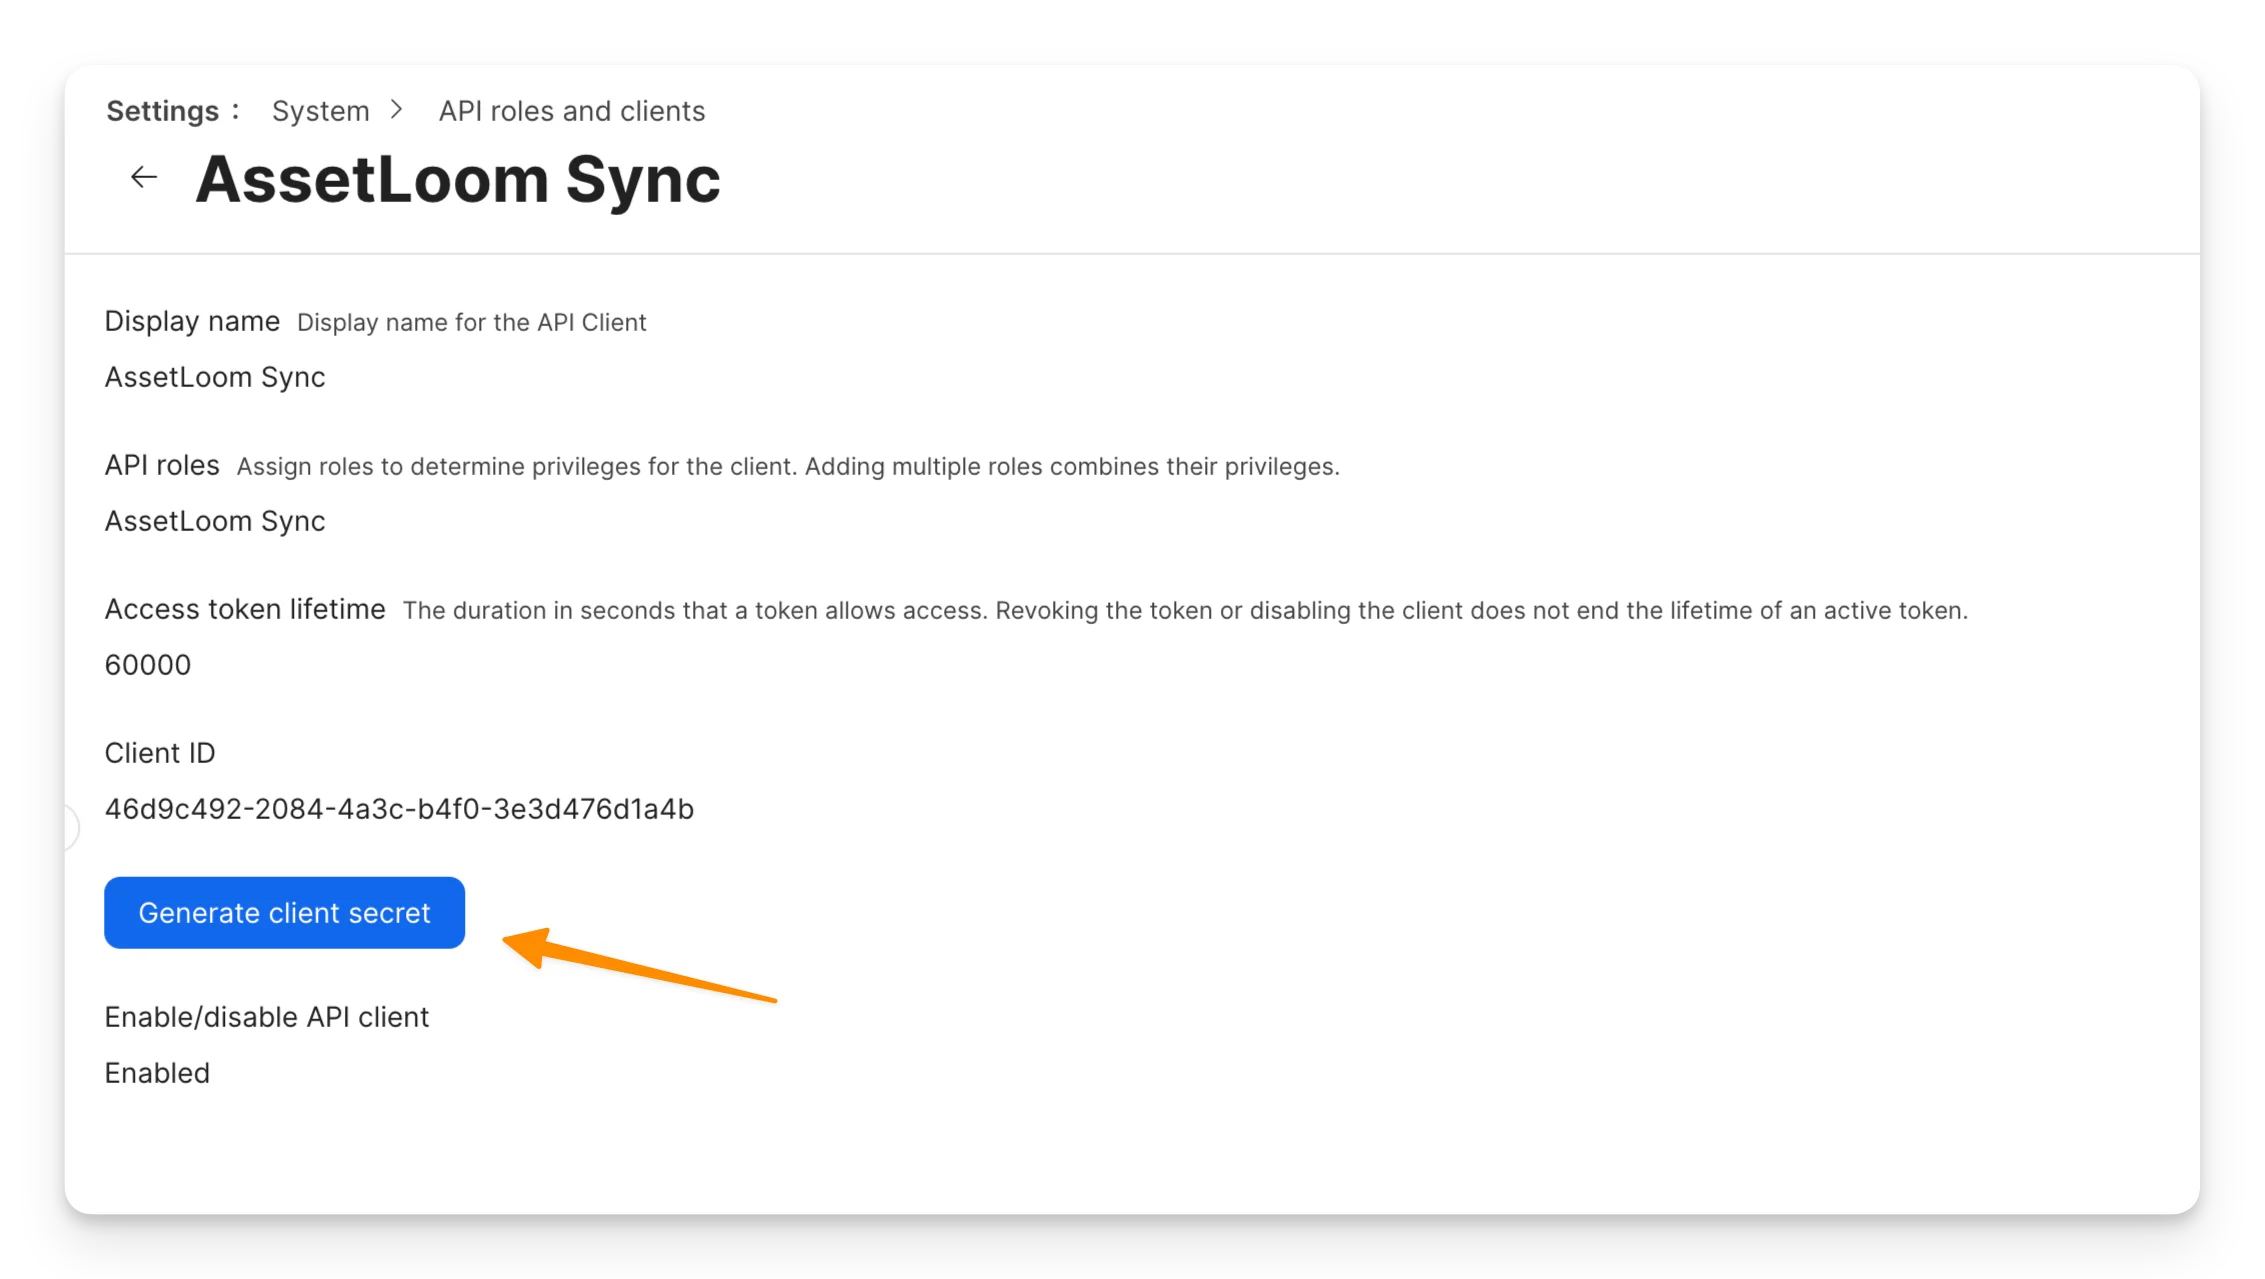
- On the API Clients screen, locate the client you just created.
- Click Generate Client Secret.
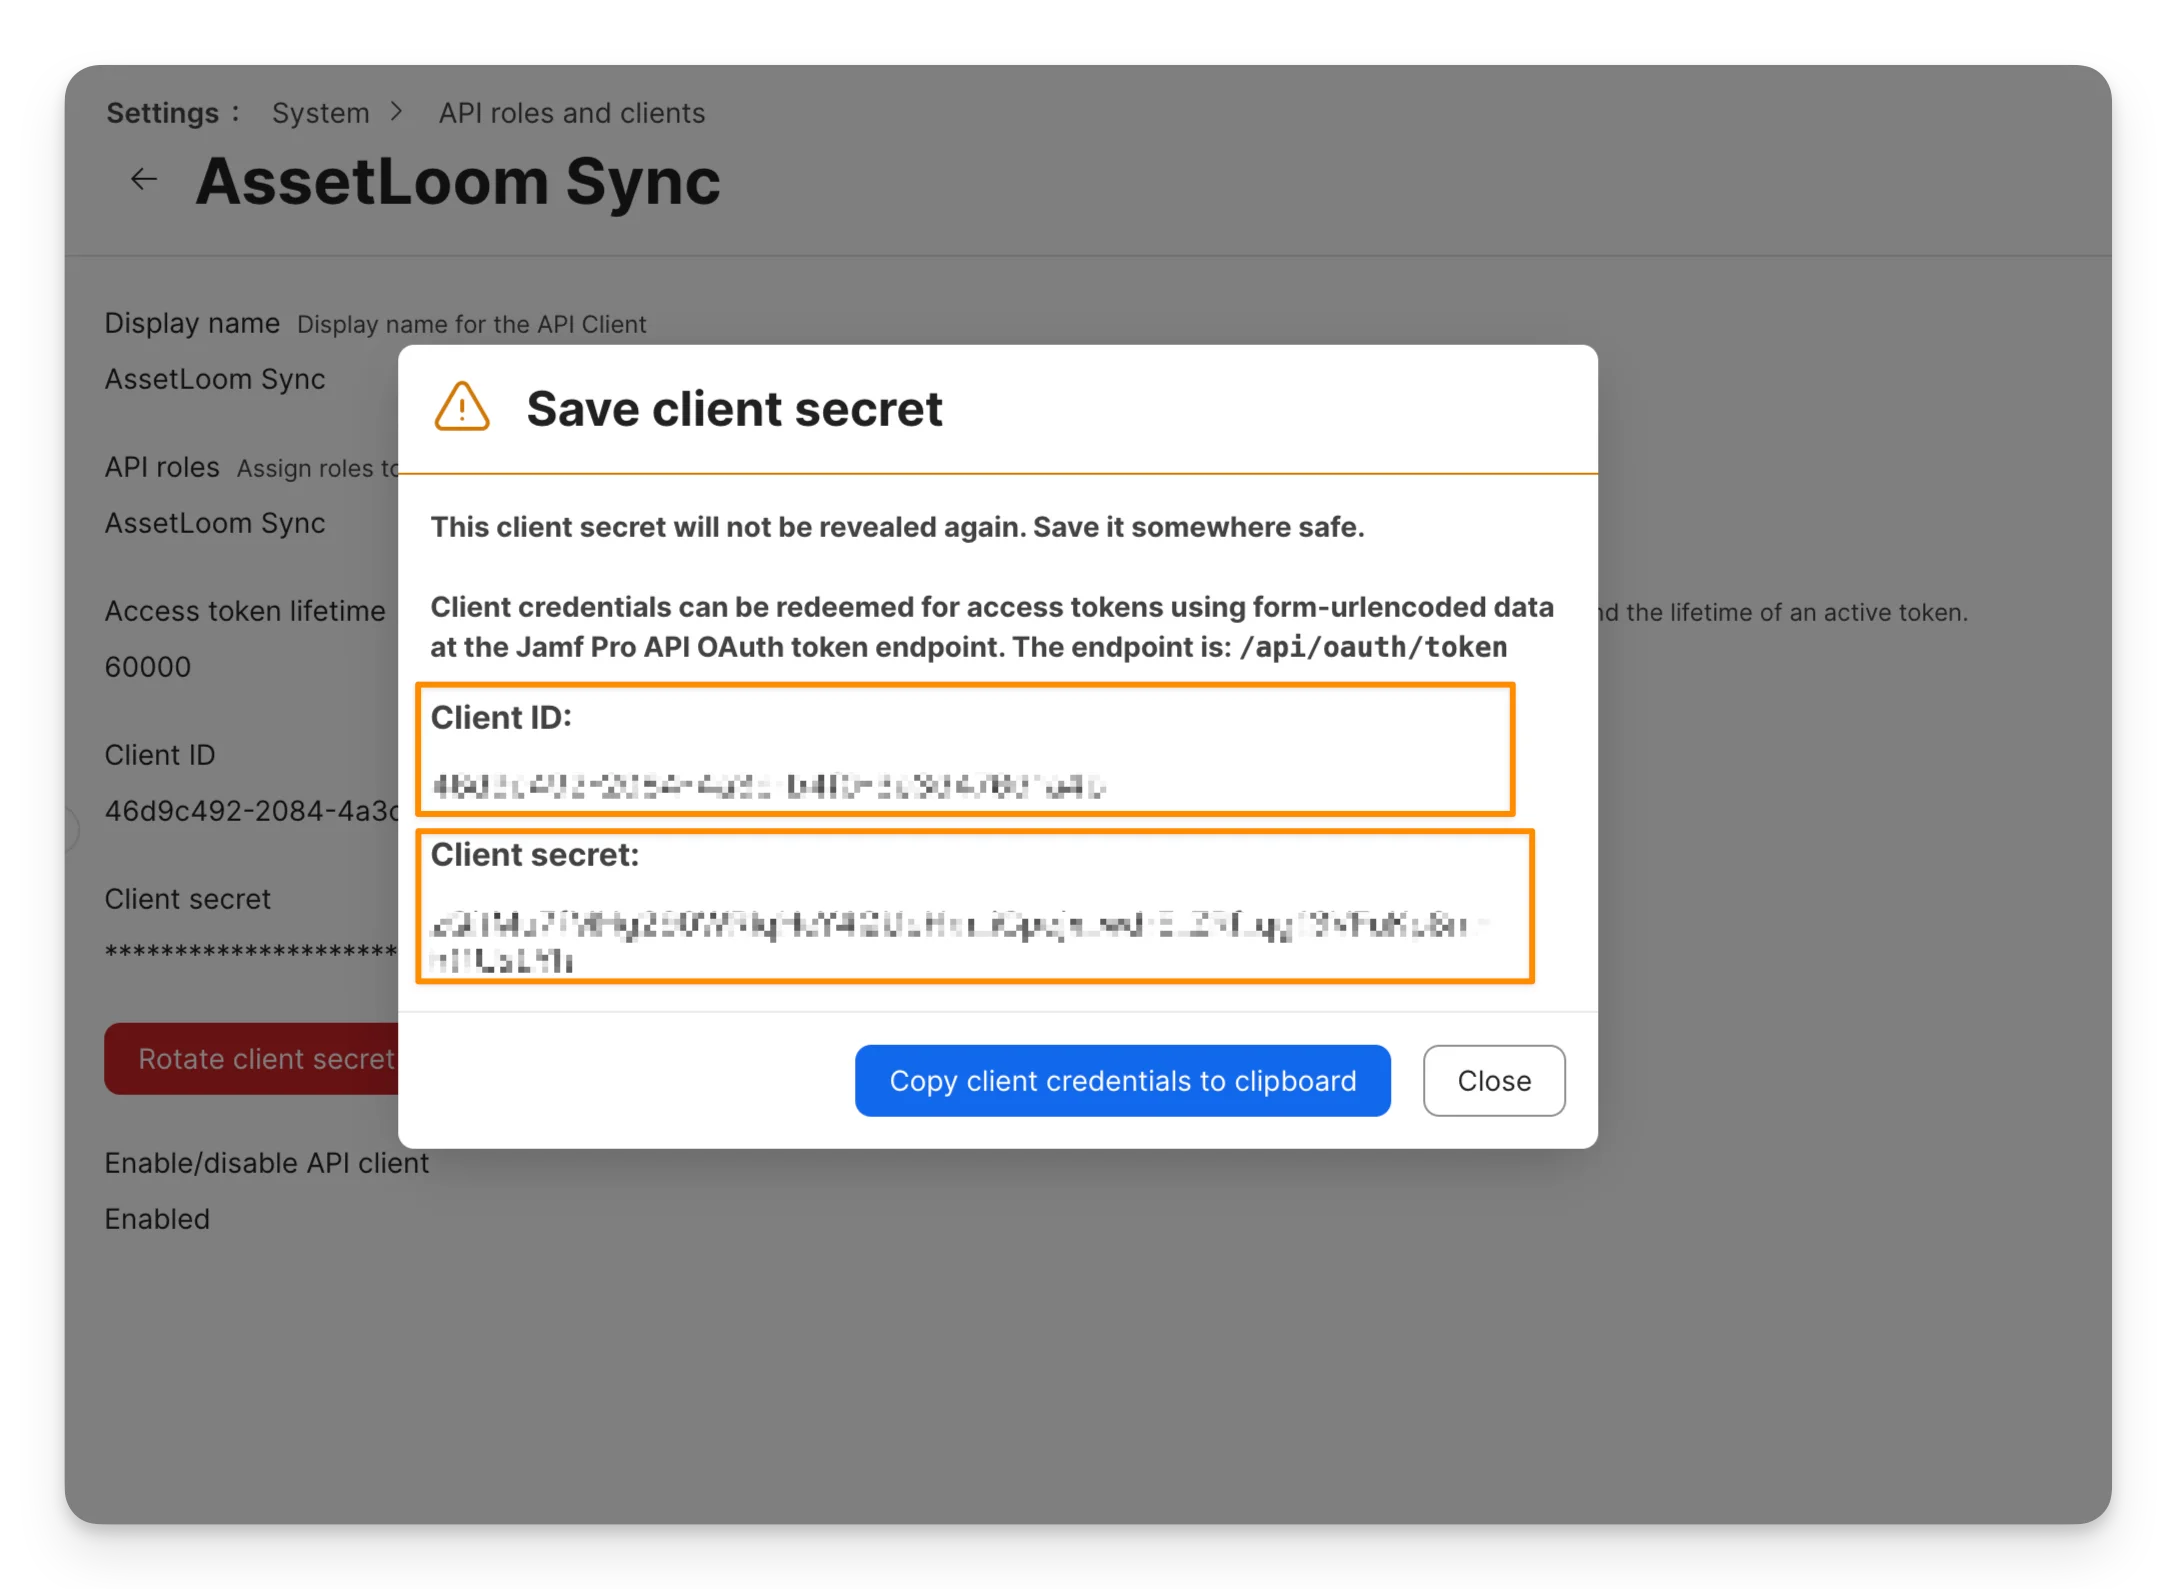
- Copy the generated Client Secret and store it securely. You’ll need both the Client ID and Client Secret in the next section.
Connect Jamf Pro to AssetLoom
With your Client ID and Client Secret ready, you can now connect Jamf Pro with AssetLoom and start the synchronization.
2.1 Open the setup panel
- In AssetLoom, go to Administration > Integrations.
- Filter by MDM (or search) to find the Jamf Pro card.
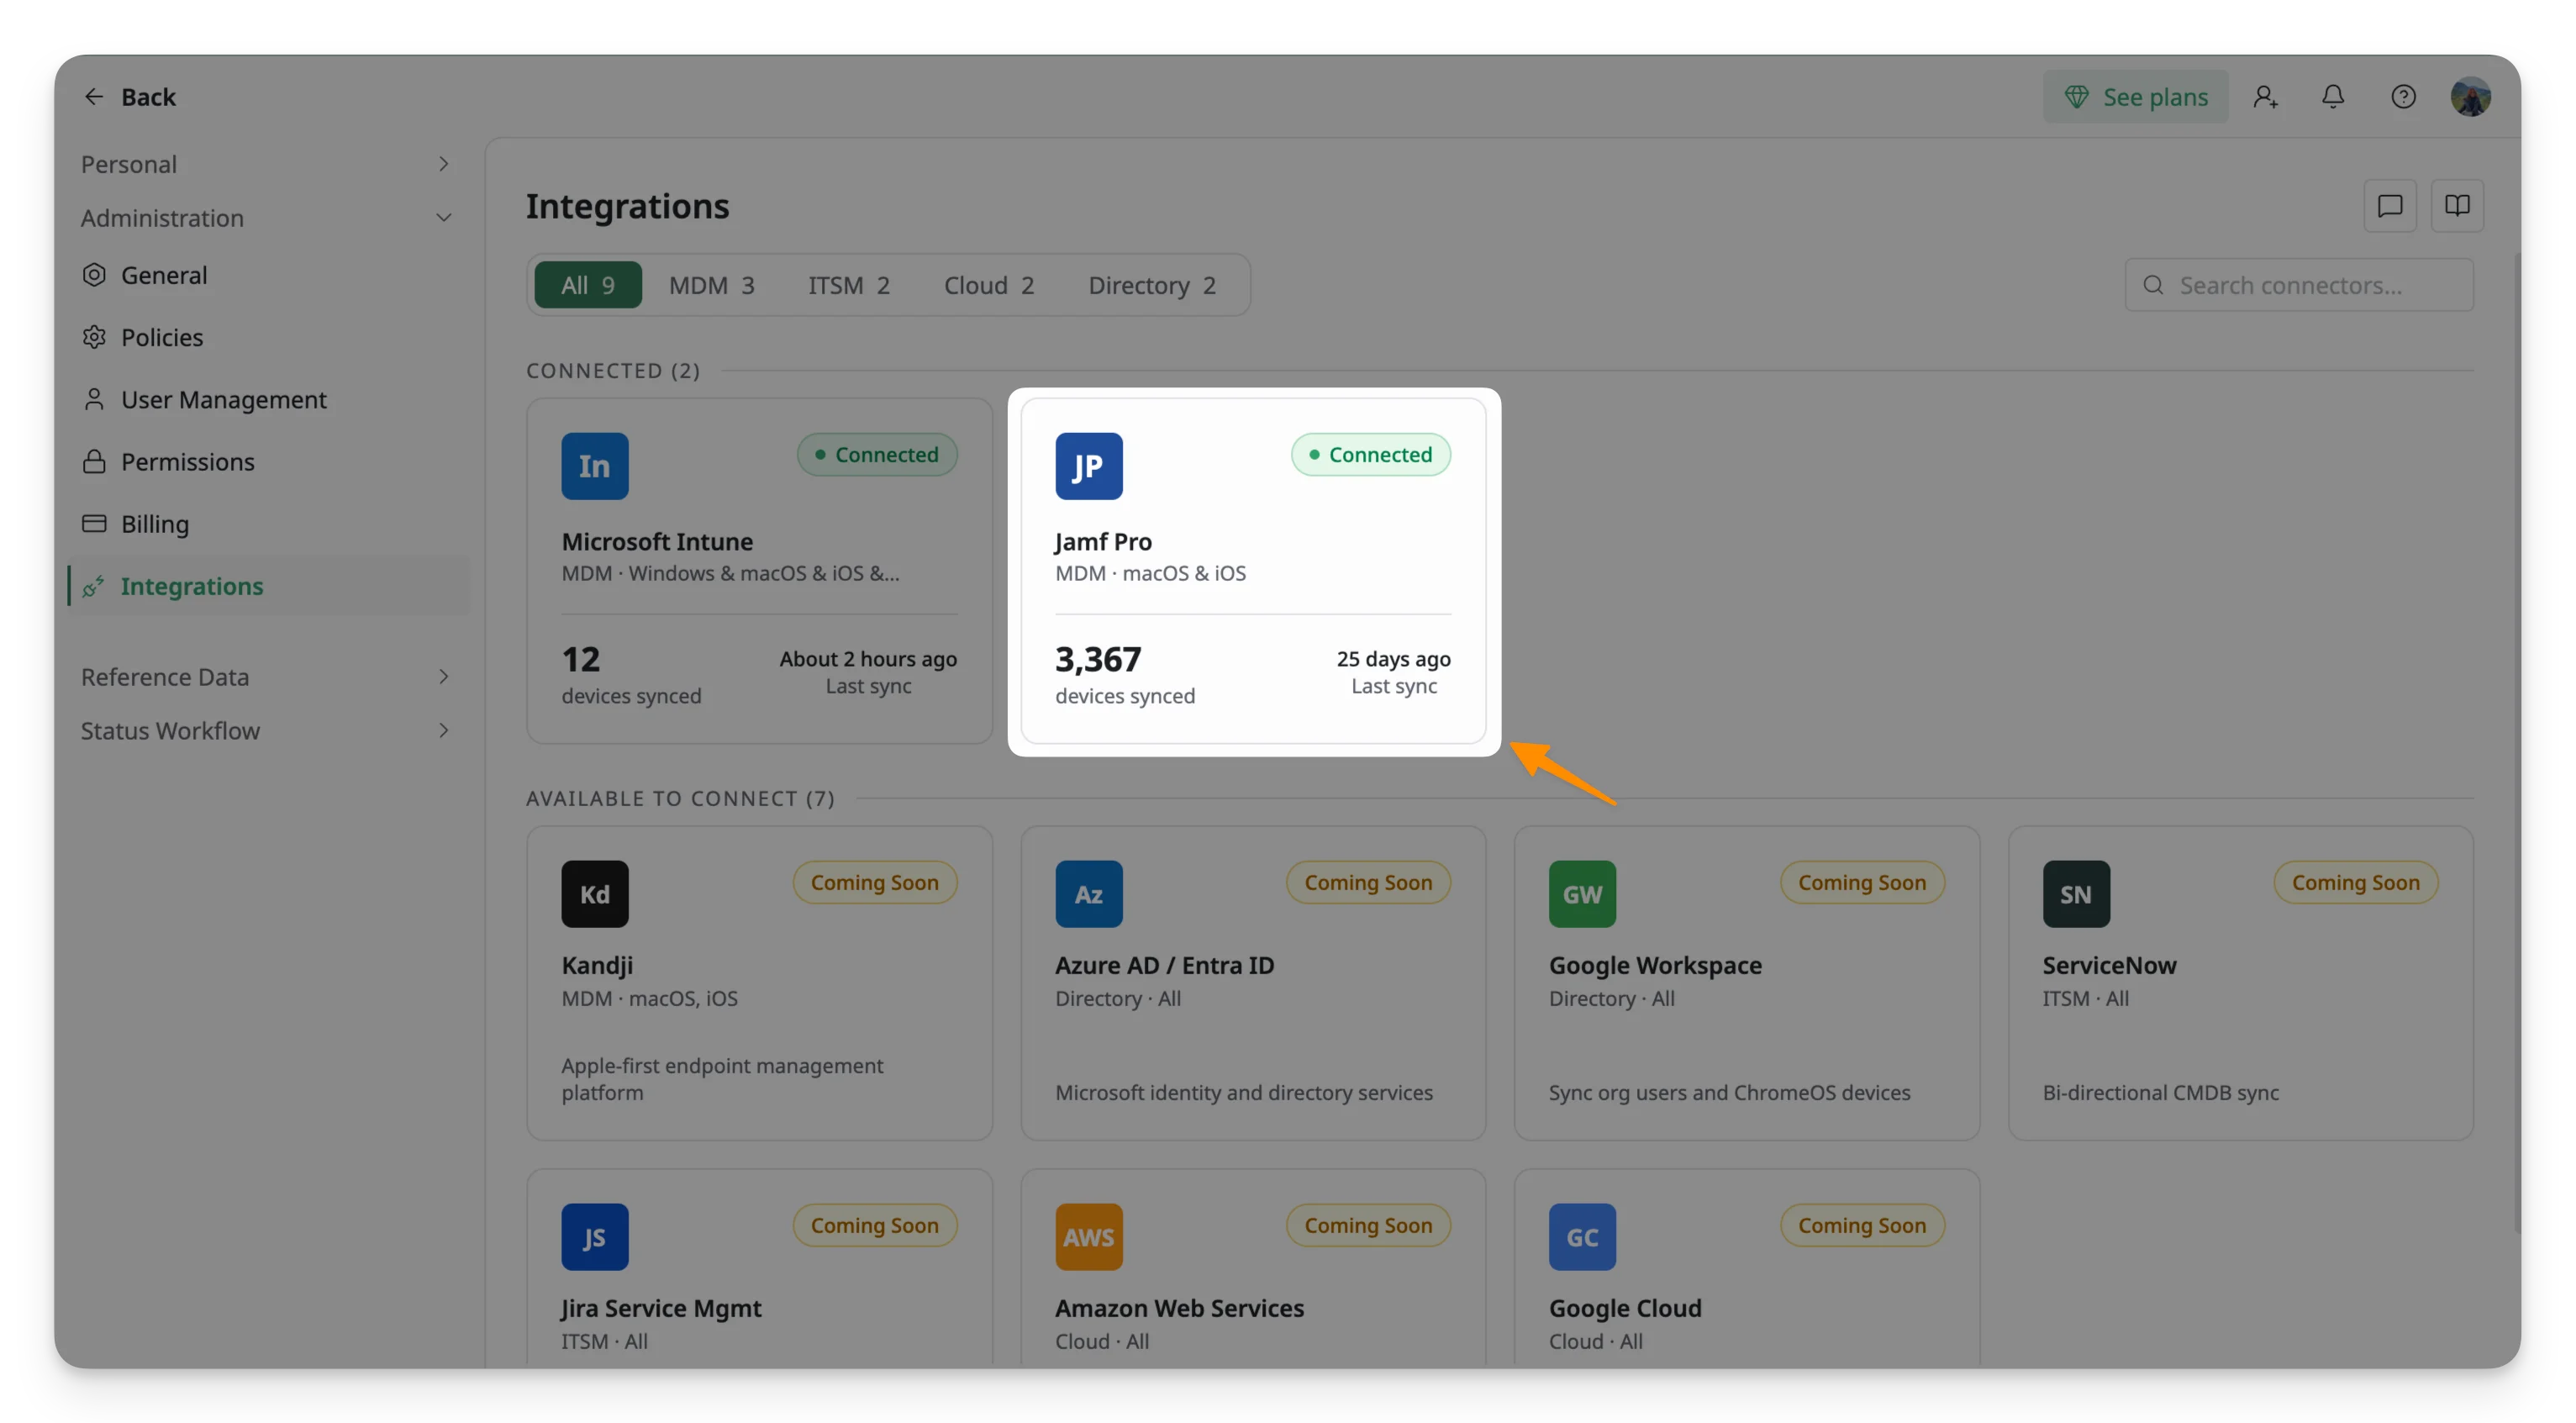
- Click on the Microsoft Intune card, and a Set up sync panel will open on the right.
2.2 Enter your credentials
Enter the credentials you collected from the Jamf Pro application:
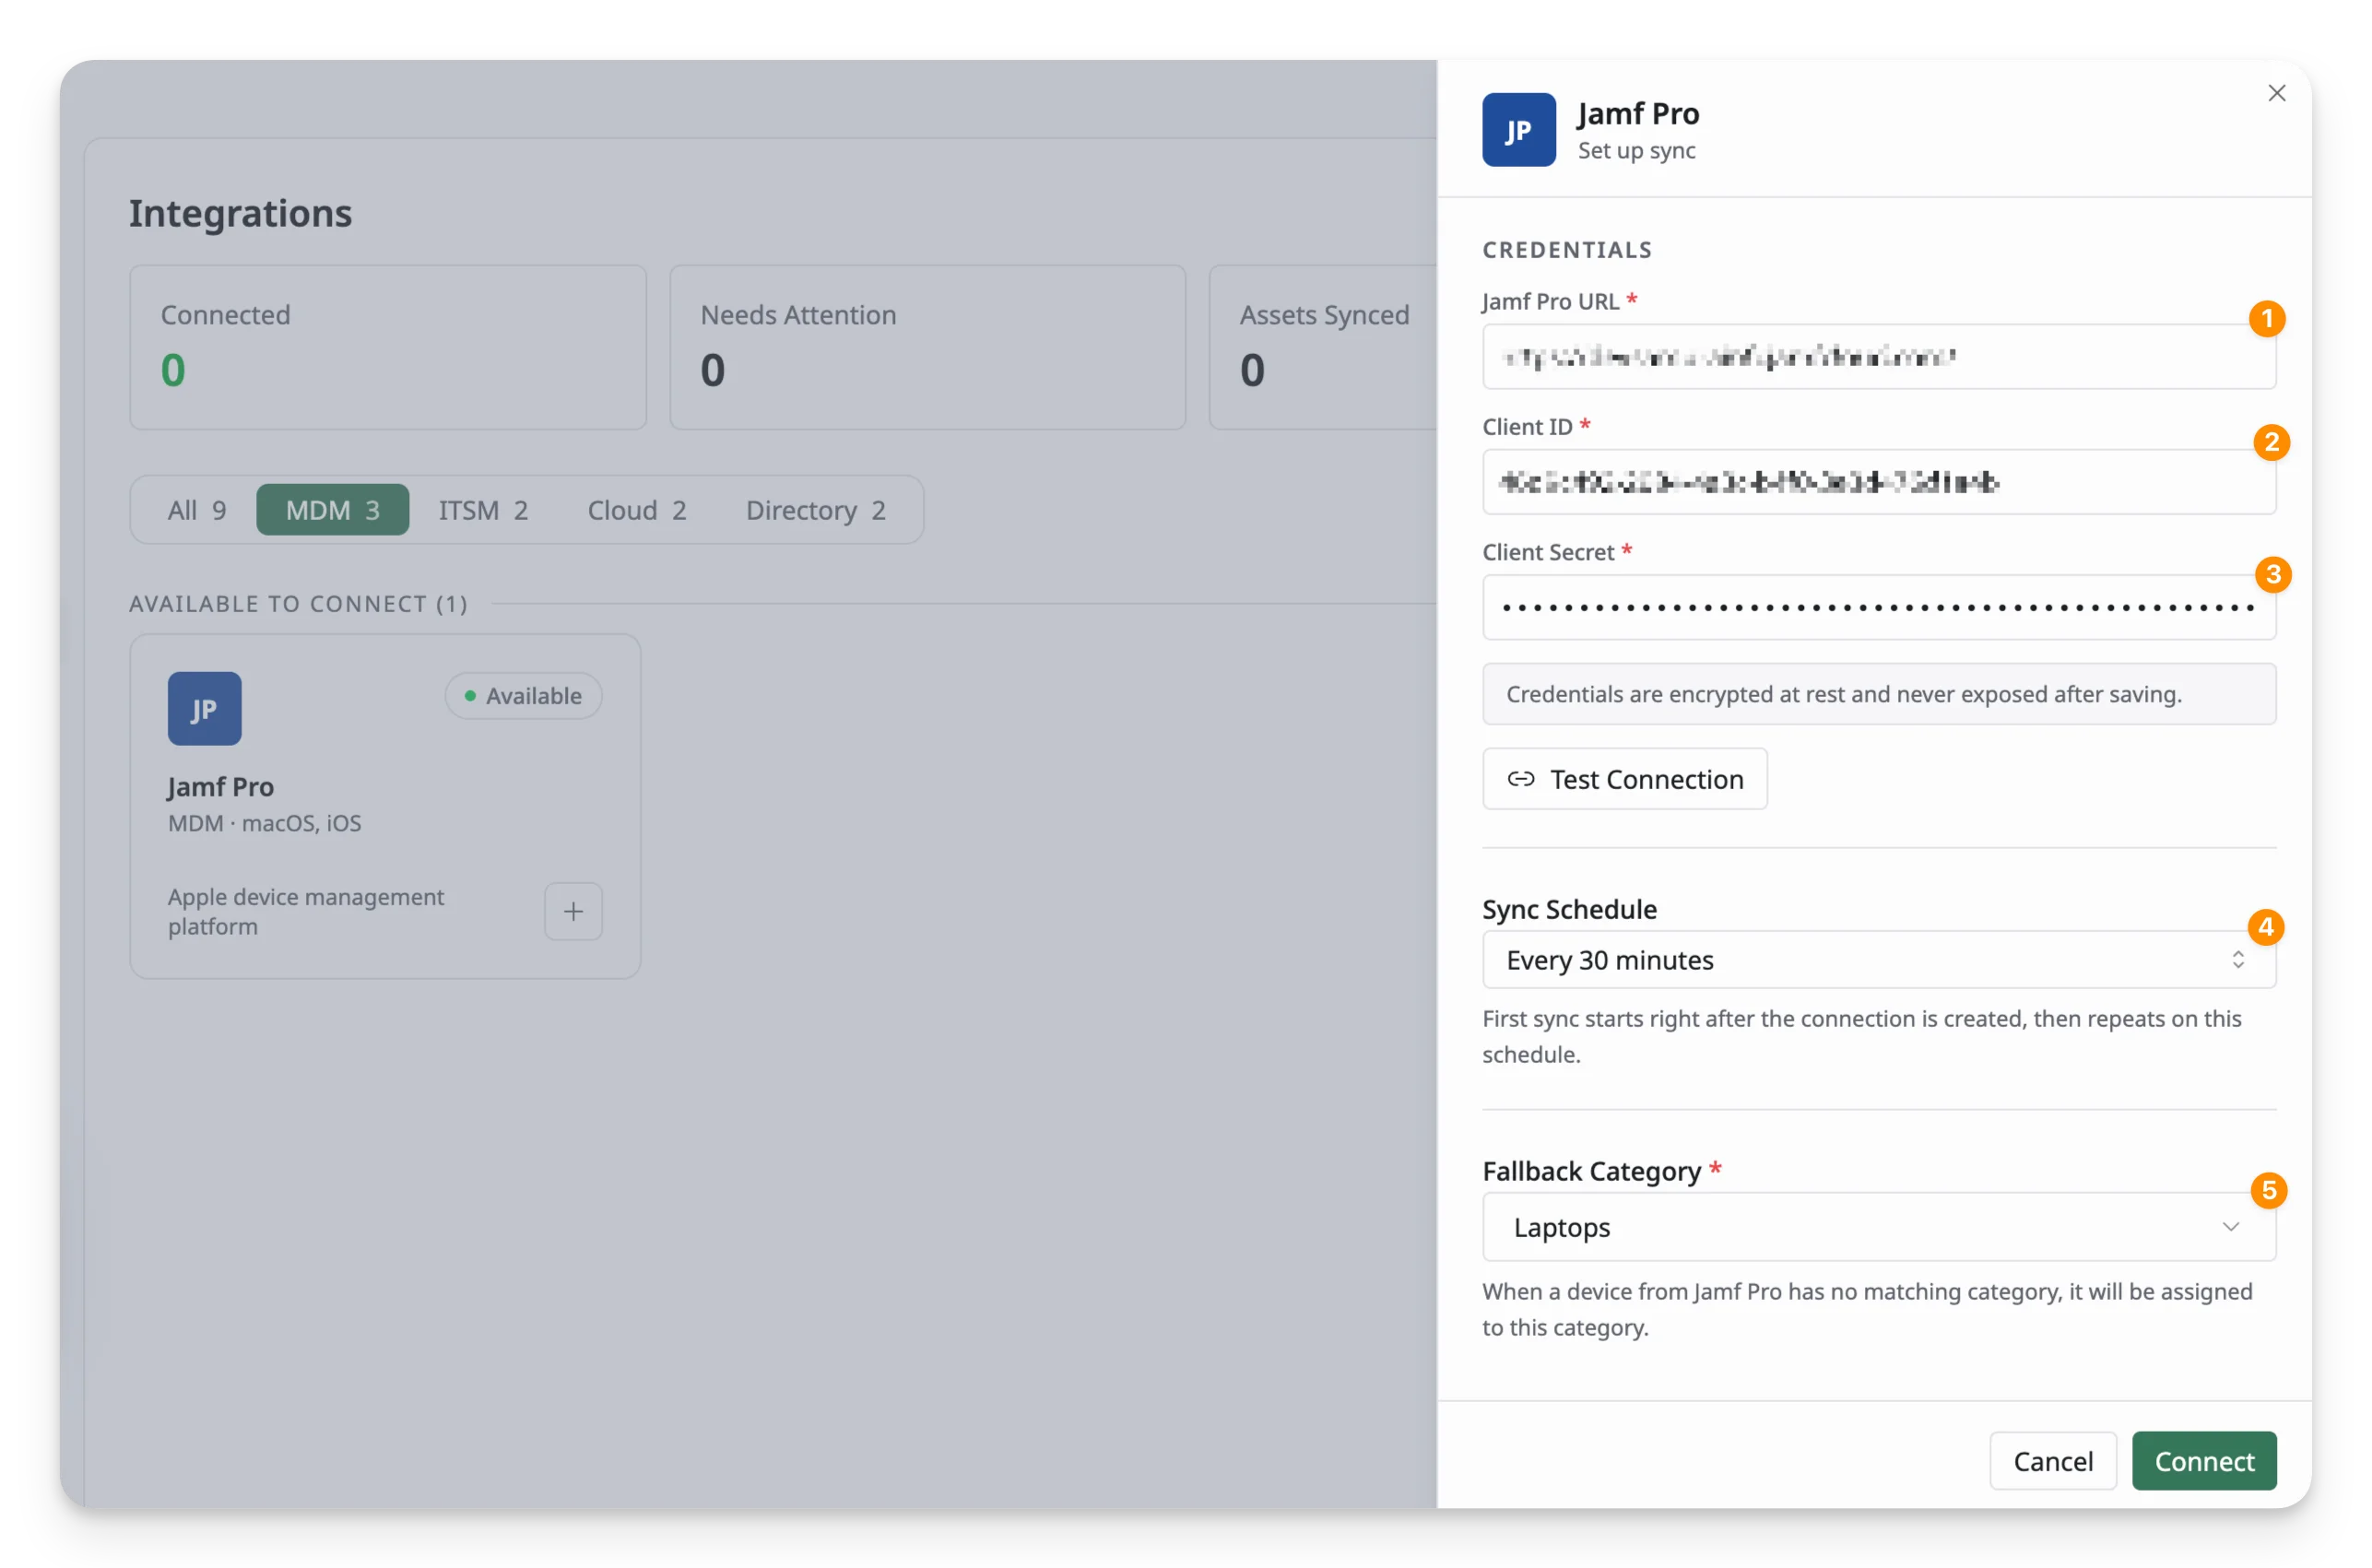
- Jamf Pro URL: your Jamf Pro instance URL (e.g.,
https://company.jamfcloud.com) - Client ID and Client Secret: the Credentials you have generated from Jamf Pro in step 1.3.
Click Test Connection to confirm AssetLoom can authenticate with your Jamf Pro instance before proceeding.
2.3 Set the sync schedule
Use the Sync Schedule dropdown to choose how often AssetLoom should automatically pull data from Jamf Pro:
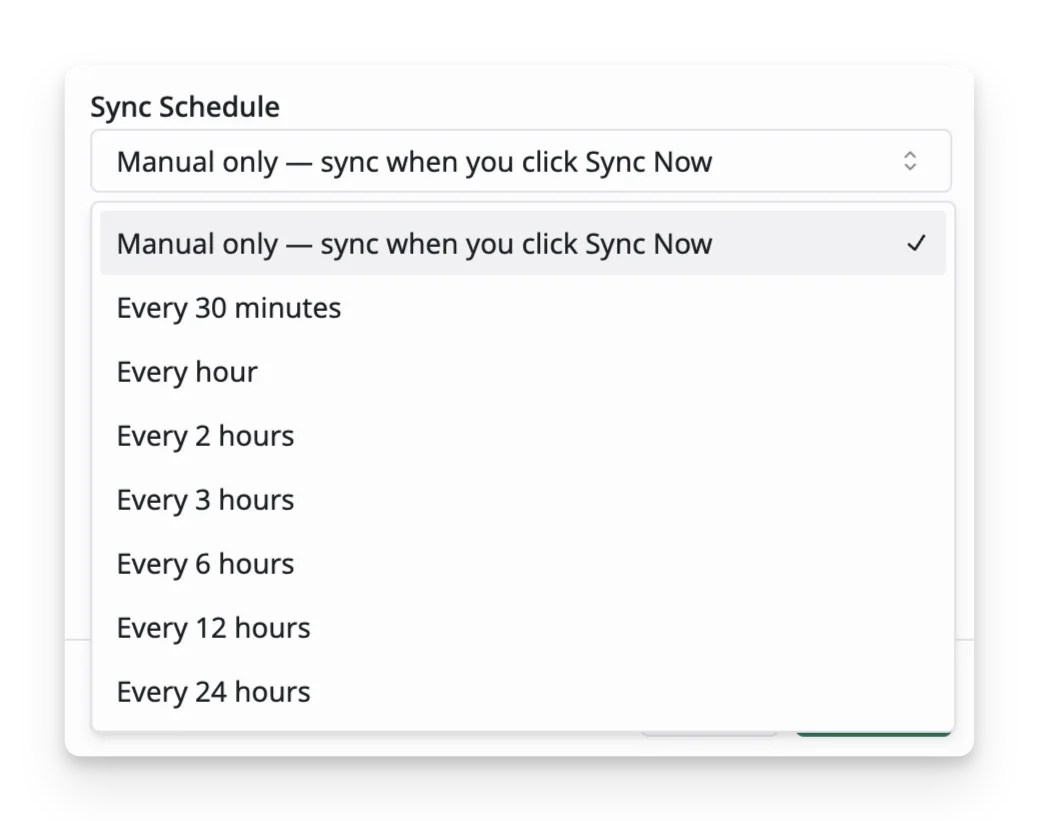
By default, sync is set to manual only, meaning no data will be pulled automatically until you either select a schedule here or turn one on later from the Configuration tab.
2.4 Set a fallback category
Select the AssetLoom category from the list that should be assigned to any device synced from Jamf Pro that doesn’t match an existing category.
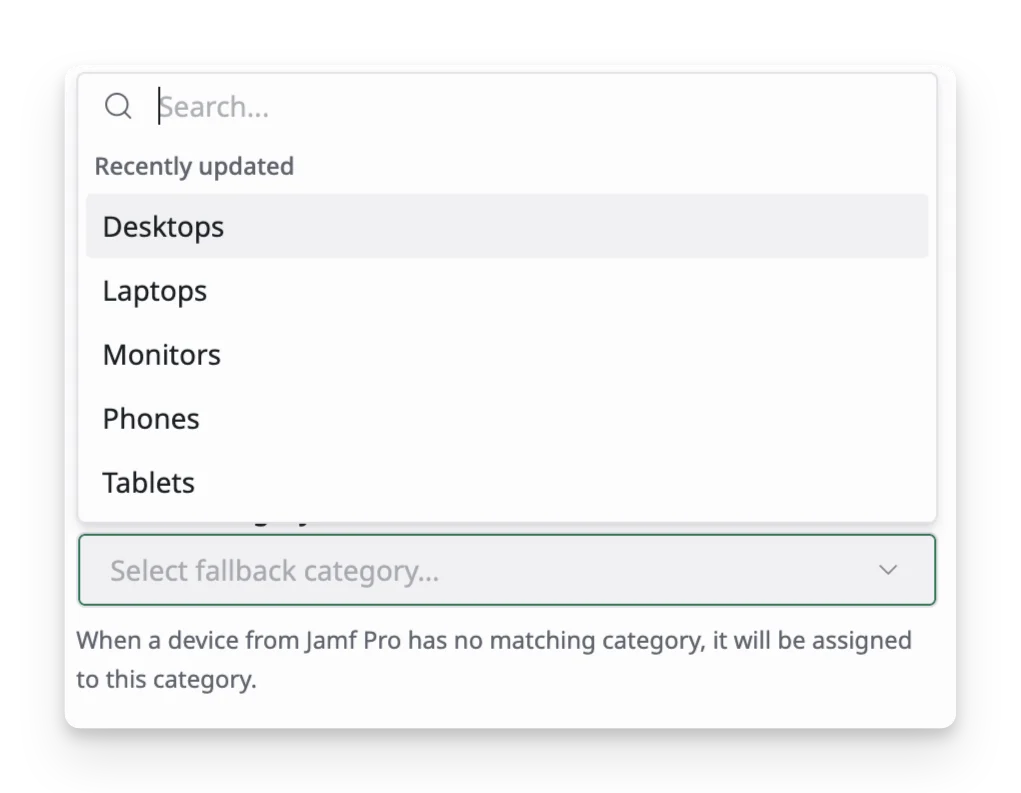
The Fallback Category acts as a safety net during synchronization.
When AssetLoom imports a device from Microsoft Intune, it attempts to match the device to one of your existing AssetLoom categories. If no suitable match can be found, AssetLoom assigns the device to the category you selected as the fallback instead of leaving it uncategorized.
2.5 Complete the connection
Click Connect to save your settings and finish setup, or Cancel to discard your changes without connecting.
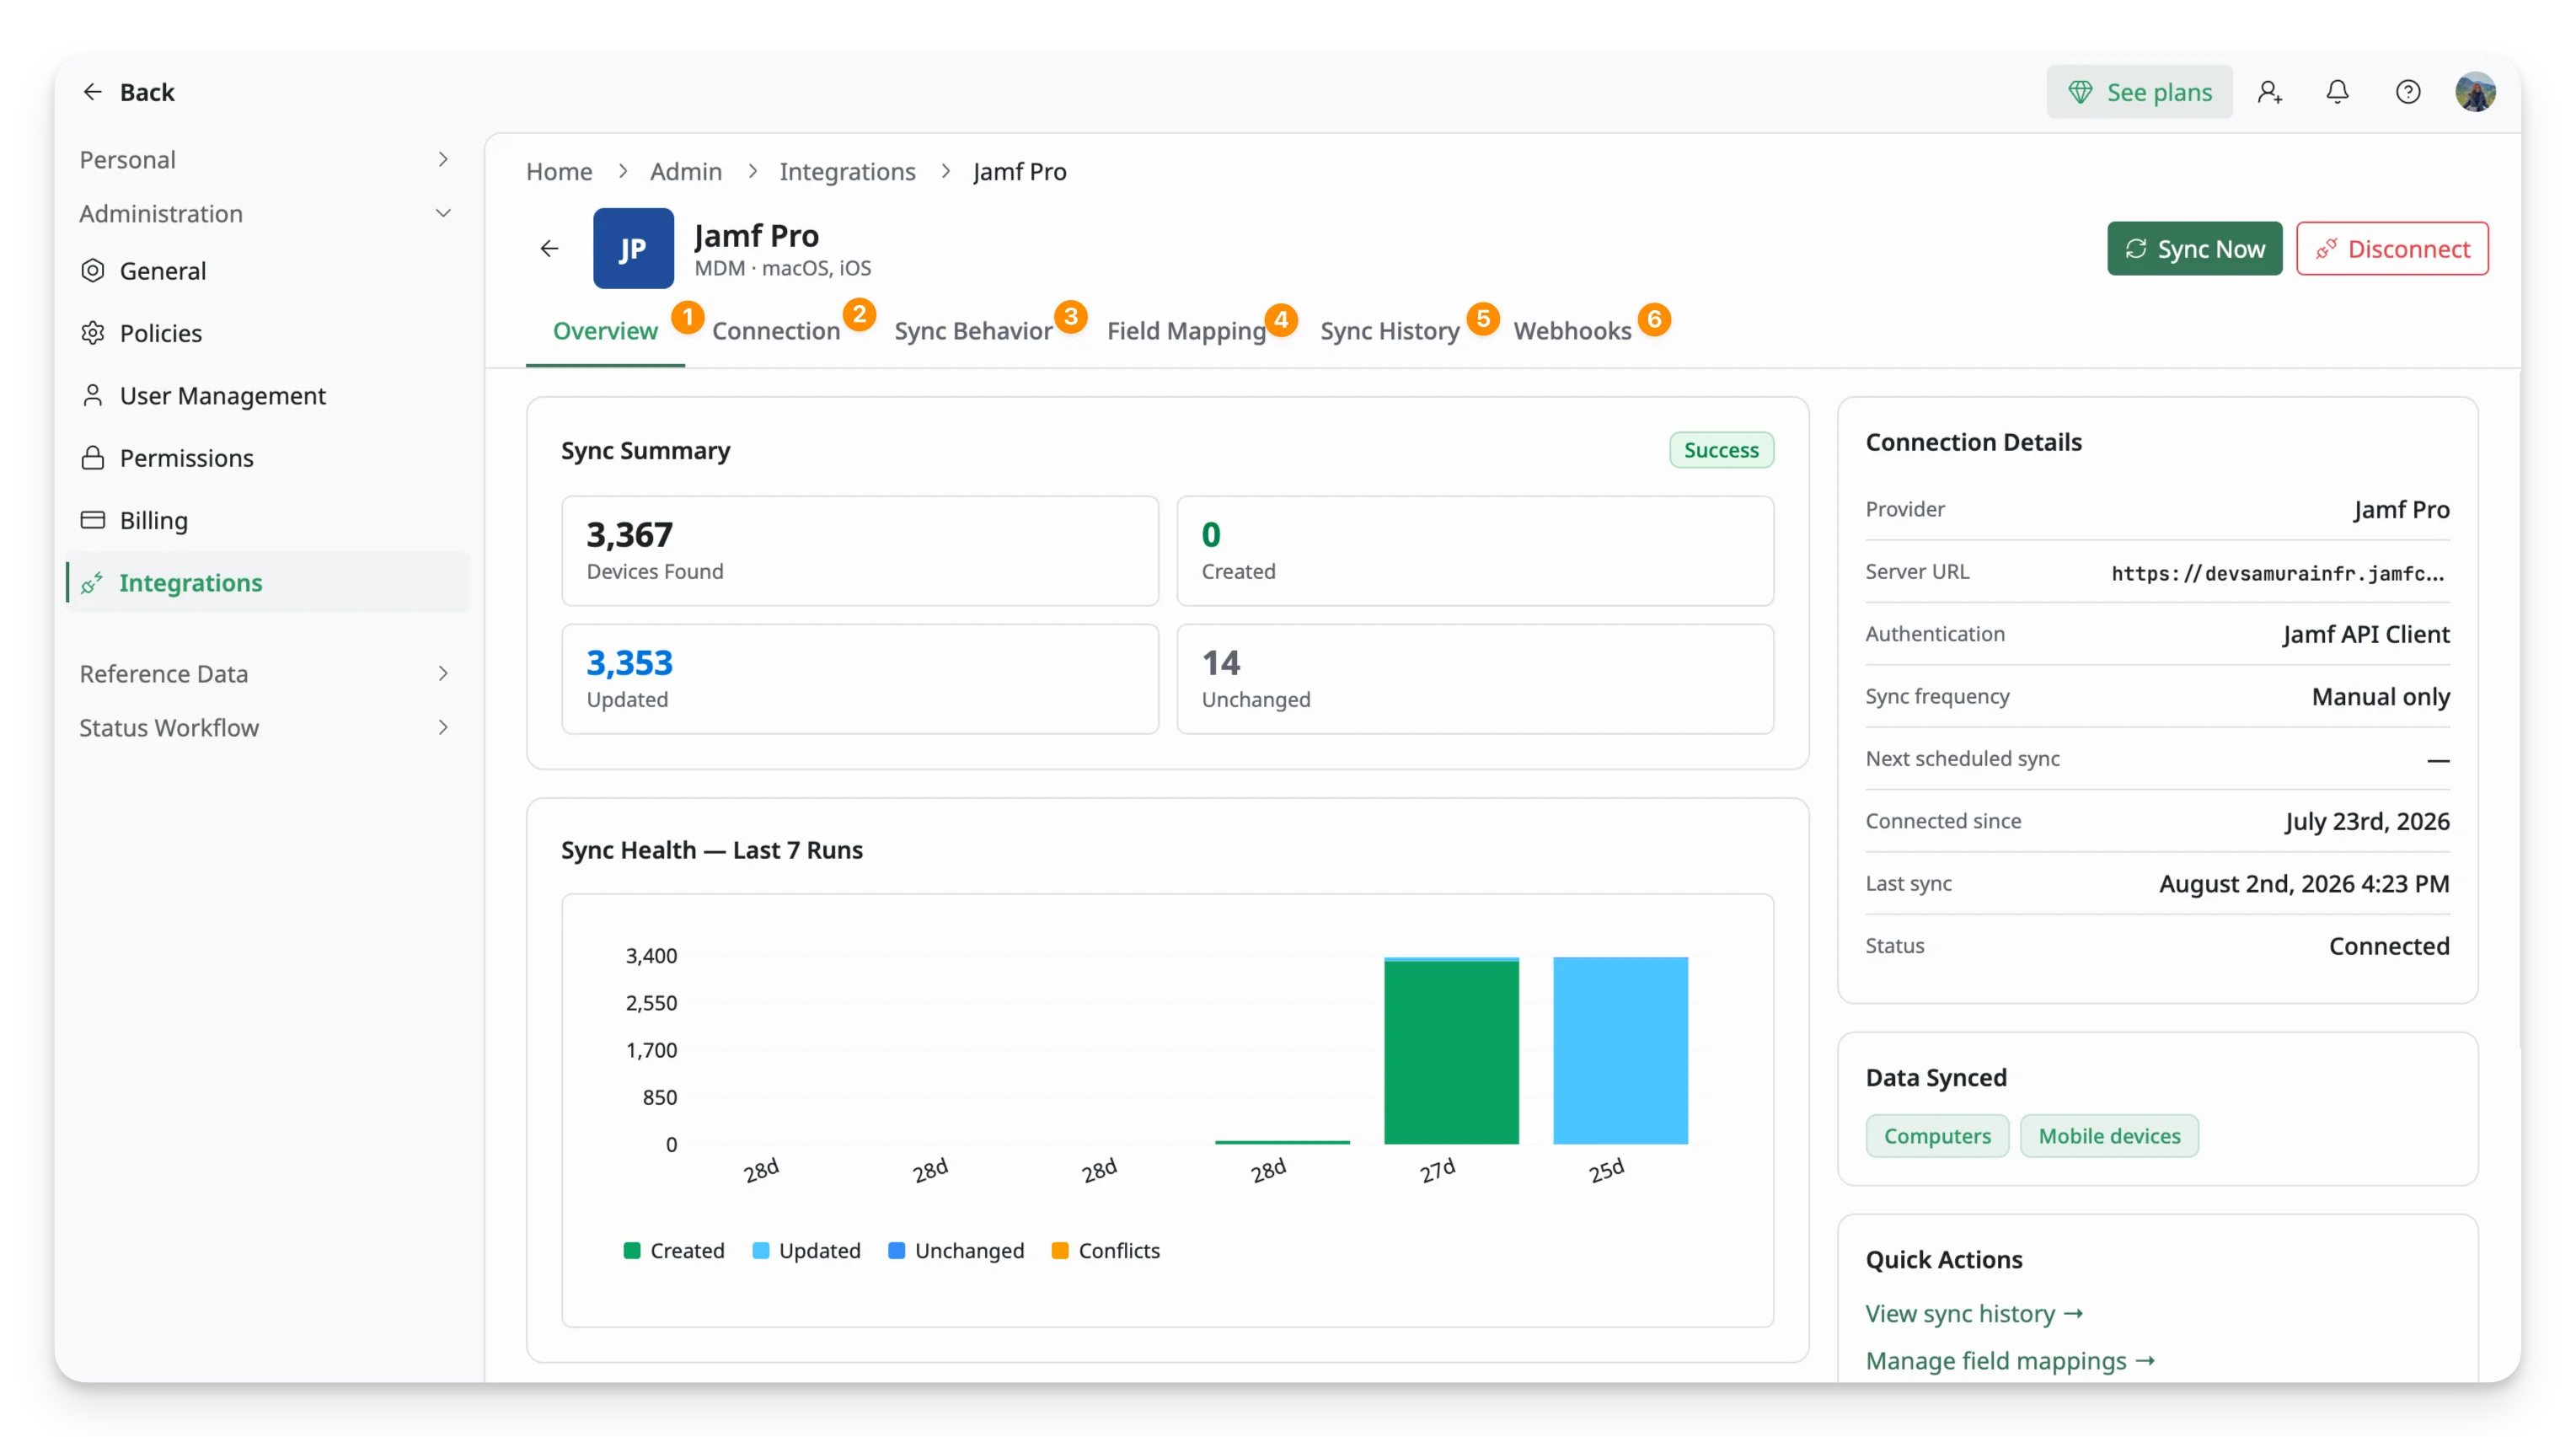
Once connected, you’ll be taken to the Jamf Pro Integration Details page.
3. Access the Jamf Pro Integration Details Page
After a successful connection, you can return to your Jamf Pro settings at any time from the Integrations hub.
- From the Integrations hub, locate the Jamf Pro card and click on it. You should see the general information for the integration in the right panel.
- To access the Jamf Pro Integration Details page, click on the Jamf Pro name in the right panel.
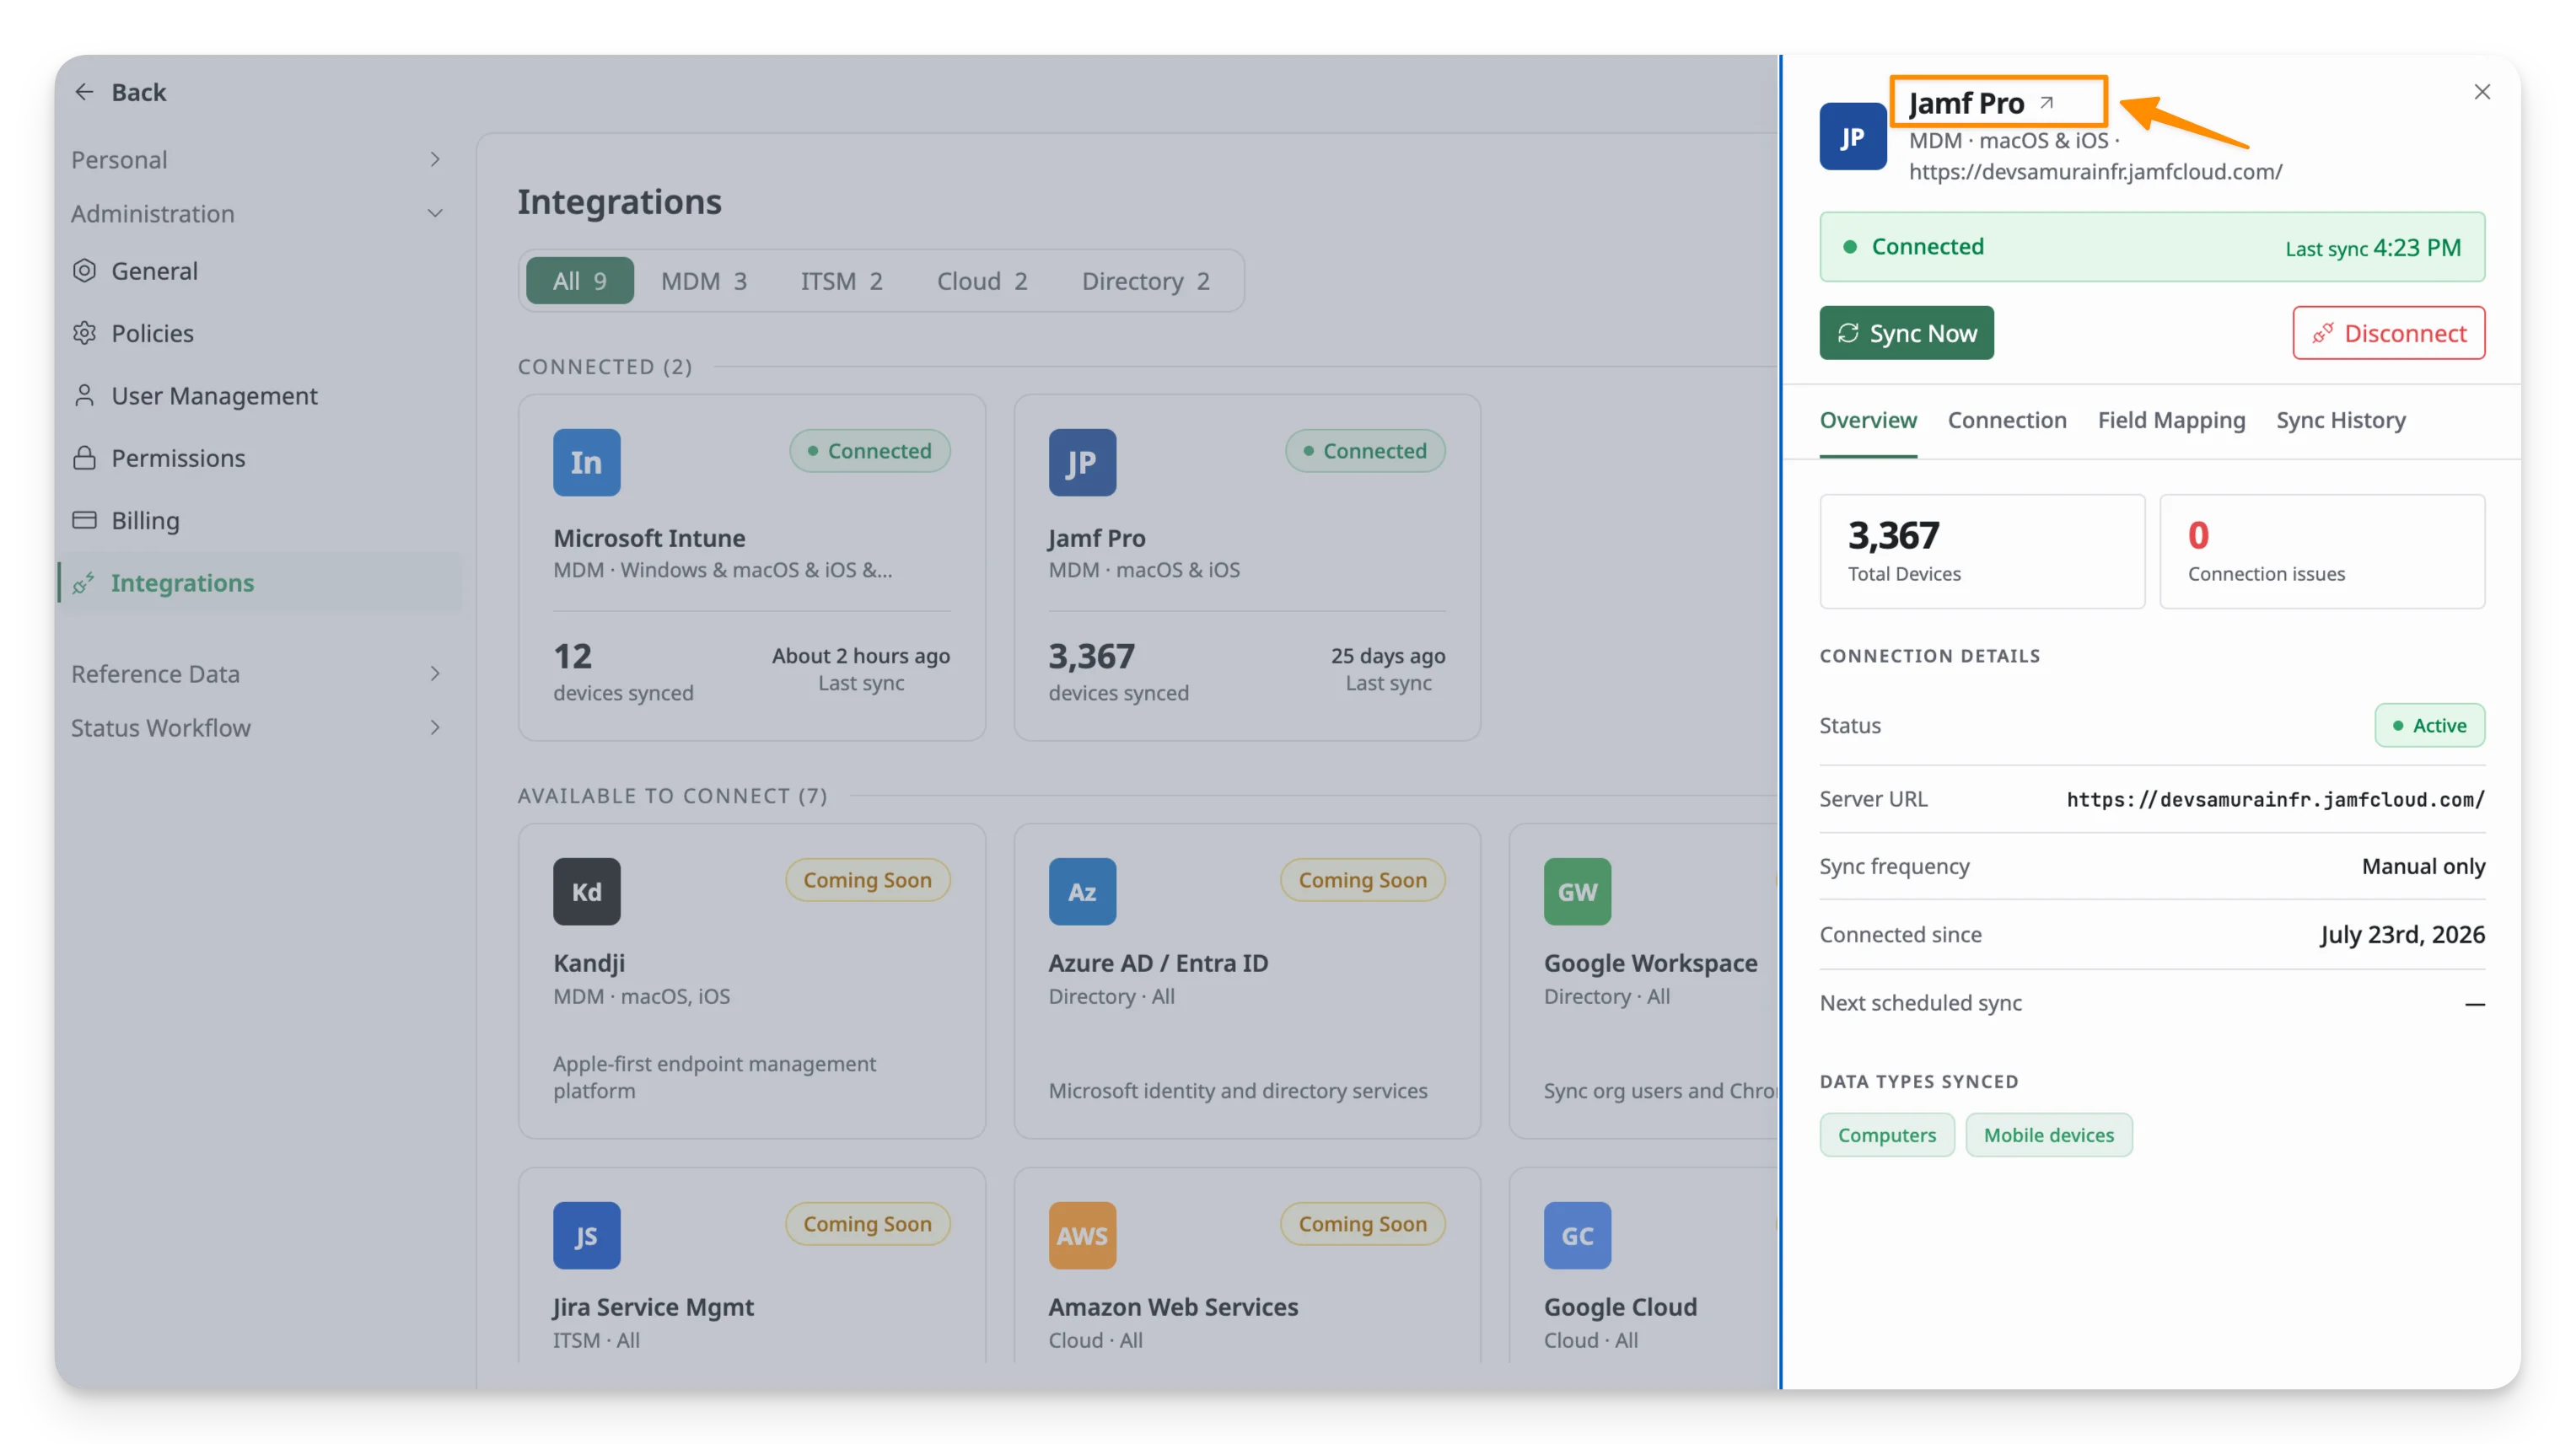
- You’ll land on the Overview tab, which shows your sync summary, sync health over the last 7 runs, and the result of the latest sync. From here, you can access five additional tabs: Configuration, Sync Behavior, Field Mapping, Sync History, and Webhooks.