Assign an asset to a team member
Learn how to assign an asset to a team member
Assigning an asset allows you to check it out to a team member and track who is currently using it. By default, when you assign an asset to a member, the asset’s status will be automatically updated to In Use.
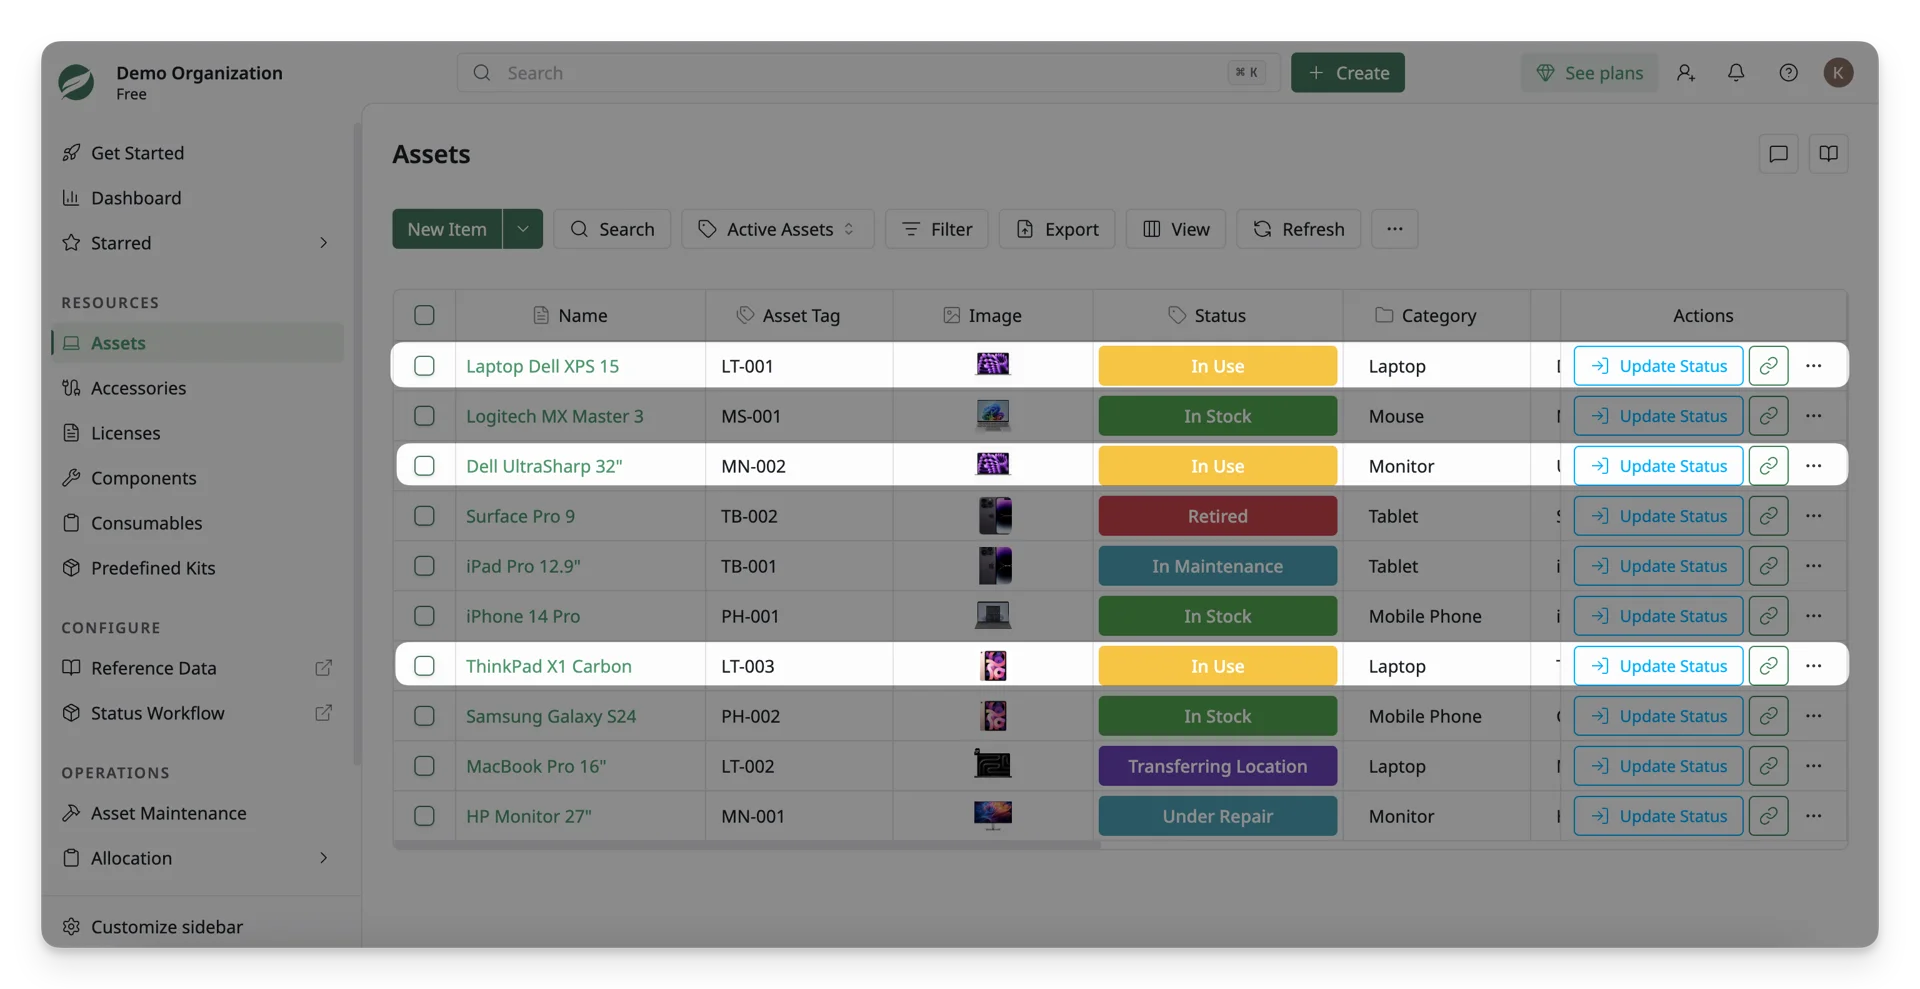
How to assign an asset to a team member?
You can assign an asset to a team member in three ways.
Before You Start
Make sure:
- You already have assets created in your workspace
- You have added team members to your workspace
- The asset is eligible for checkout
How is it considered "eligible"?
An asset can only be assigned if its current status allows a Checkout transition. In the default workflow, this usually means the asset is with In Stock status.
Not sure what a status transition is? Check out this guide: Status Workflow ->
Assets can be assigned through status transition. This means that you can change the status of the asset from In Stock to In Use to assign it away. To proceed:
- From the asset list, locate the asset you want to assign. Click on the “Update Status” button in the Action Column.
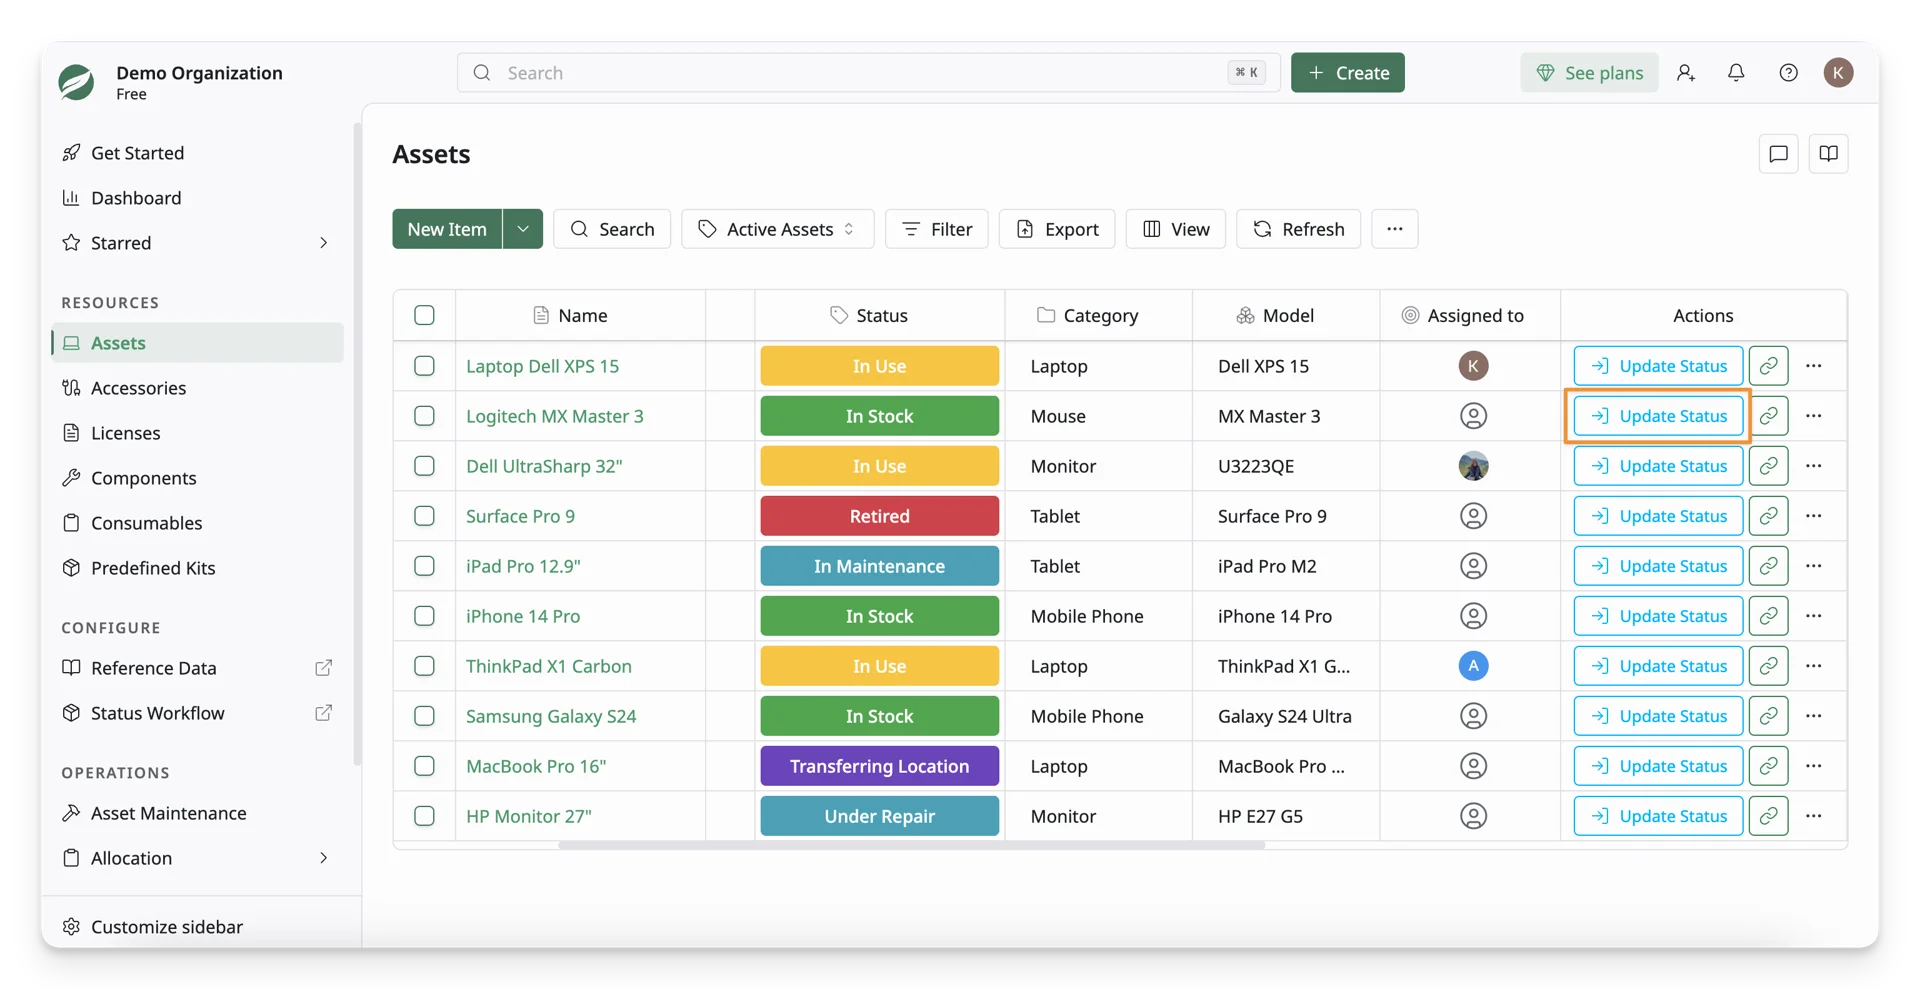
- Click the Status of the asset and select a status transition ( In Stock → In Use ).
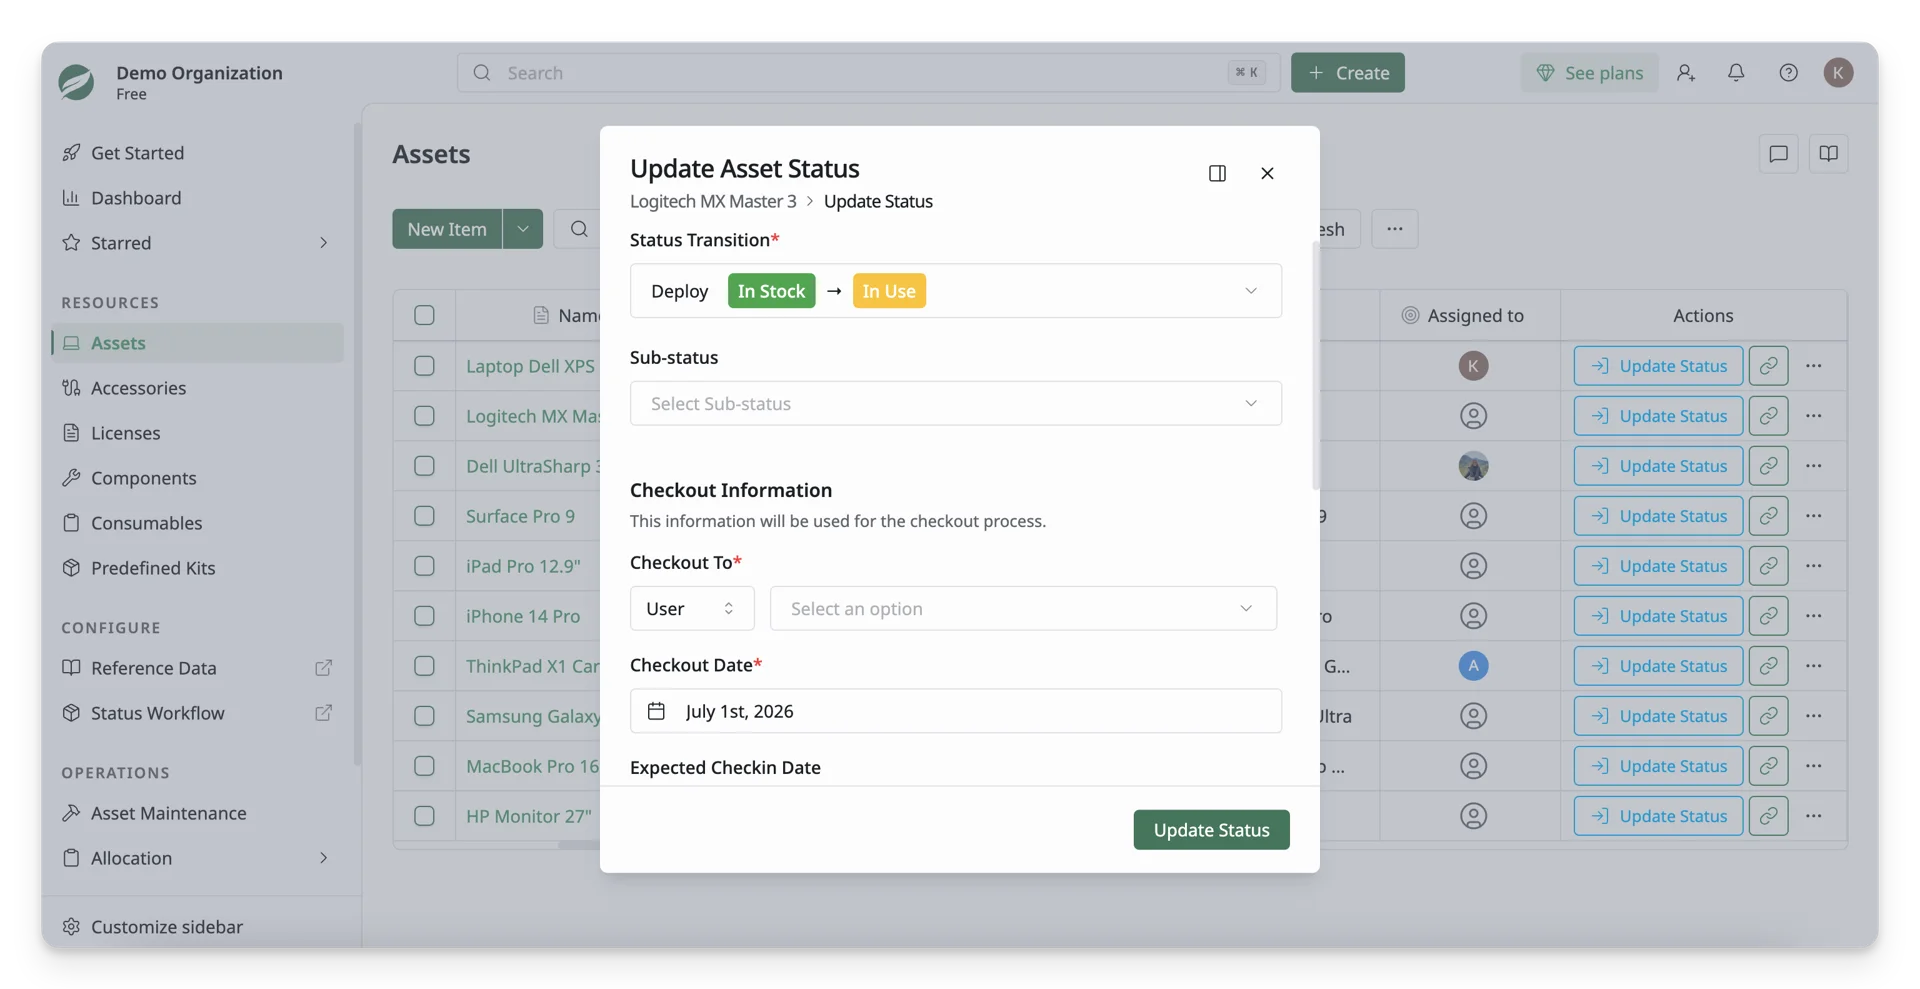
- Select your preferred Sub-status (e.g. Assigned ), enter checkout details, and modify asset details if needed.
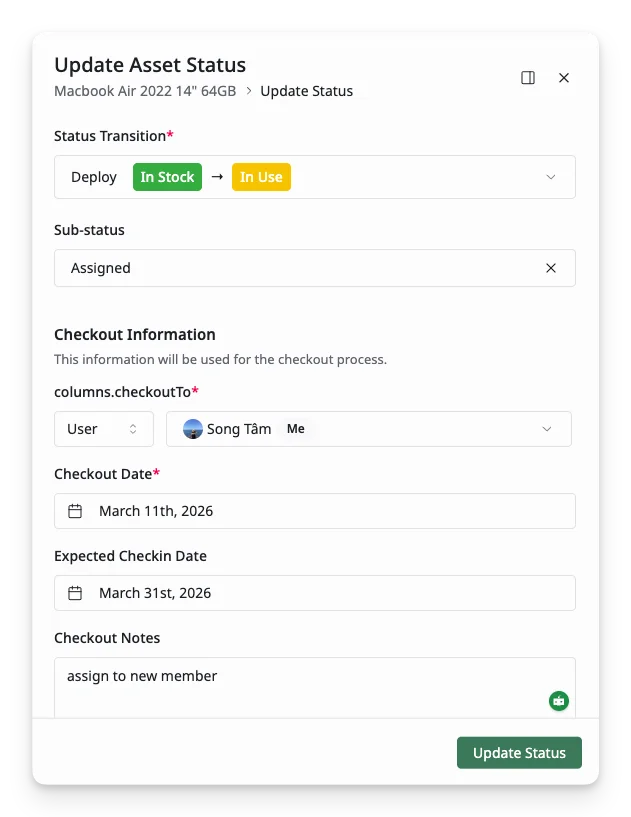
- Click Update Status to finish. The asset should now be assigned to your team member, and its status changes to In Use.
What’s Next?
- Create an onboarding kit: Group your onboarding resources into a kit and automatically assign them to new team members.
- Manage access and visibility: Control who can see and manage specific items using roles and permissions.