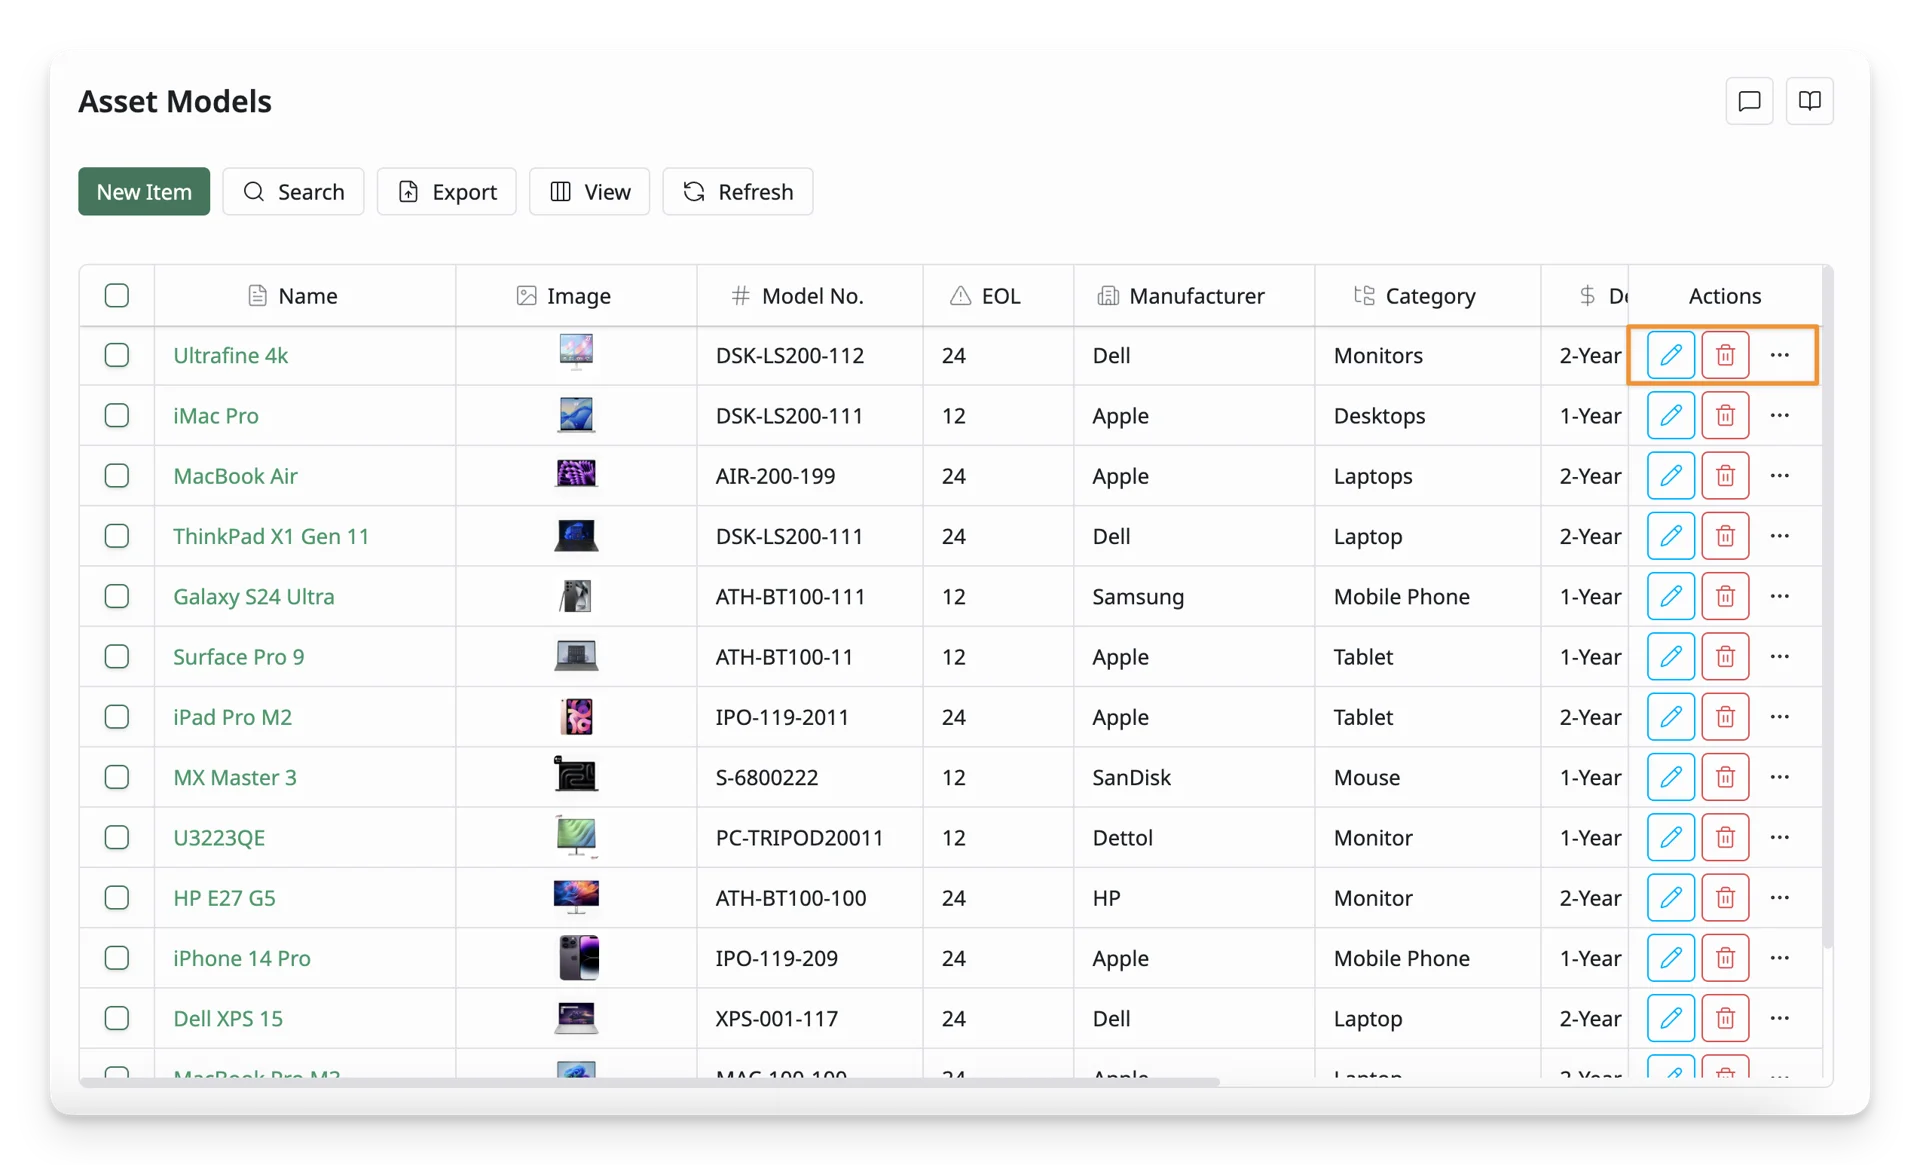
Asset Models
Learn how to manage asset models as one type of reference data
1. What Are Asset Models
Asset Models are one type of reference data used to define and standardize assets that share the same specifications, characteristics, or attributes. In AssetLoom, creating Asset Models helps ensure consistency and accuracy when adding new assets by allowing identical or similar items to be grouped under a predefined model.
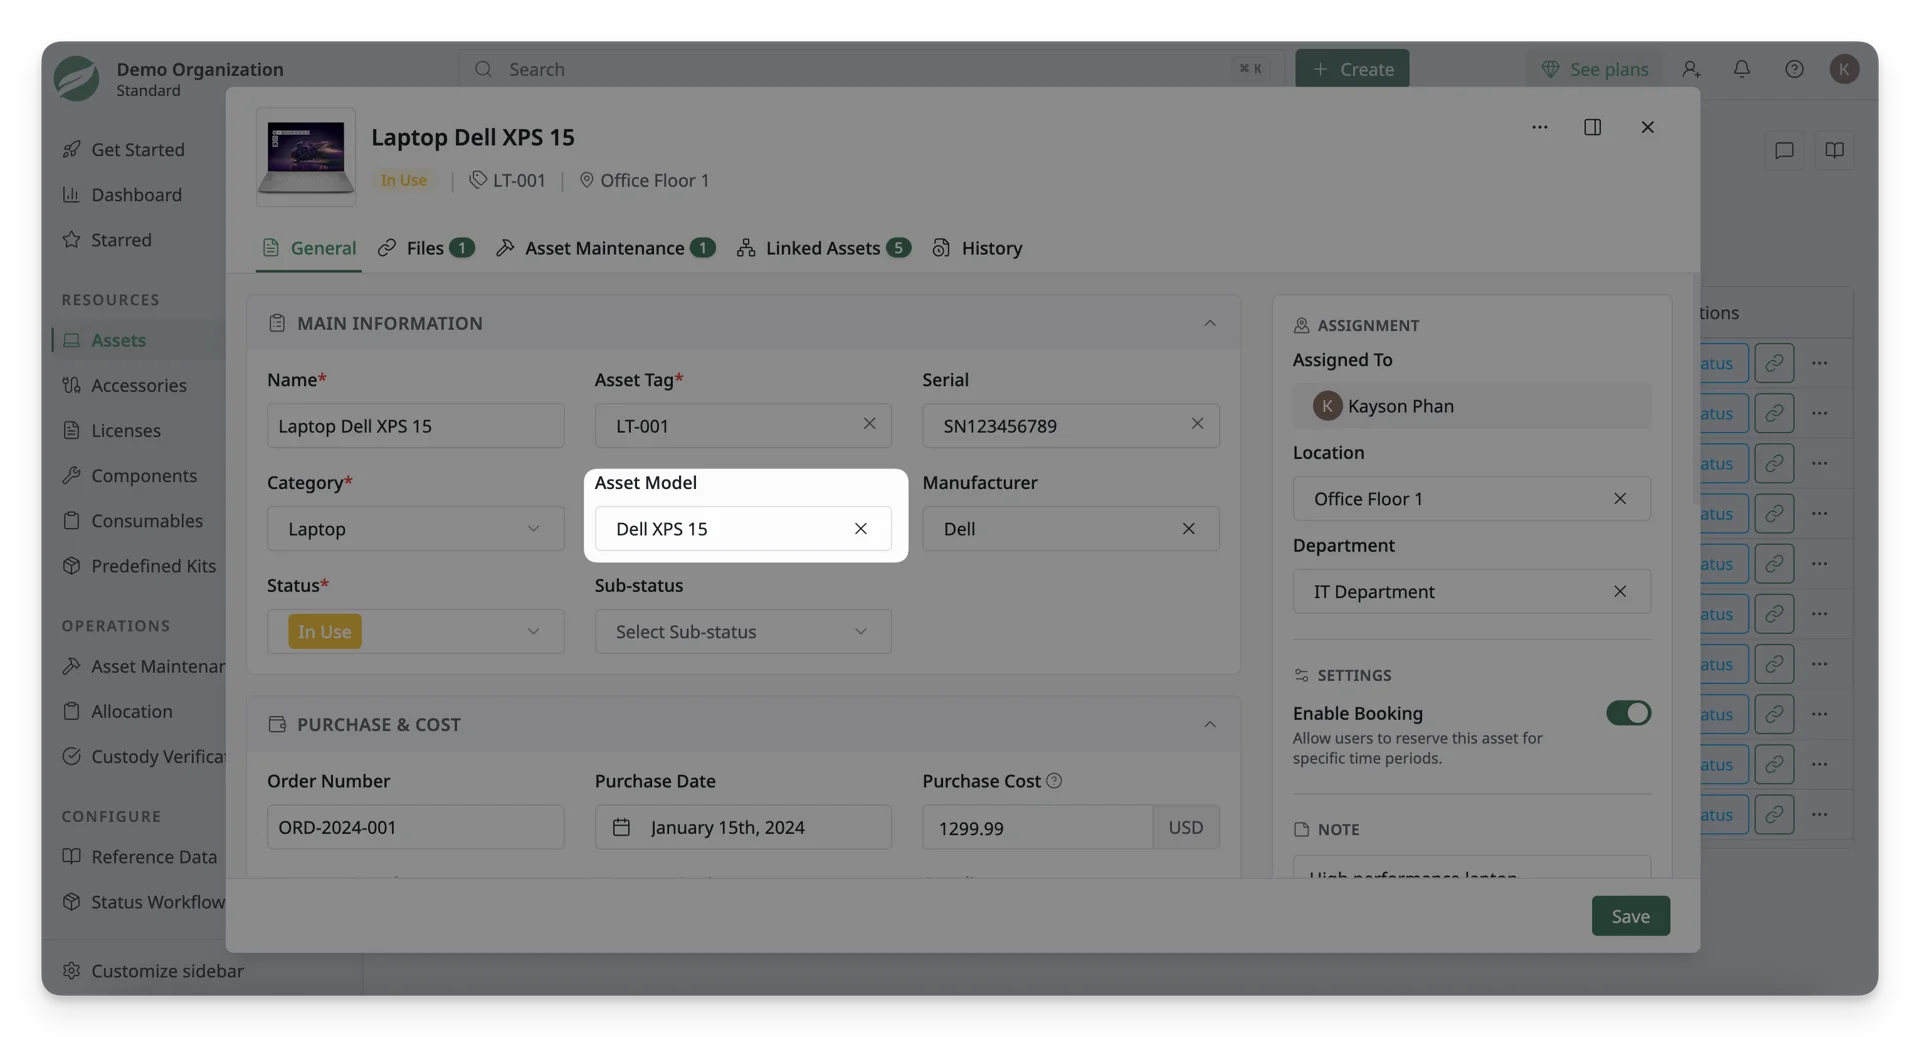
By setting up Asset Models, you can:
- Quickly apply predefined fields (category, manufacturer, image, and other custom fields) when creating a new asset.
- Set depreciation rules at the model level so asset depreciation can be calculated consistently.
- Check out assets under the same Asset Model when preparing a predefined kit.
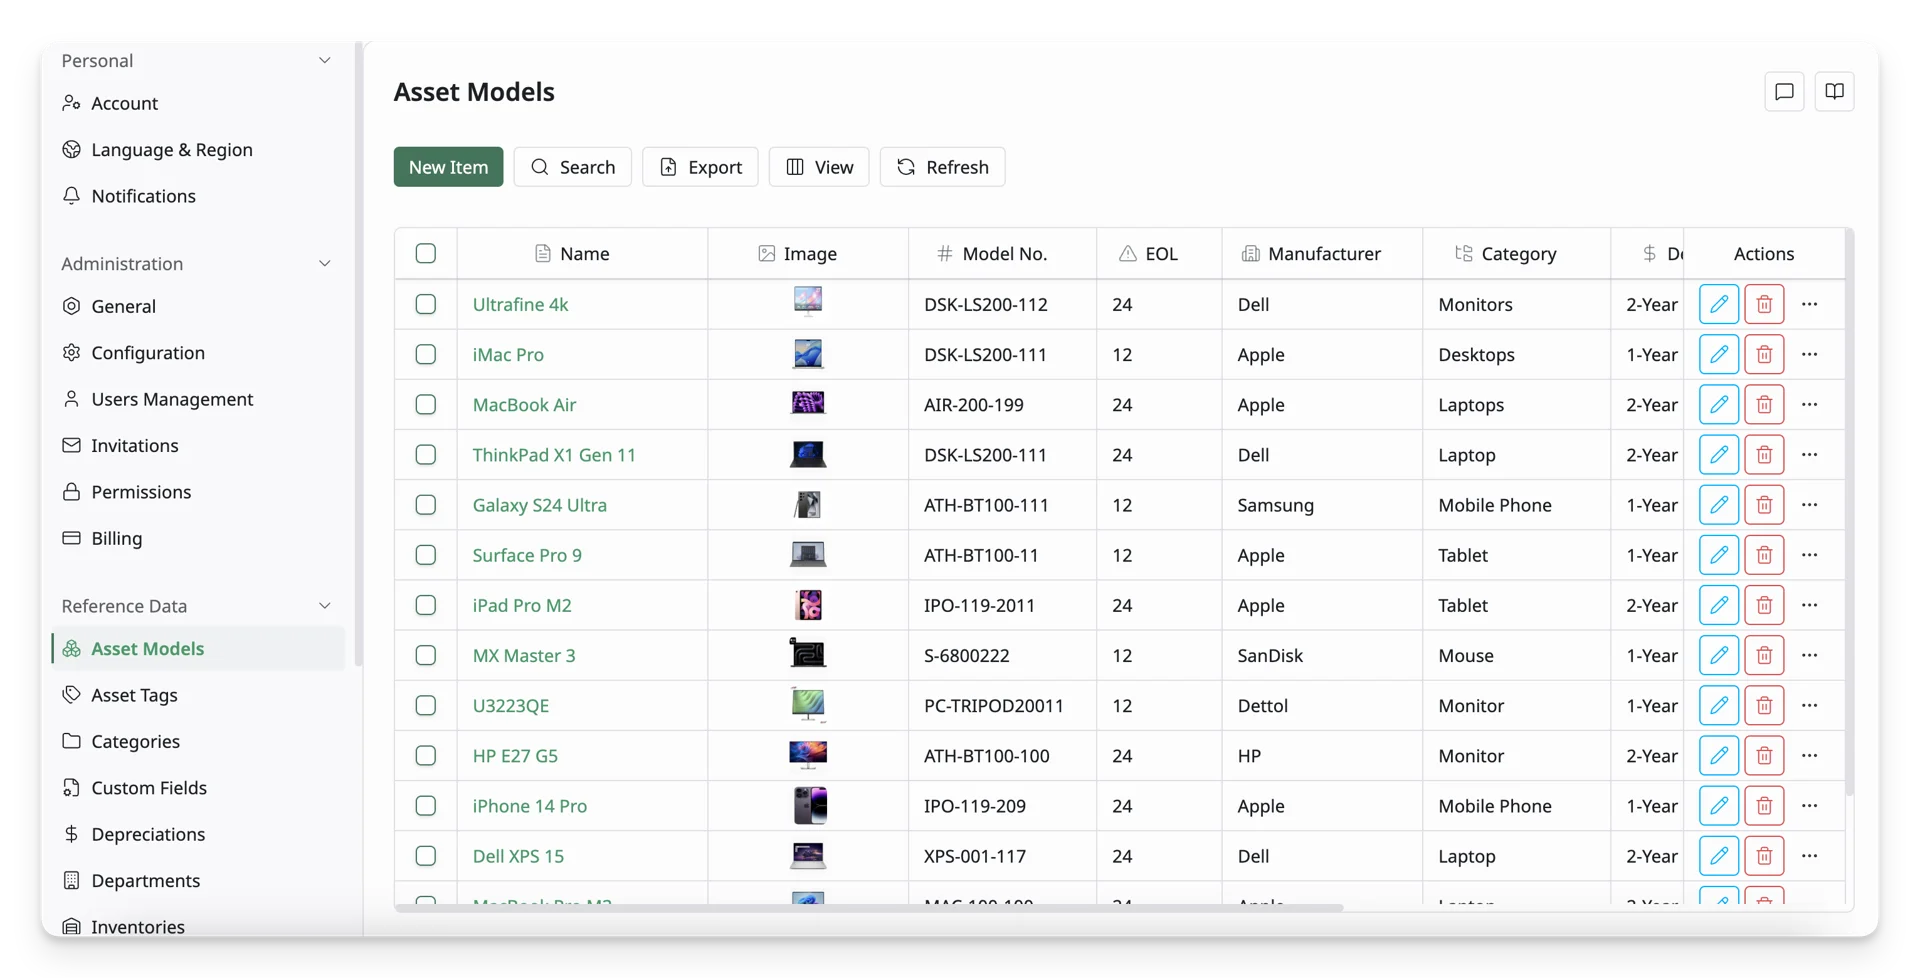
The Asset Model is located under the Reference Data section in the Personal Settings page. This page displays all asset models in the system and serves as the central place for managing them.
2. How To Set Up Asset Models
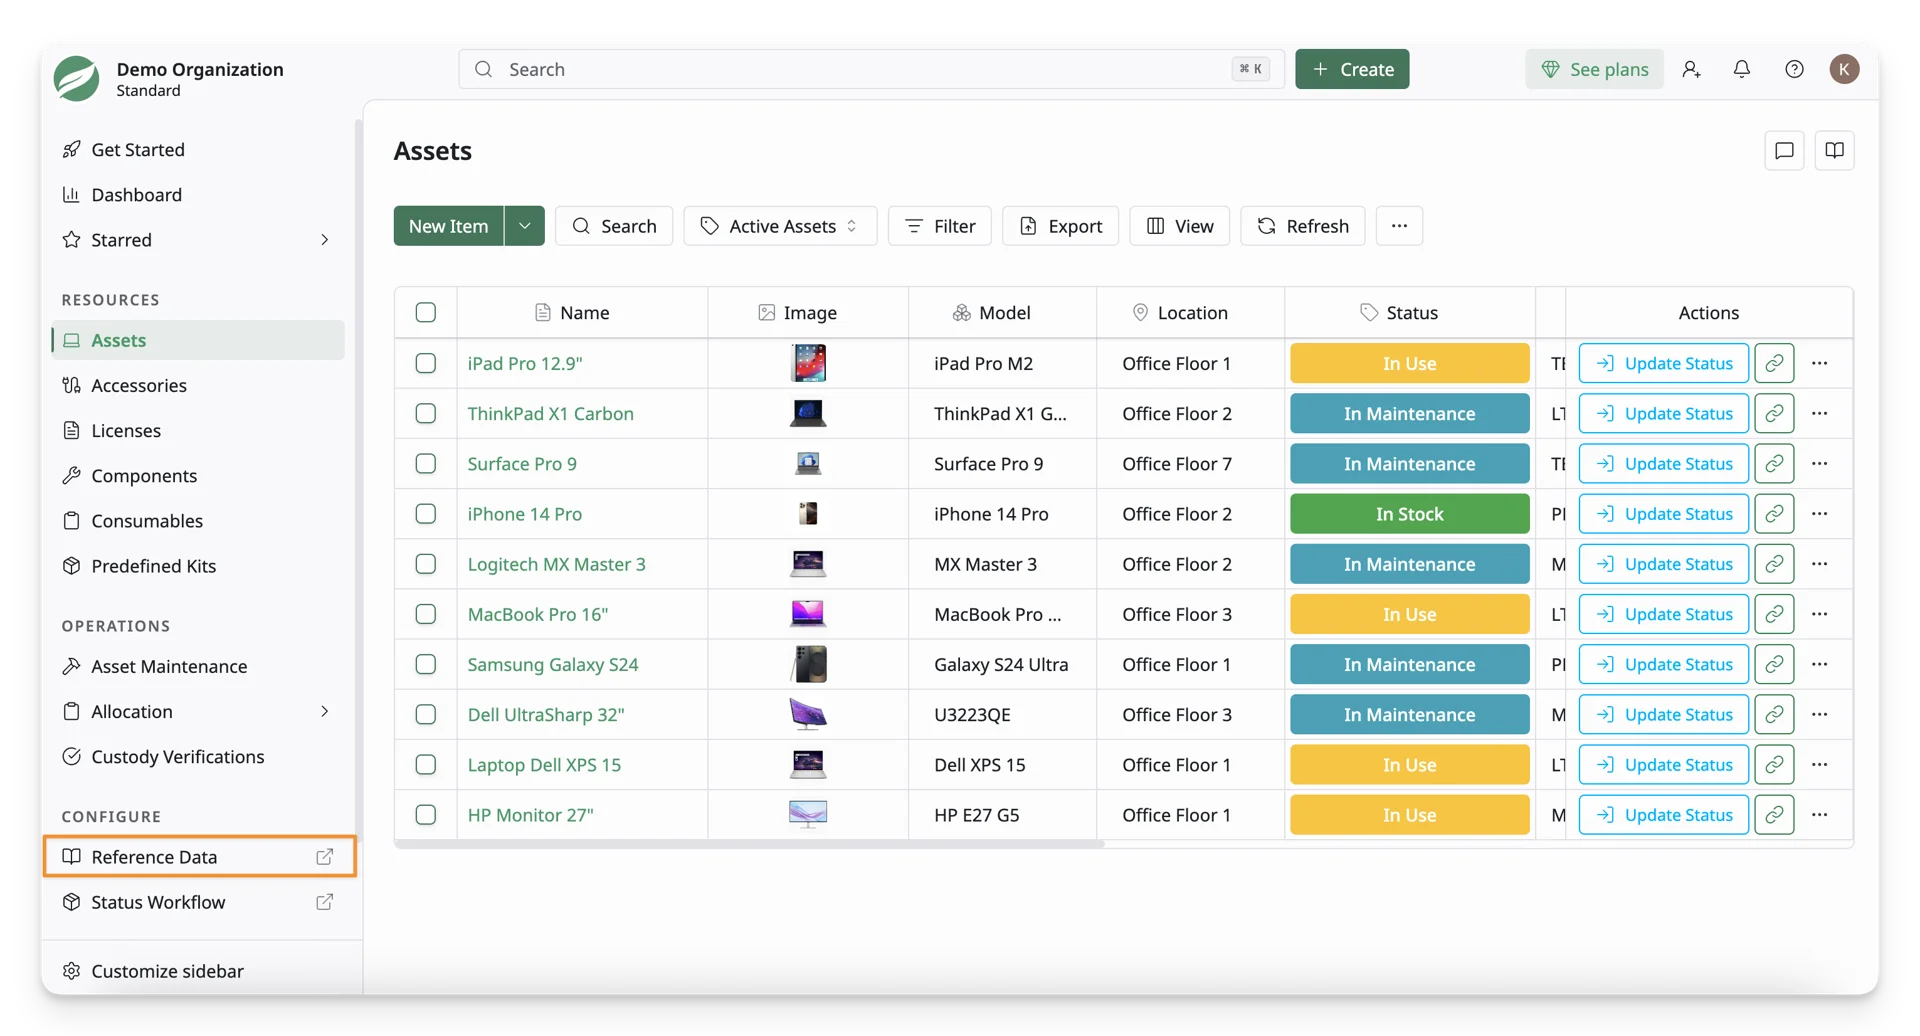
Step 1: Navigate To The Asset Models Screen
Select the Reference Data in the Configure section on the left-hand side menu sidebar.
On the left menu sidebar, you can view the Asset Models under the Reference Data.
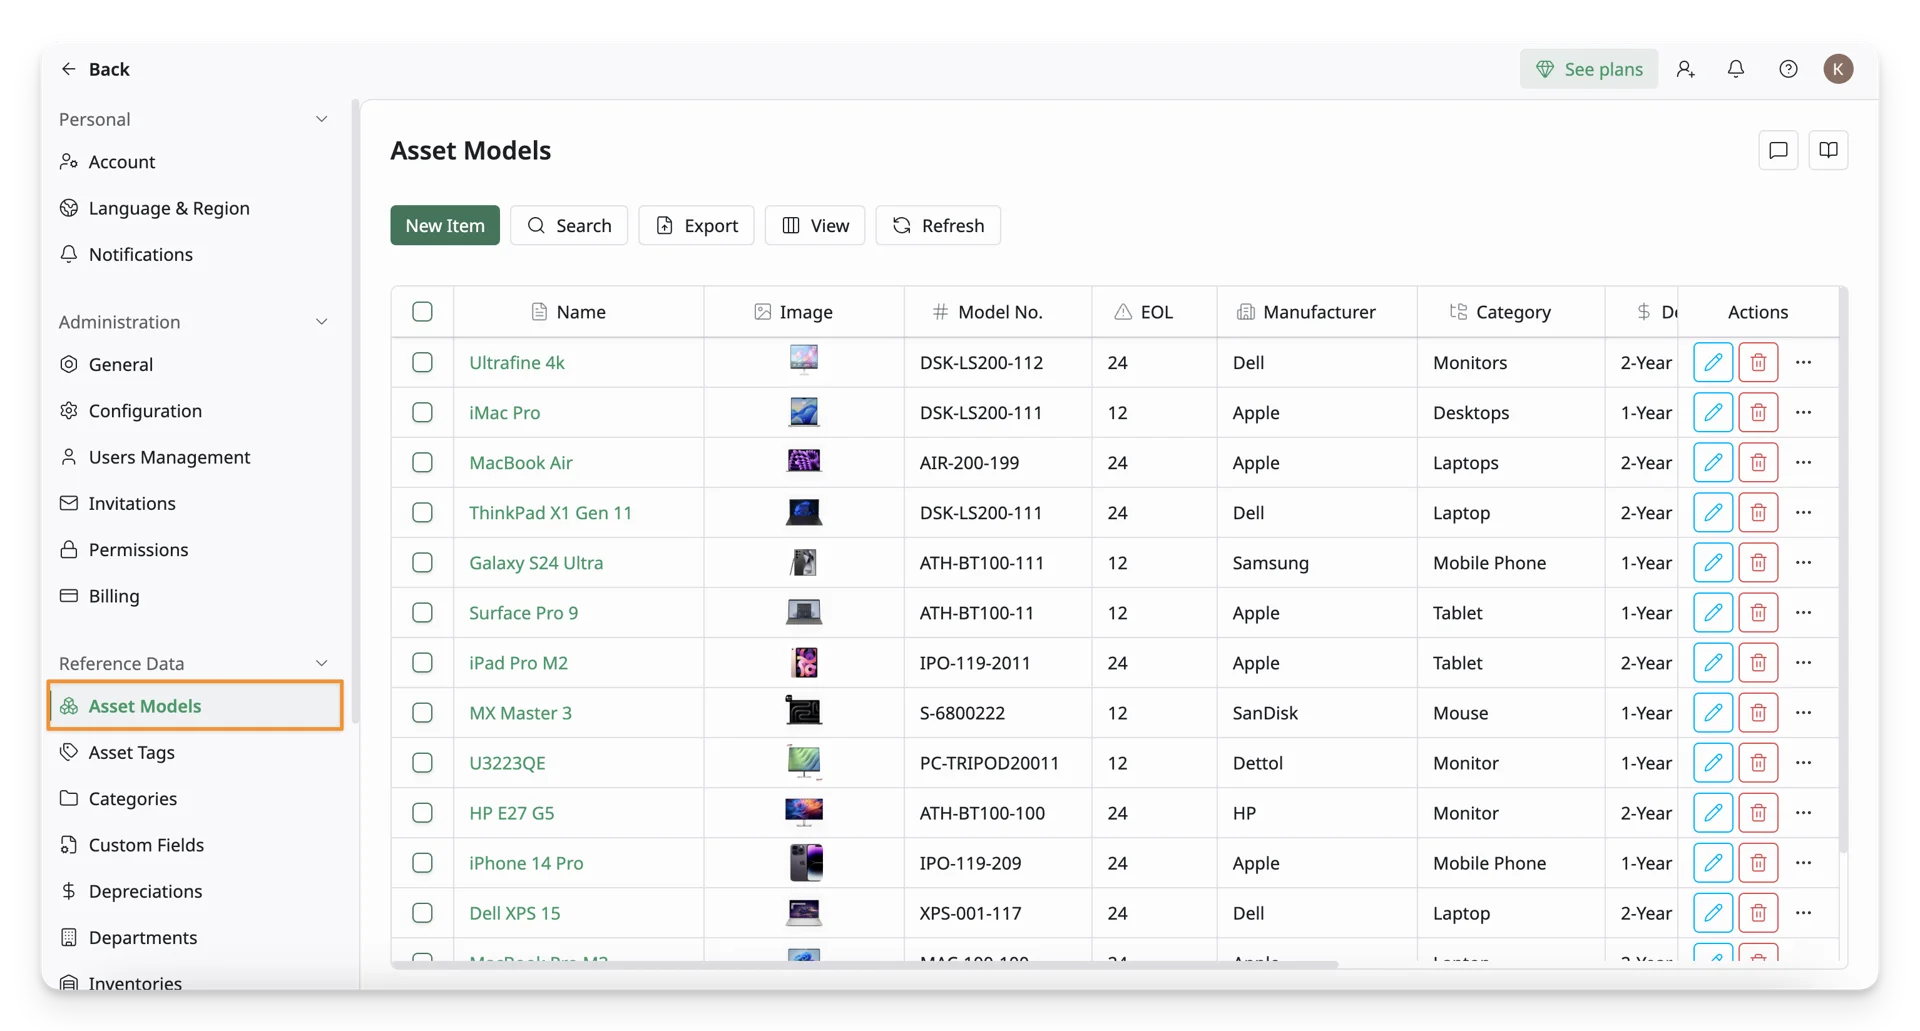
Step 2: Fill In The Asset Model Form
Click the “New Item” button to open the Asset Model Form
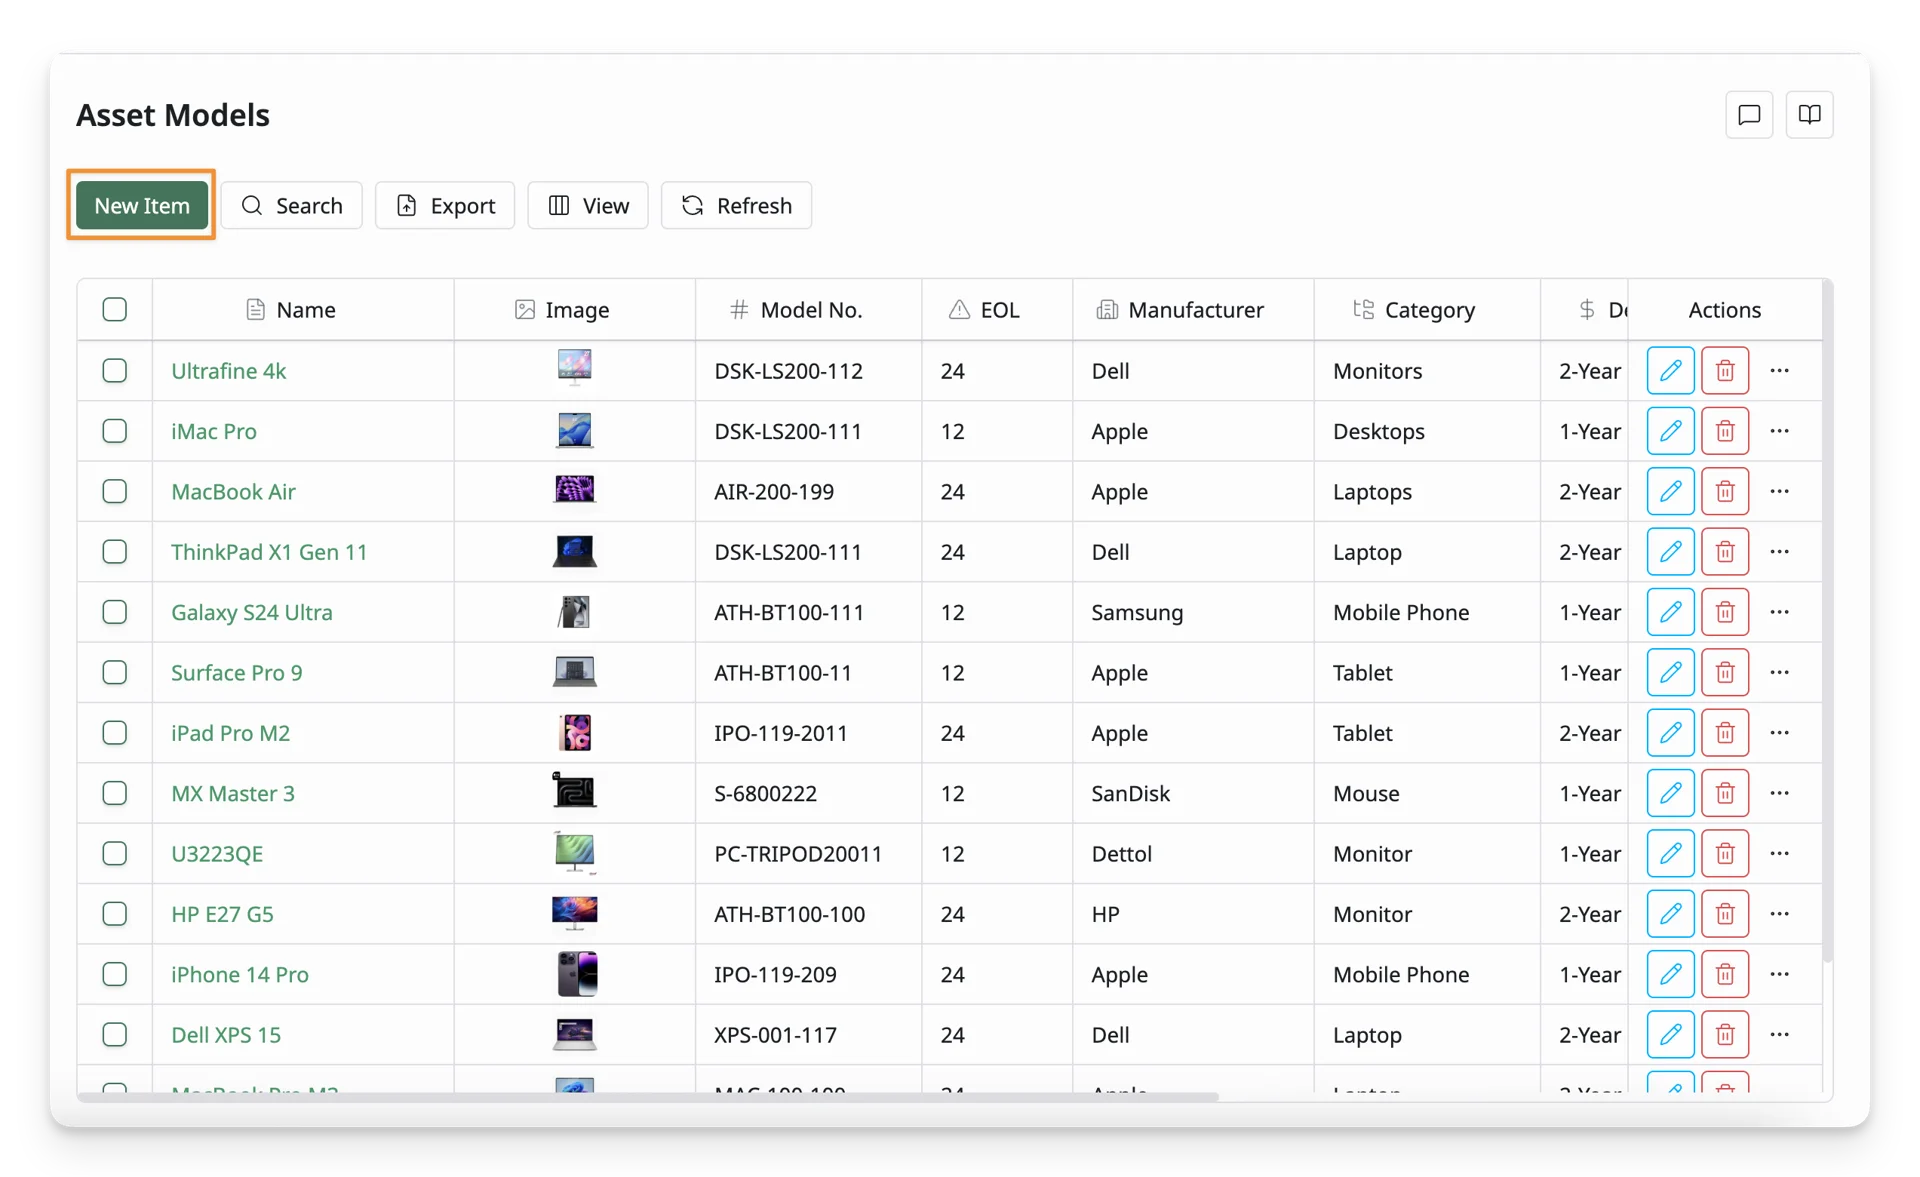
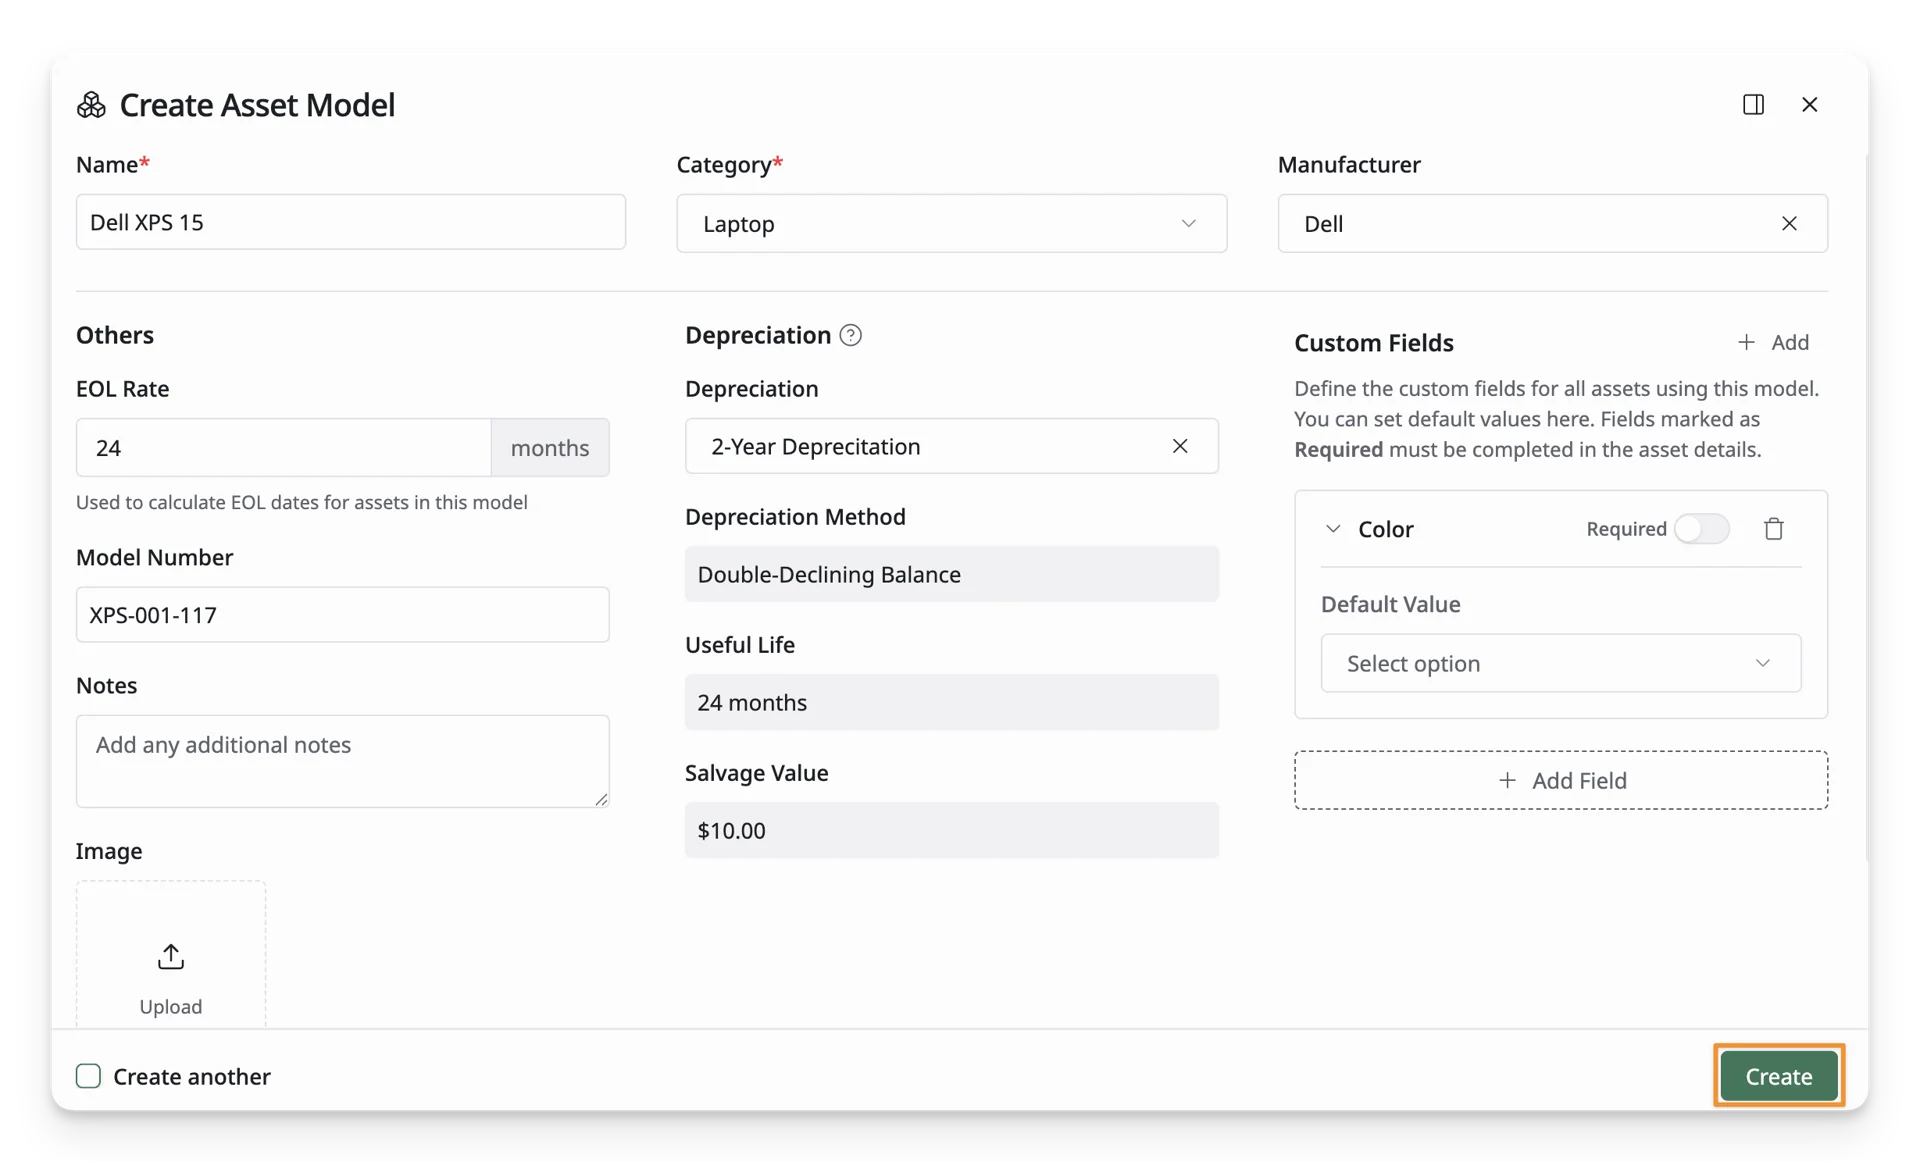
Now you can fill in the Asset Model Form. Below are some key fields:
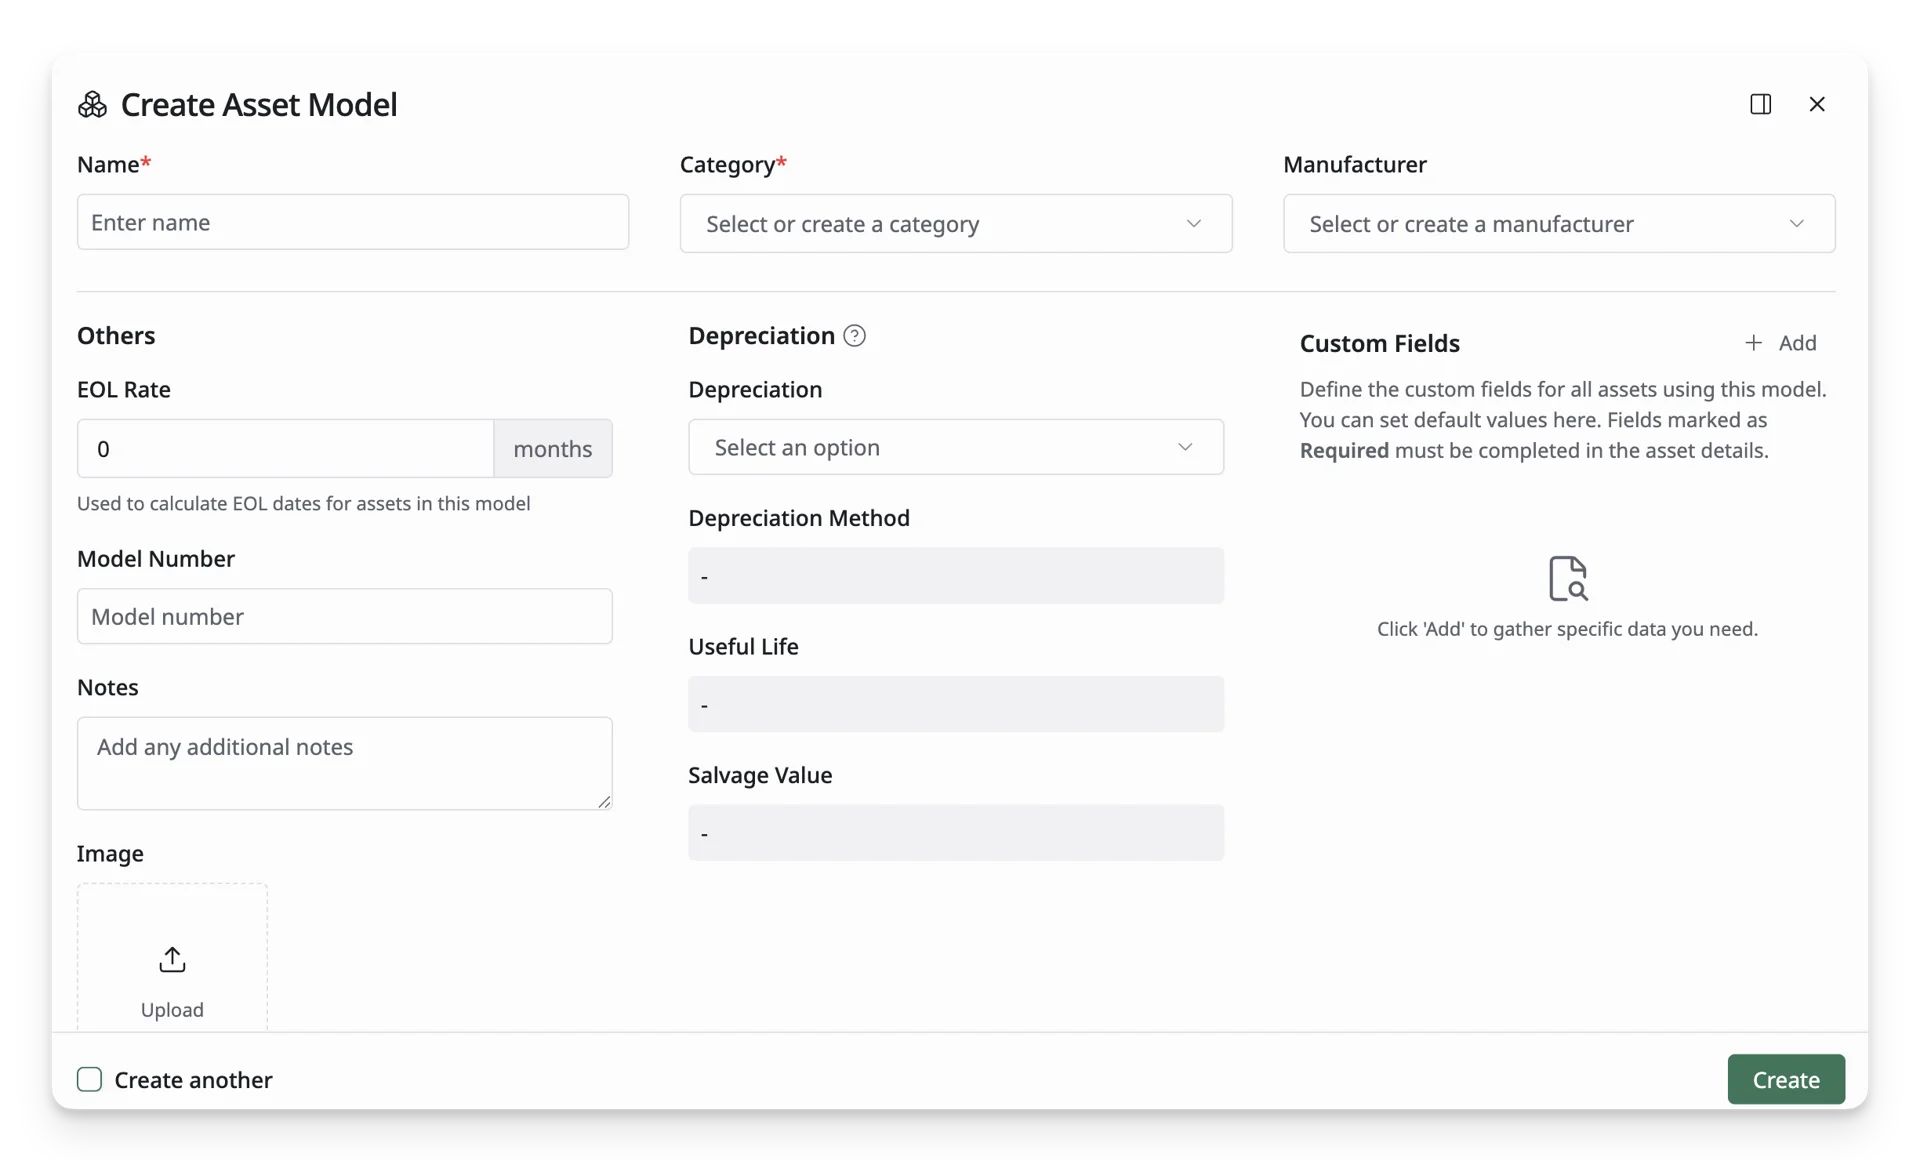
Asset Model Information
This section summarizes key asset model information.
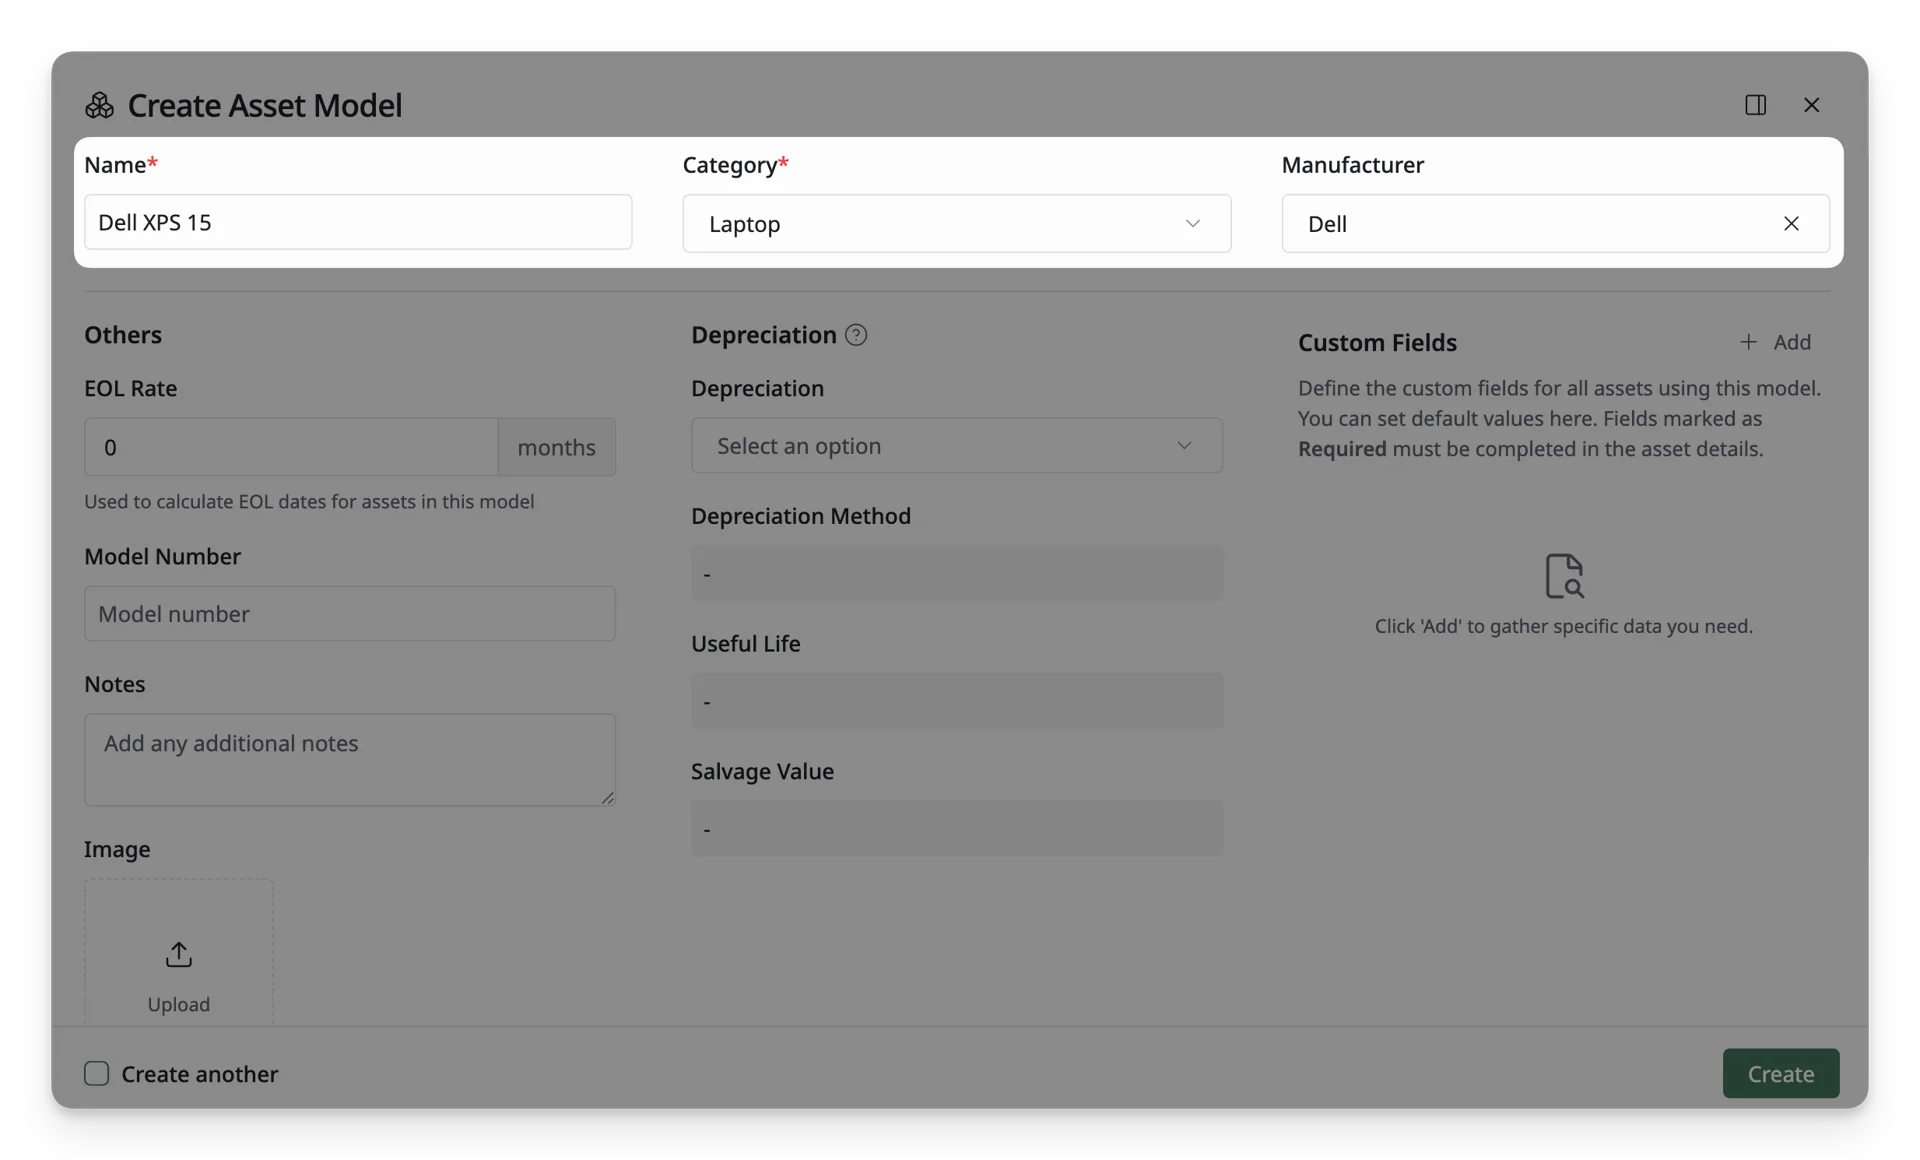
- Model Name: The name used to identify the Asset Model.
- Category: The asset category this model belongs to.
- Manufacturer: The company or brand that produces this model.
Once this Asset Model is created, selecting it for a new asset will automatically fill in the Category and Manufacturer fields.
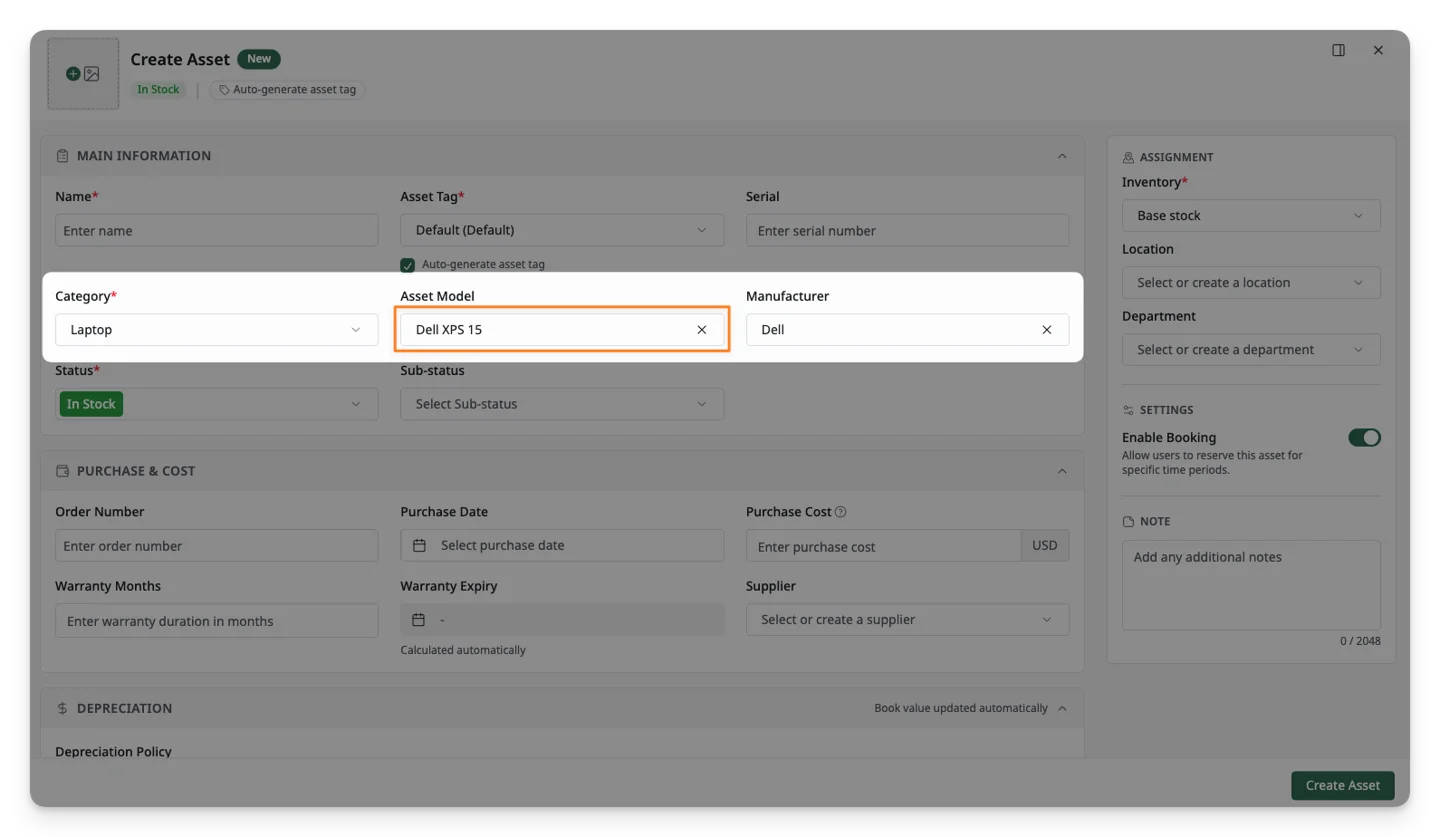
If you update the Asset Model of an existing asset, the Category and Manufacturer fields will not be updated automatically. This helps prevent existing asset data from being changed accidentally.
Other Information
This section includes additional details about the asset model.
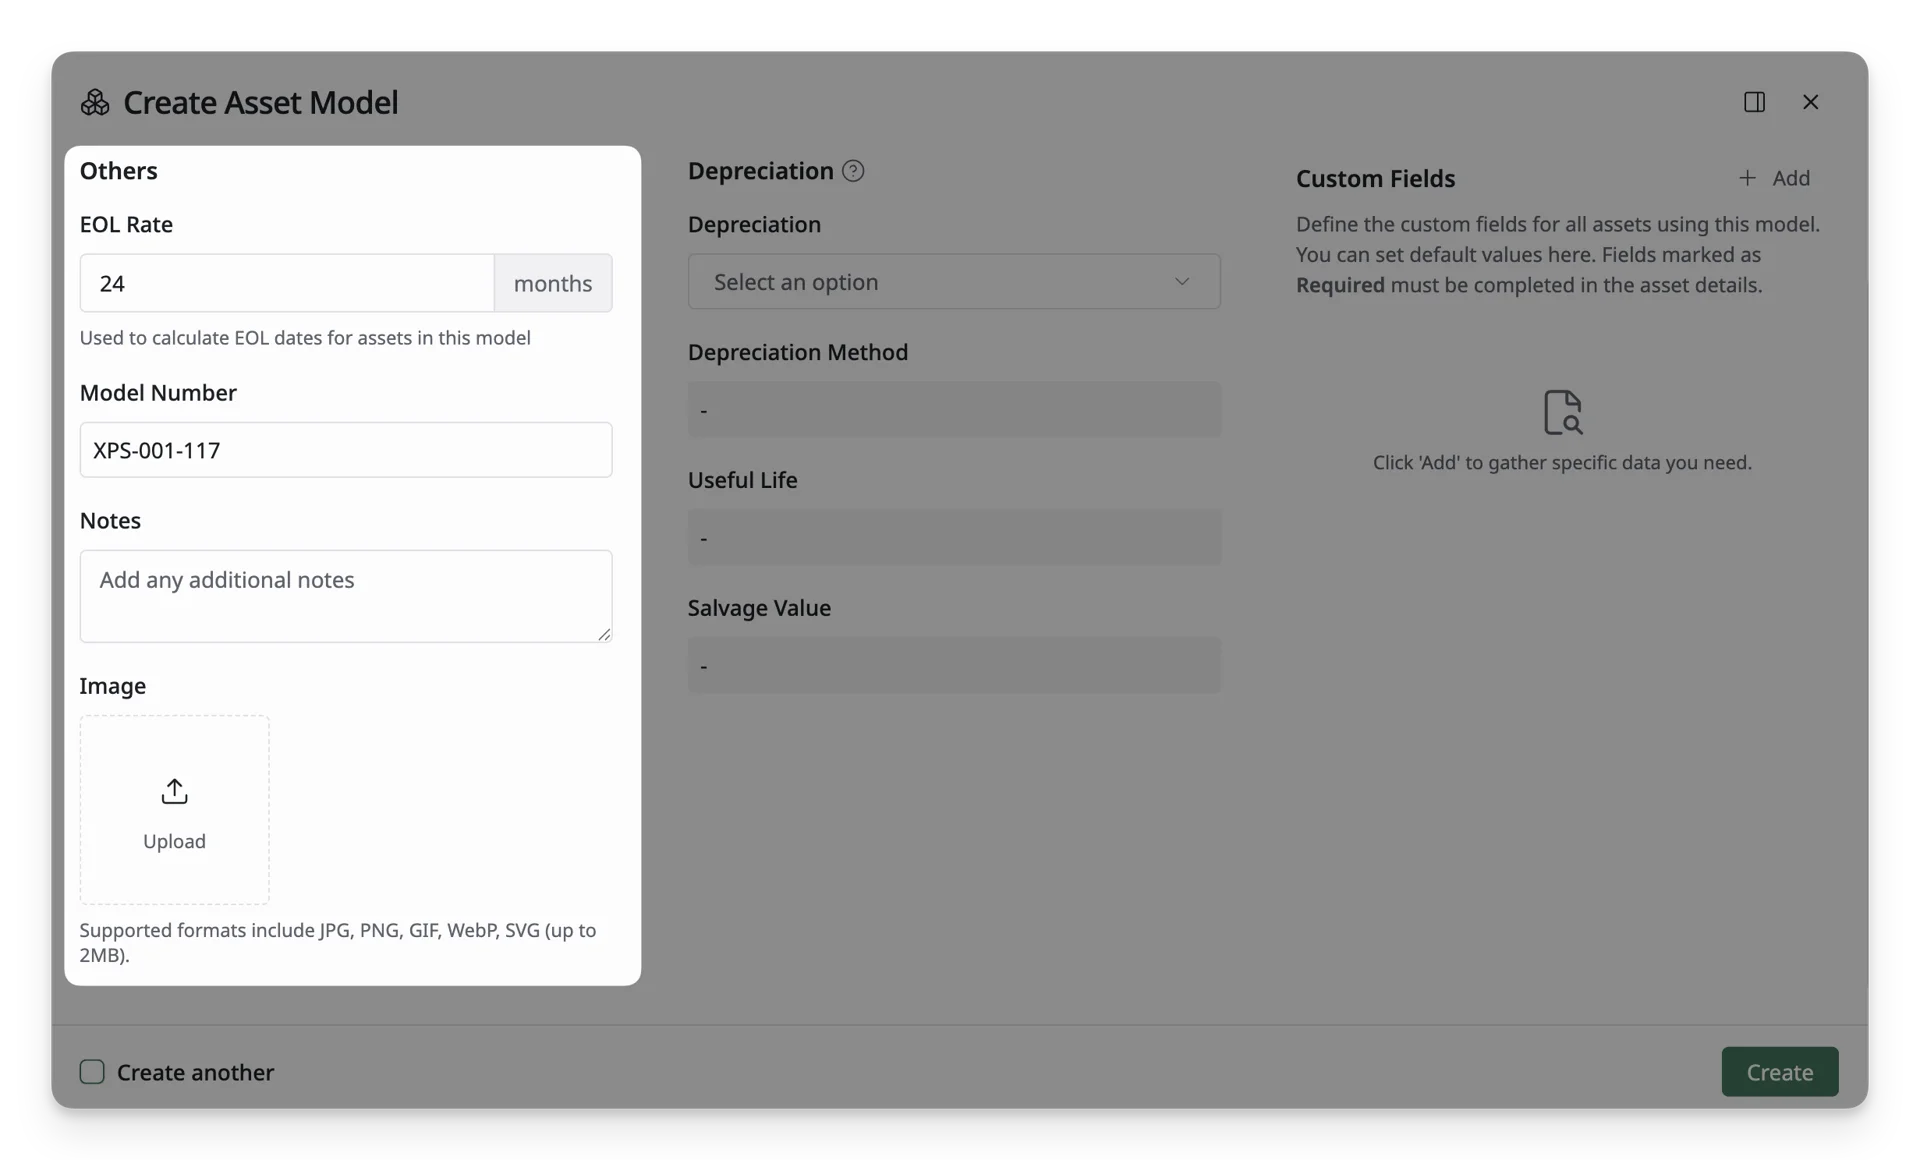
- EOL (End-of-Life) Rate: Defines the expected lifecycle duration for assets under this Asset Model. Asset EOL dates are automatically calculated based on this rate, ensuring consistent lifecycle tracking without manually setting an EOL date for each asset.
- Model Number: The unique model identifier or product number provided by the manufacturer.
- Notes: Additional information or internal remarks related to this Asset Model.
- Image: A visual reference for the Asset Model that helps users quickly identify related assets. This image syncs to the new asset when you select the model for that asset.
Depreciation Information
This section is essential for tracking the asset model’s value over time.
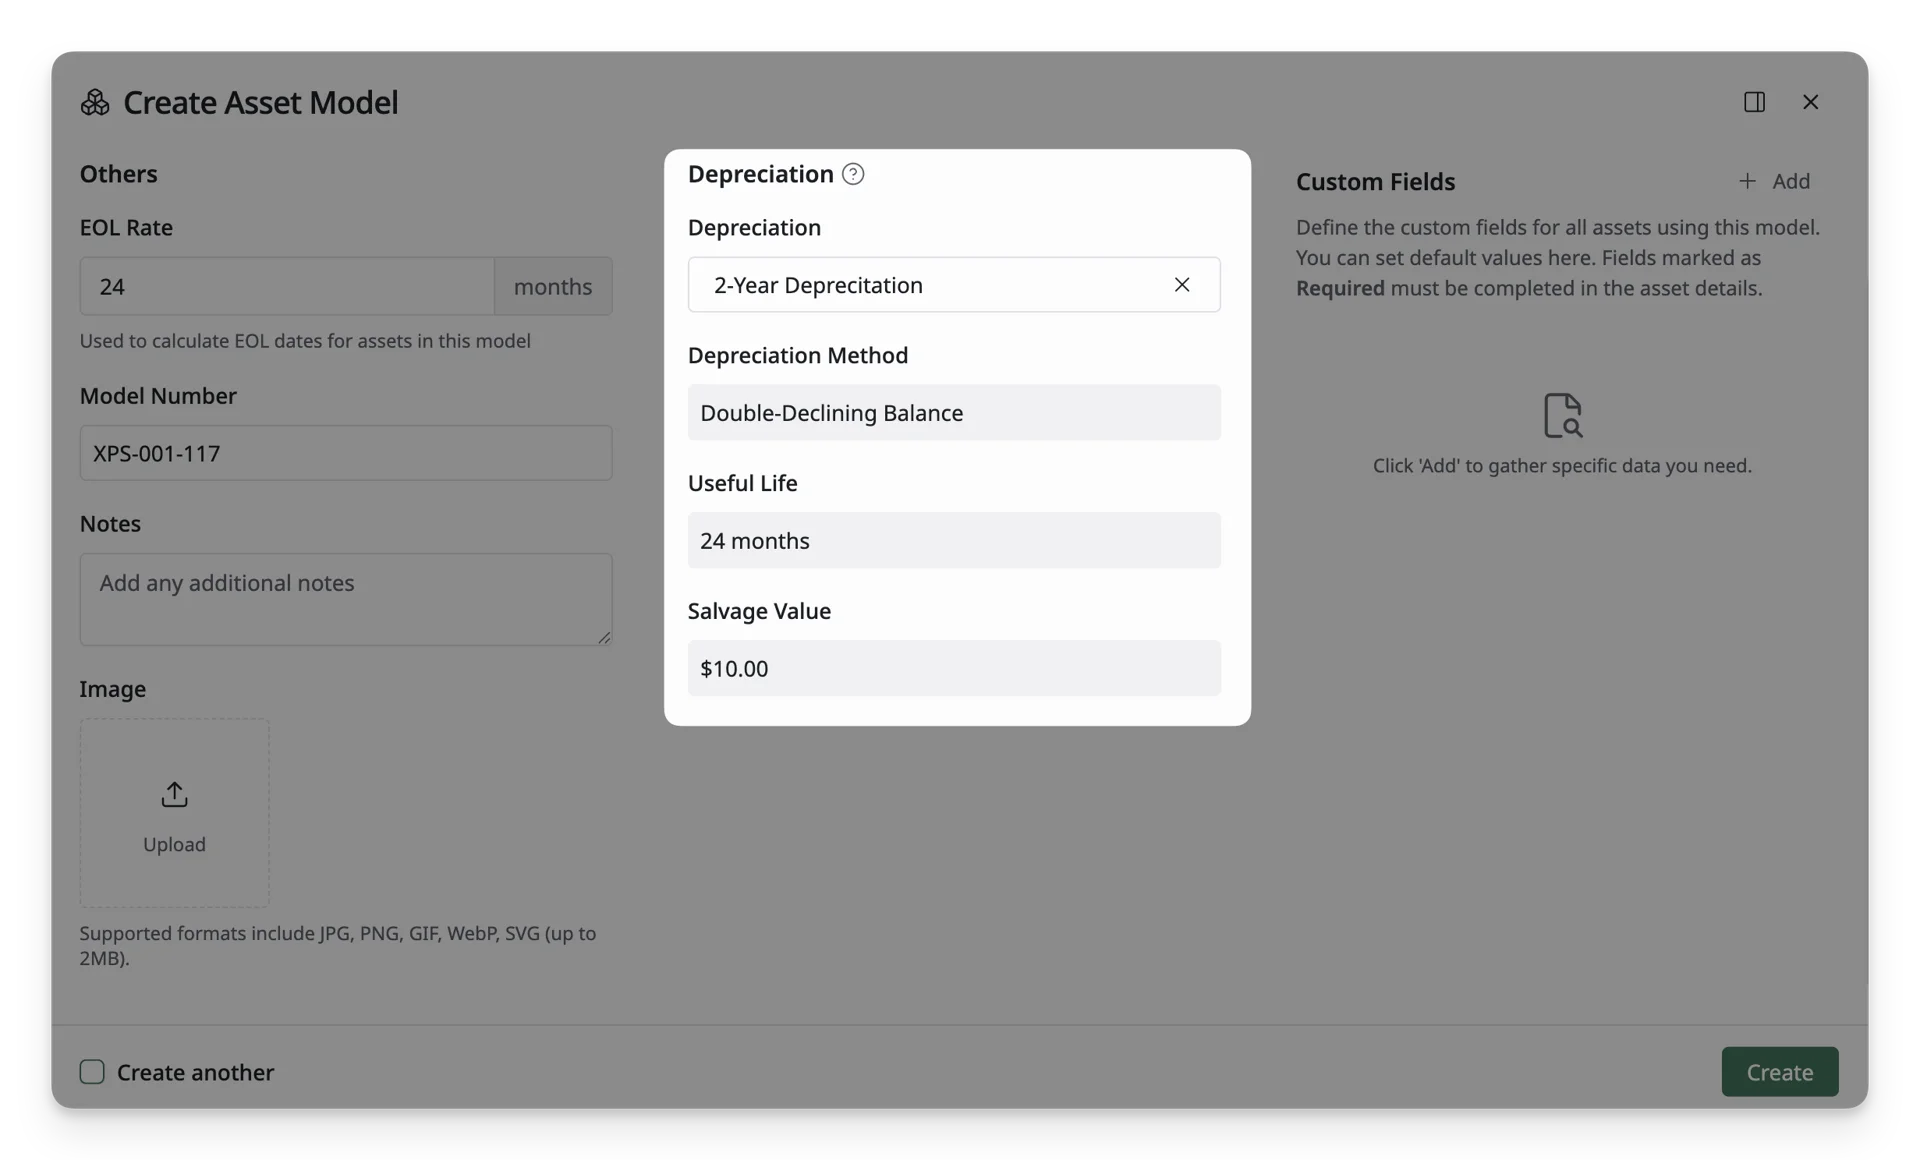
You can only edit the Depreciation field in this section. To edit other fields in the Depreciation section, you need to navigate to the Reference data → Depreciation.
You can only edit the Depreciation field in this section. To edit other fields in the Depreciation section, you need to navigate to the Reference data → Depreciation.
- Depreciation: Select the depreciation rule applied to the asset model. This determines how the asset value decreases over time.
- You can select an existing depreciation rule created in the Reference data → Depreciation.
- Or you can create a new rule here. Note that the new depreciation rule created in this form only has a 12-month duration.
- Depreciation Method: Specifies the depreciation calculation method used to determine the asset’s value over time. Common methods include:
- Straight-Line, where the value decreases evenly over the useful life
- Double-Declining Balance, where the value decreases more rapidly in the early periods.
- Useful Life: Shows the depreciation period for the selected rule.
- Salvage Value: Displays the minimum value the asset model should retain after depreciation. The asset value will not depreciate below this amount.
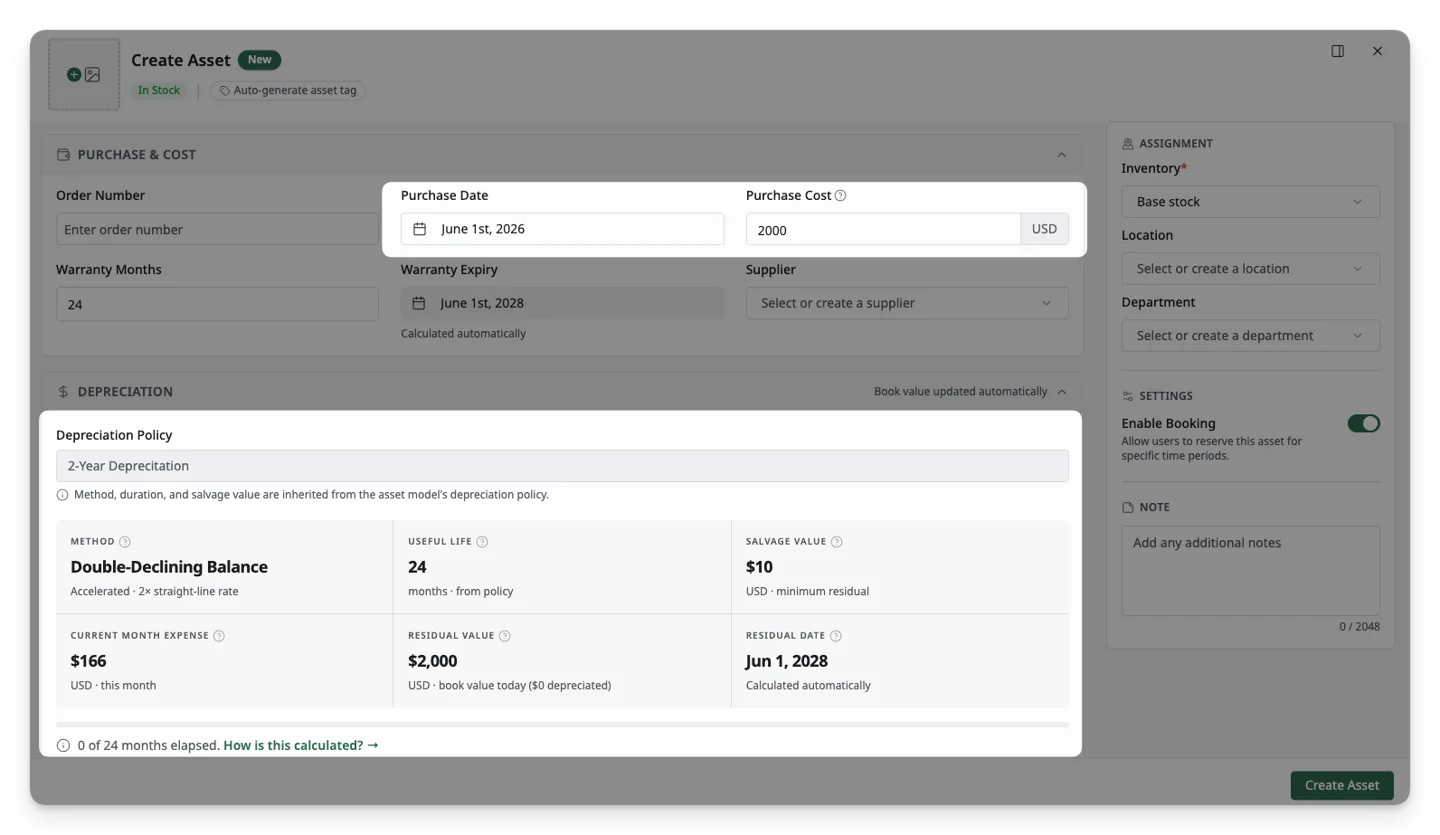
Once Depreciation is set for this Asset Model, selecting the model for a new asset and entering the purchase details will automatically calculate the asset’s depreciation information.
Custom Field Information
This section includes additional details about the asset models.
Click Add to include extra fields for tracking unique data about the asset model (e.g., condition, version, or any other specific details).
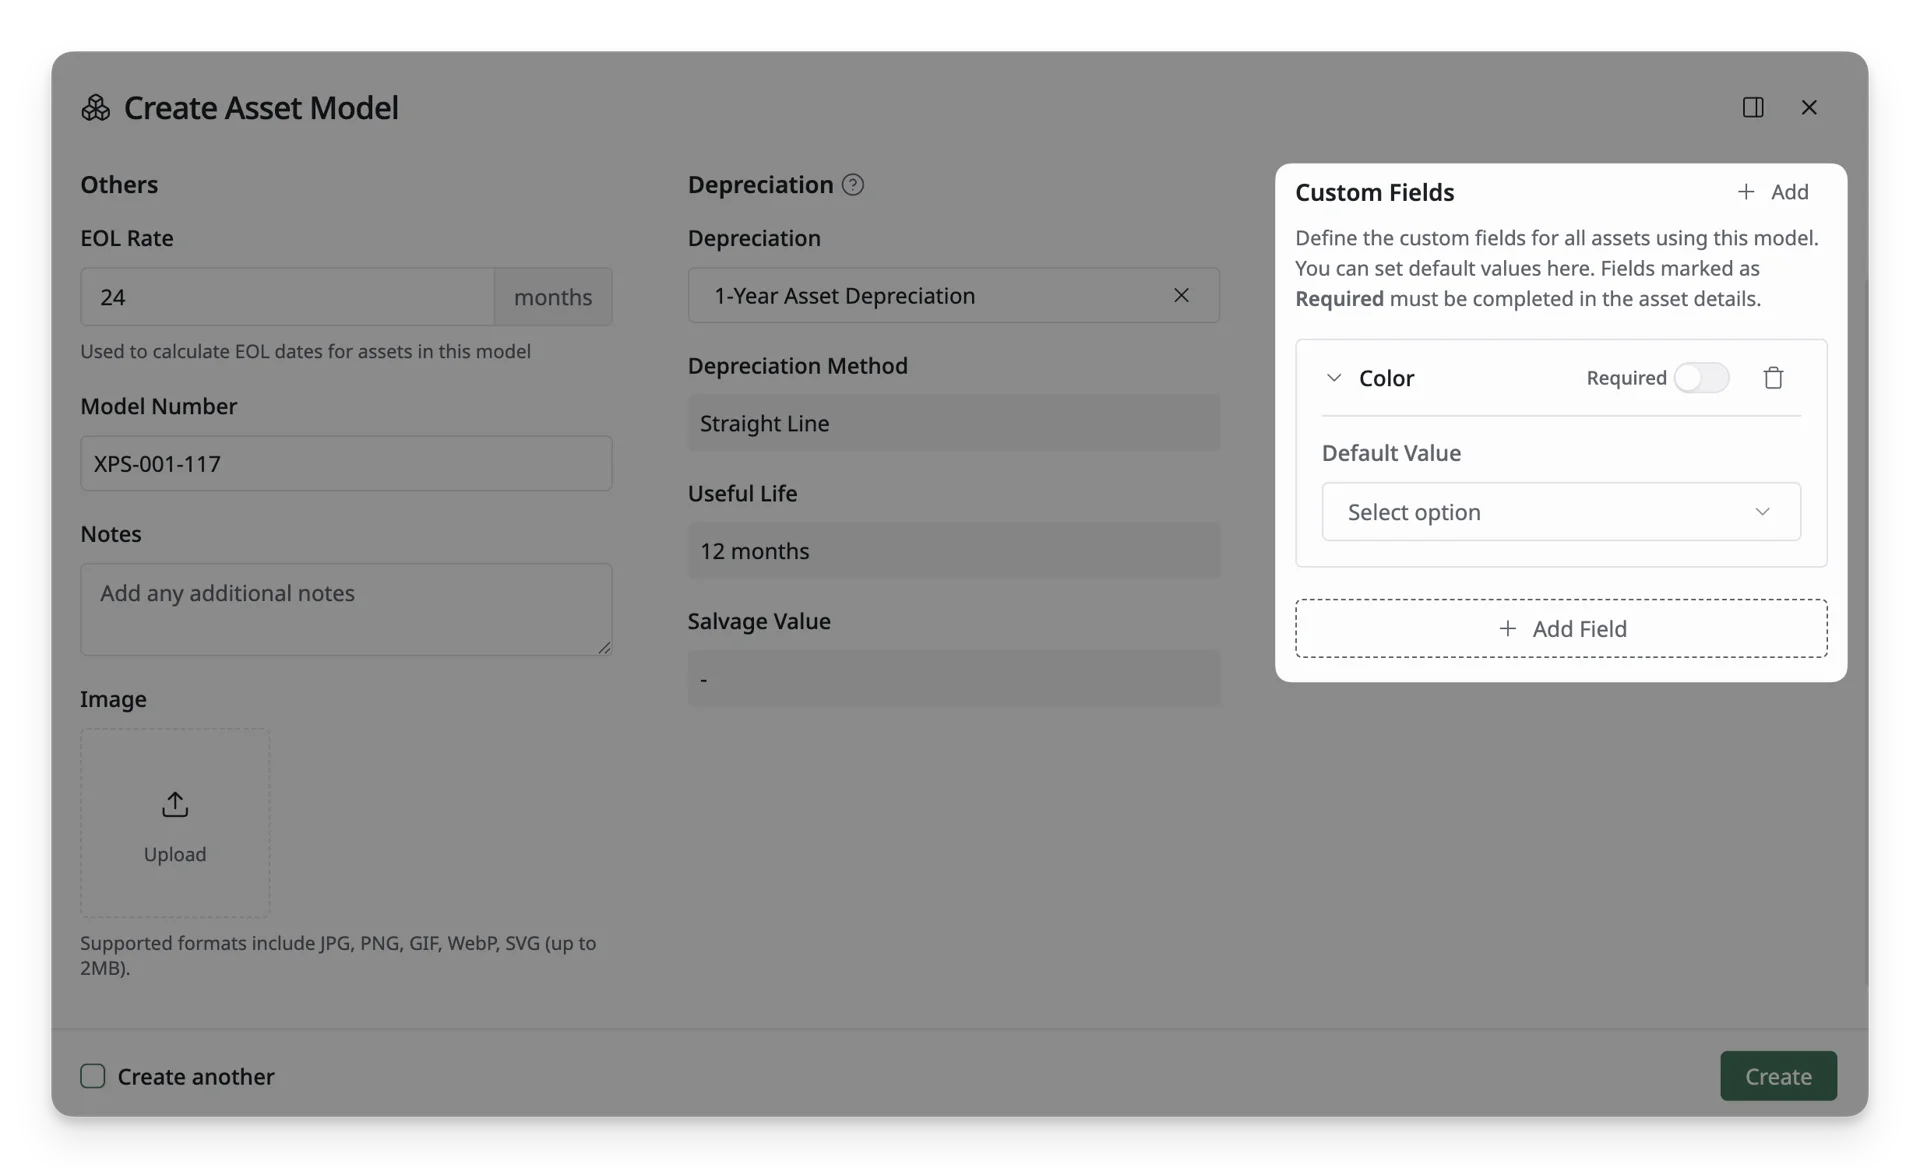
Custom fields must be created in advance in Reference Data -> Custom Fields. If no custom fields have been set up, you won’t see any options to add them in this form.
Step 3: Save The Asset Models
Once all required fields are filled, click the Create button at the bottom of the form to save the asset model to the system.
Step 4: Review Your Asset Model
After creating the model, you will be redirected to the Asset Model List, where you can view and manage all your models. If any information needs to be updated, simply click on the asset model and modify the details as needed.
3. Actions With Asset Model List
After creating the asset models, you can perform some actions with the list:
- Edit: Update the Asset Model’s details
- Delete: Remove an Asset Model that is no longer needed. This action should only be used when the model is not required for future asset creation.
- Duplicate: Create a copy of an existing Asset Model to quickly set up a similar model with minor changes.