Request an Asset via the Asset Booking System
Learn how to book an asset with the AssetLoom asset booking system
The Asset Booking System in AssetLoom allows you to request an asset for a specific period of time. This is useful when an employee needs to reserve equipment, devices, or other company assets before using them. Once a booking request is submitted, admins can review and manage the request in the Reservations section.
To access the Asset Booking System, go to Allocation → Asset Booking. From this Asset Booking Sytem, you can select the asset they want to book, choose the booking start and return date, add notes, and submit the request.
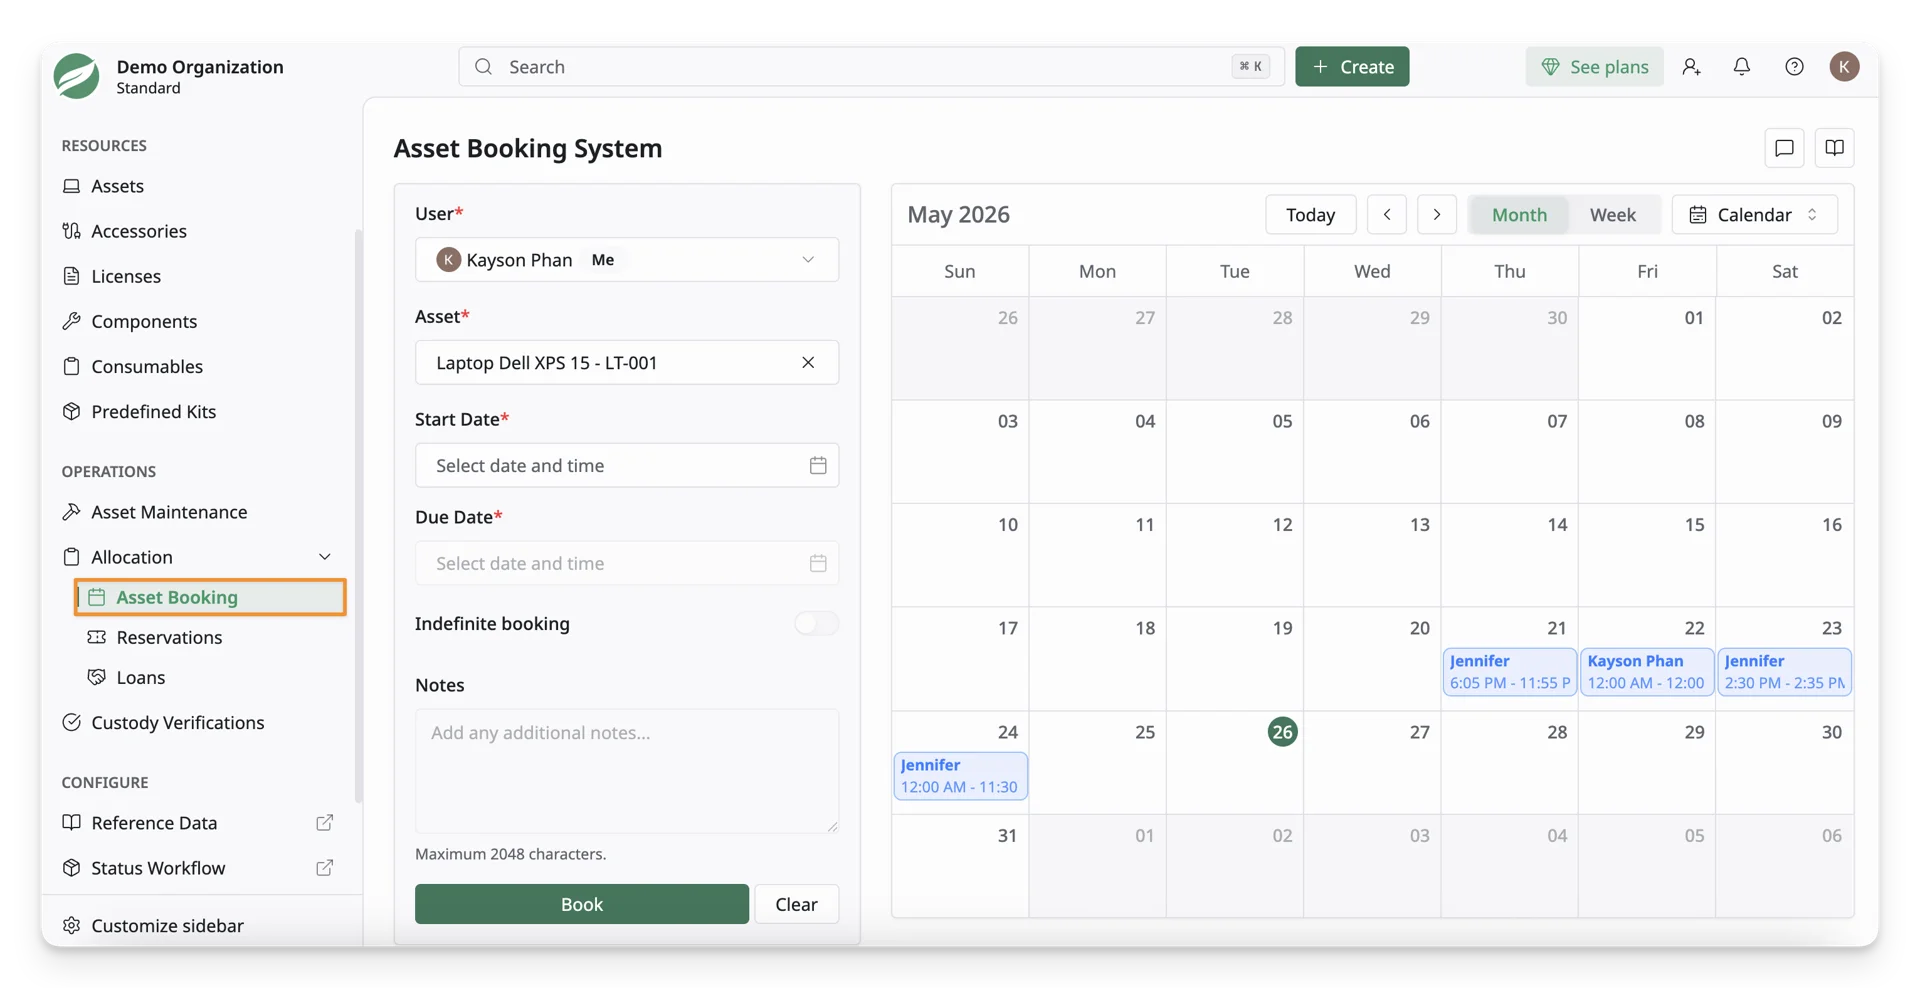
All users with the View Role can access the Asset Booking System and submit asset booking requests for themselves.
For Site Admins or authorized users, they can also create booking requests on behalf of other users.
The Asset Booking System is divided into two main areas:
- Booking Form on the left
- Calendar / Booking View on the right
The Booking Form
The booking form is where you enter the details of the asset reservation.
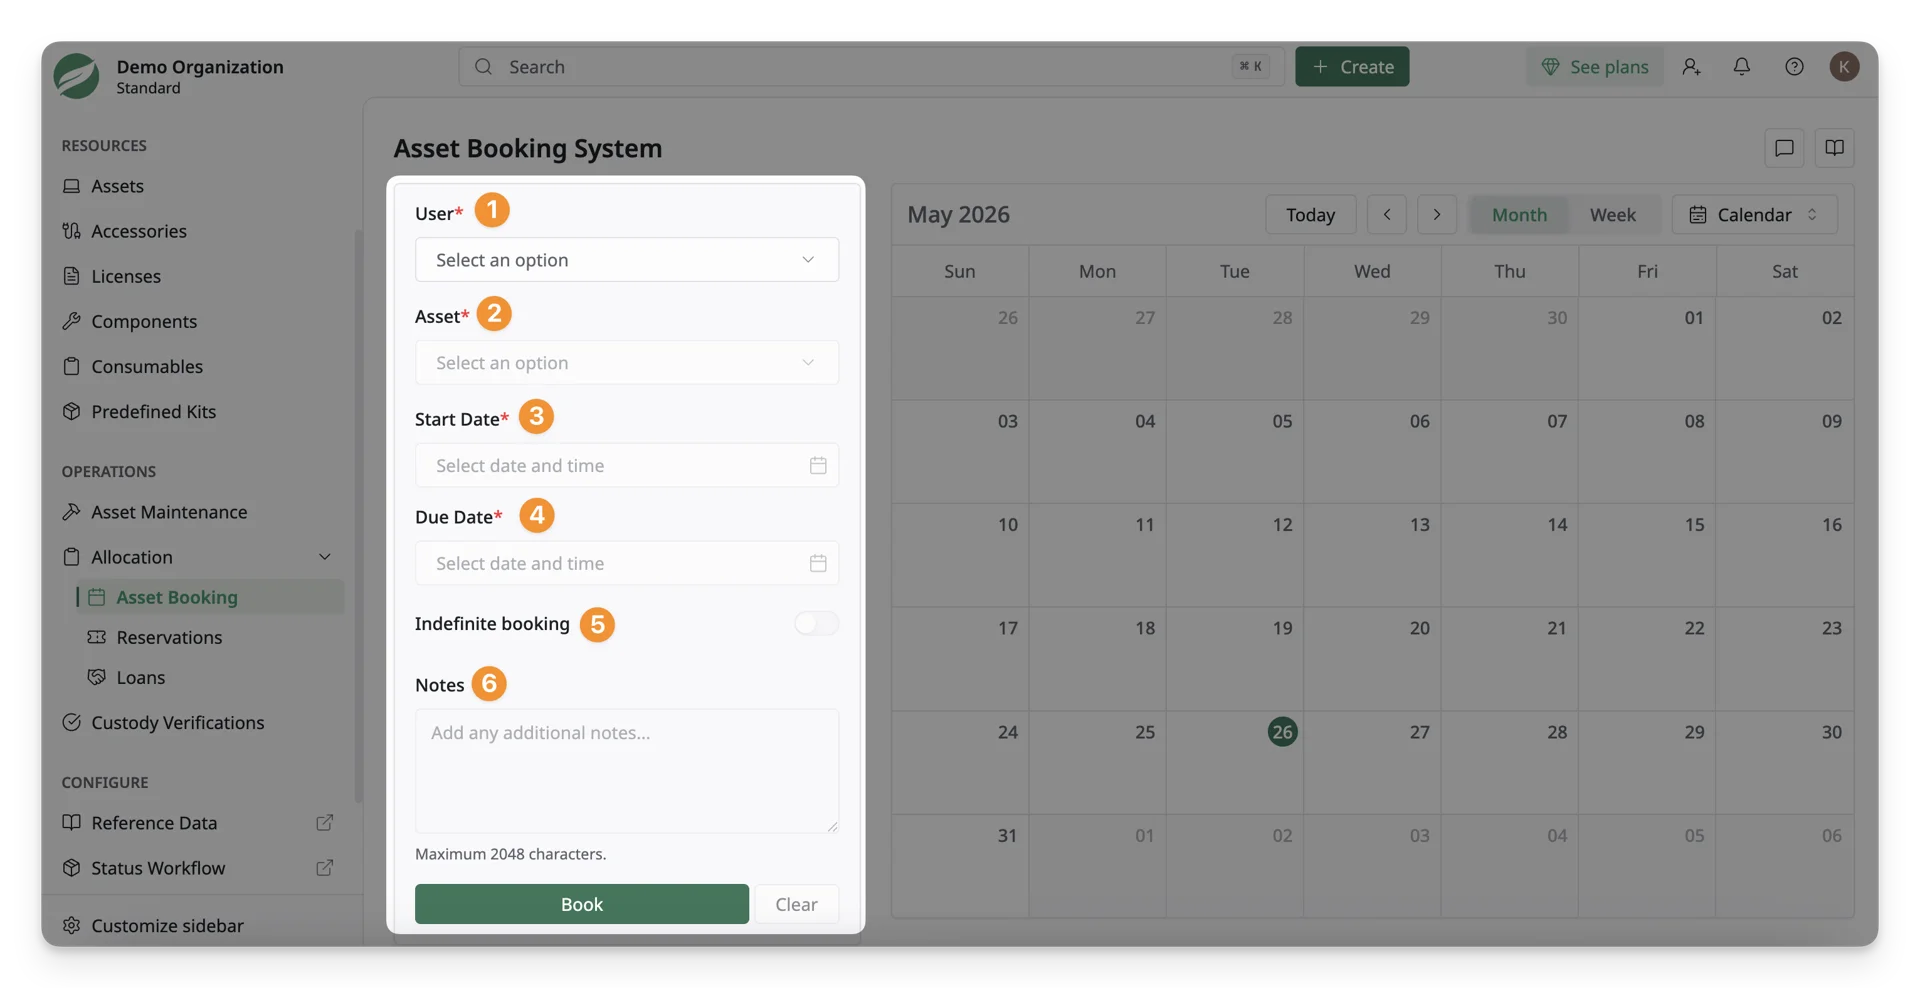
Use the User field to select who the asset booking request is for.
1. Select a User to Make the Booking For
Use the User field to select who the asset booking request is for.
All users can submit booking requests for themselves. However, only admins or authorized users can select another user and submit a booking request on their behalf.
Regular users cannot select other users. For regular users, the booking request is made for themselves.
2. Select an Asset to Book
Use the Asset field to search for the asset you want to book. You can search by asset name or asset tag. After an asset is selected, the calendar on the right displays existing bookings for that same asset, if there are any.
3. Select the Booking Start and Due Date
Use the Start Date and Due Date fields to select the time range for the asset booking.
- The Start Date is when the user wants to begin using the asset.
- The Due Date is when the asset is expected to be returned.
You can also select the booking time range directly from the calendar by dragging across the desired dates or times.
4. Make the Booking Indefinite
Enable Indefinite booking if the asset does not have a planned return date. When this option is selected, the booking can be submitted without a due date.
5. Add Booking Notes
Use the Notes text box to enter any additional information related to the booking request.
For example, you can add details about why the asset is needed, where it will be used, or any special handling instructions.
The Booking Calendar
Use the calendar on the right side to view the availability of the selected asset.
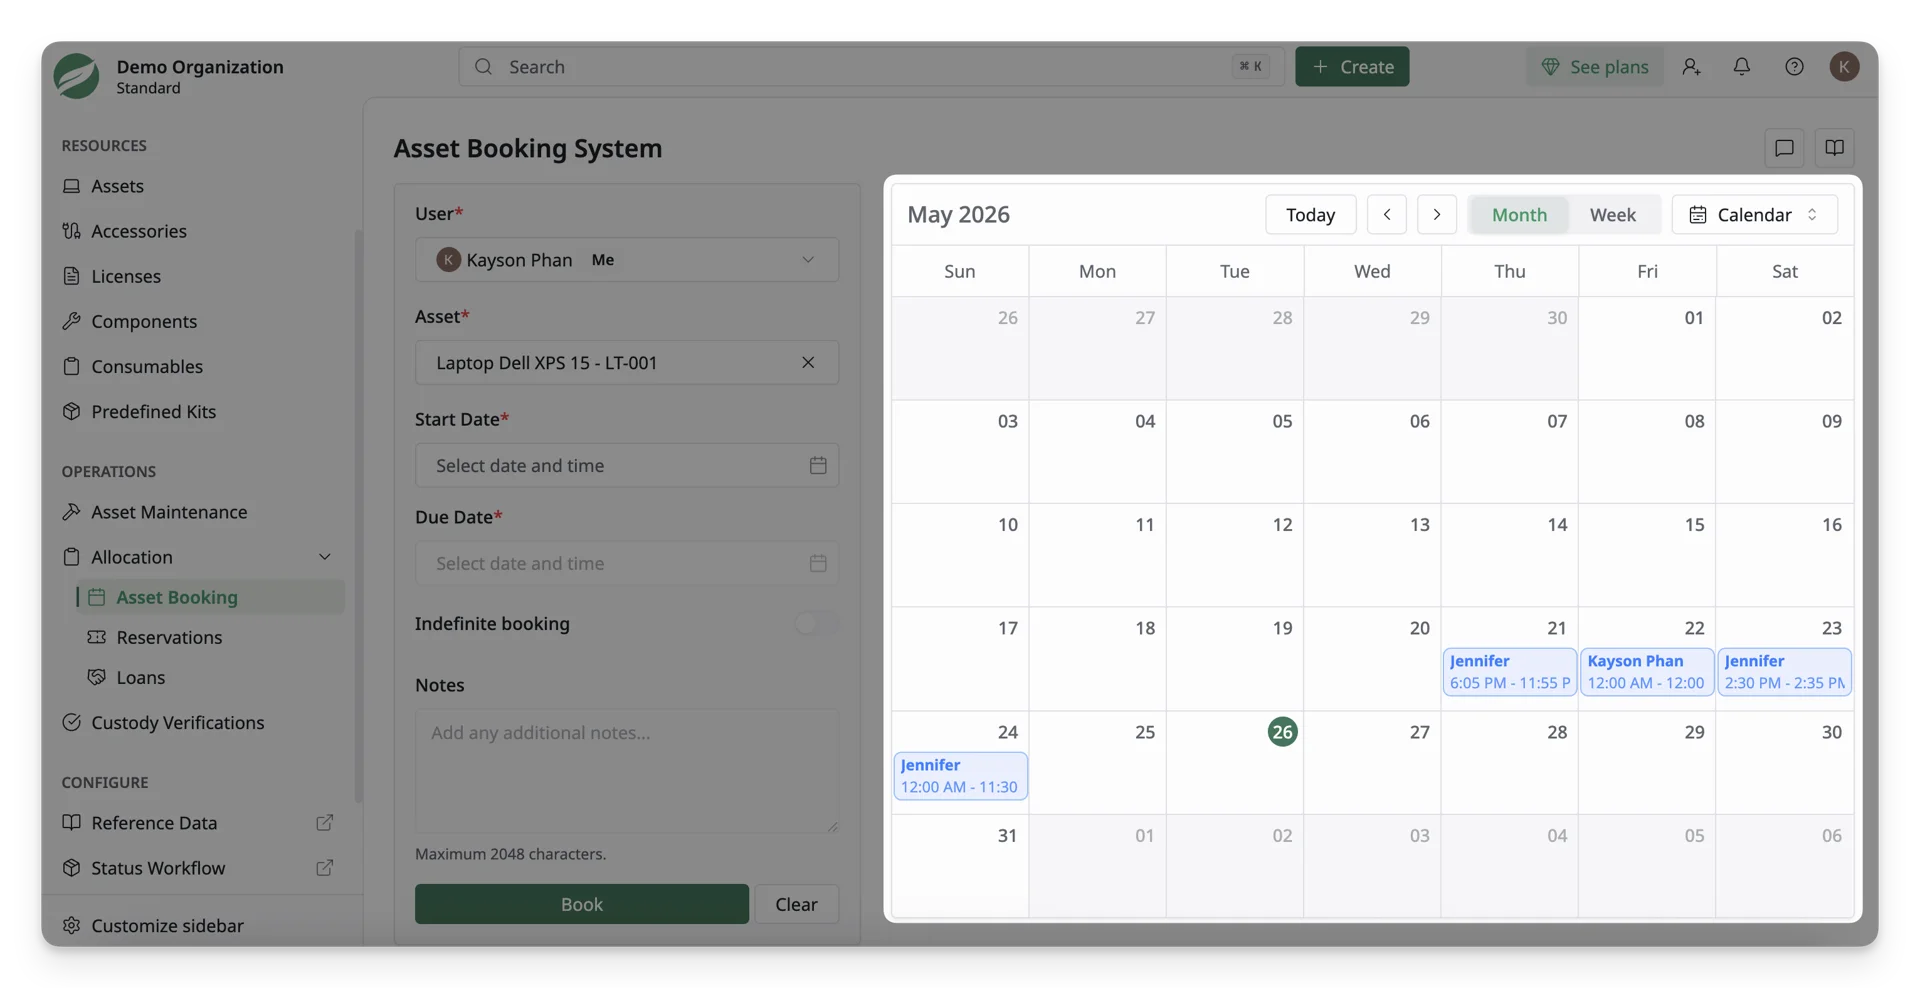
After an asset is selected in the booking form, the calendar displays existing bookings for that asset. This helps avoid selecting a time range that overlaps with another booking.
You can also select a booking time range directly on the calendar instead of using the Start Date and Due Date fields from the Booking Form.
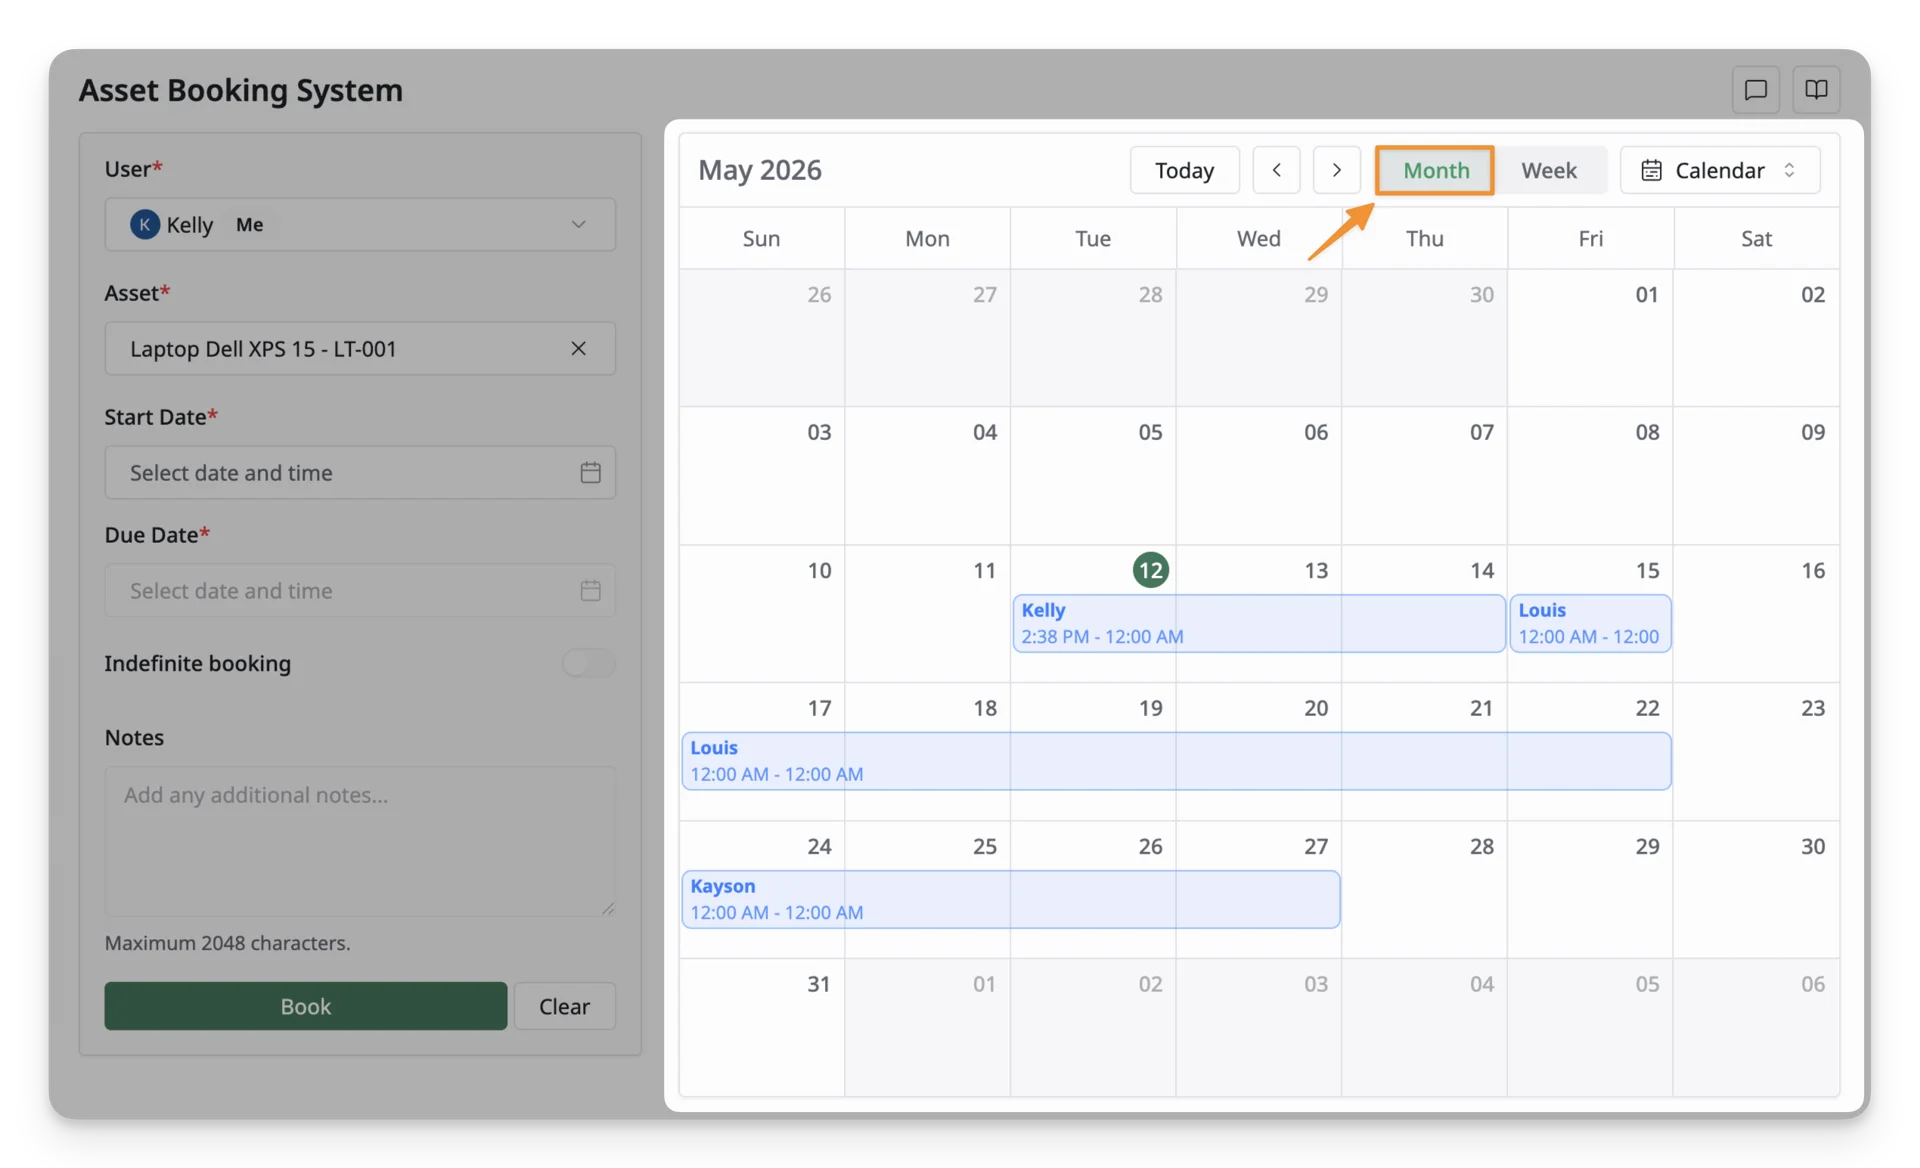
1. Month View
In Month View, you can see bookings across the full month. This view is useful when the asset needs to be reserved for multiple days.
2. Week View
In Week View, you can view bookings by day and time. This view is useful when the asset needs to be booked for a specific time within a single day.
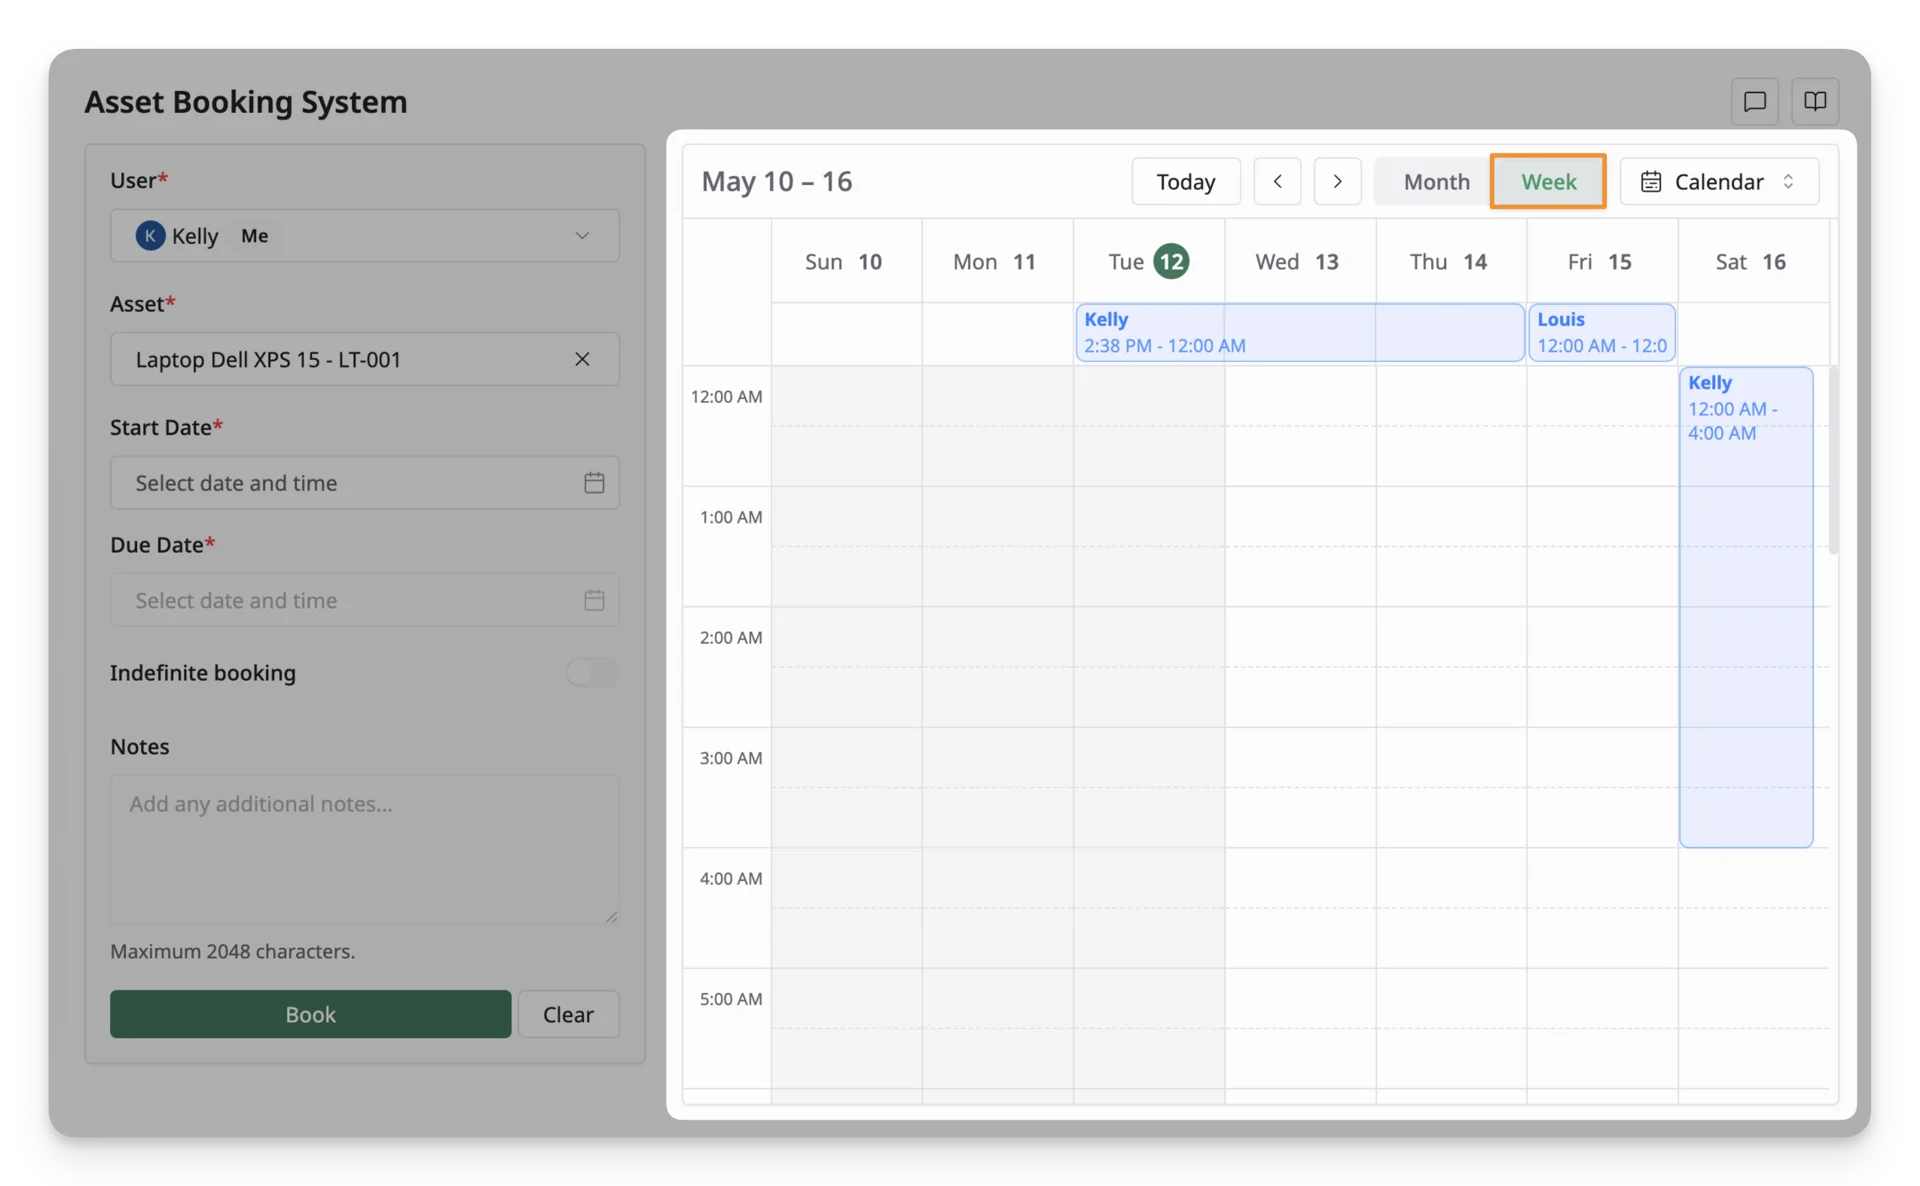
You can drag on the calendar to select the exact time range for the booking request.
3. List View
You can switch from Calendar View to List View to see upcoming bookings for the selected asset. This view helps you quickly review future reservations without looking through the full calendar.
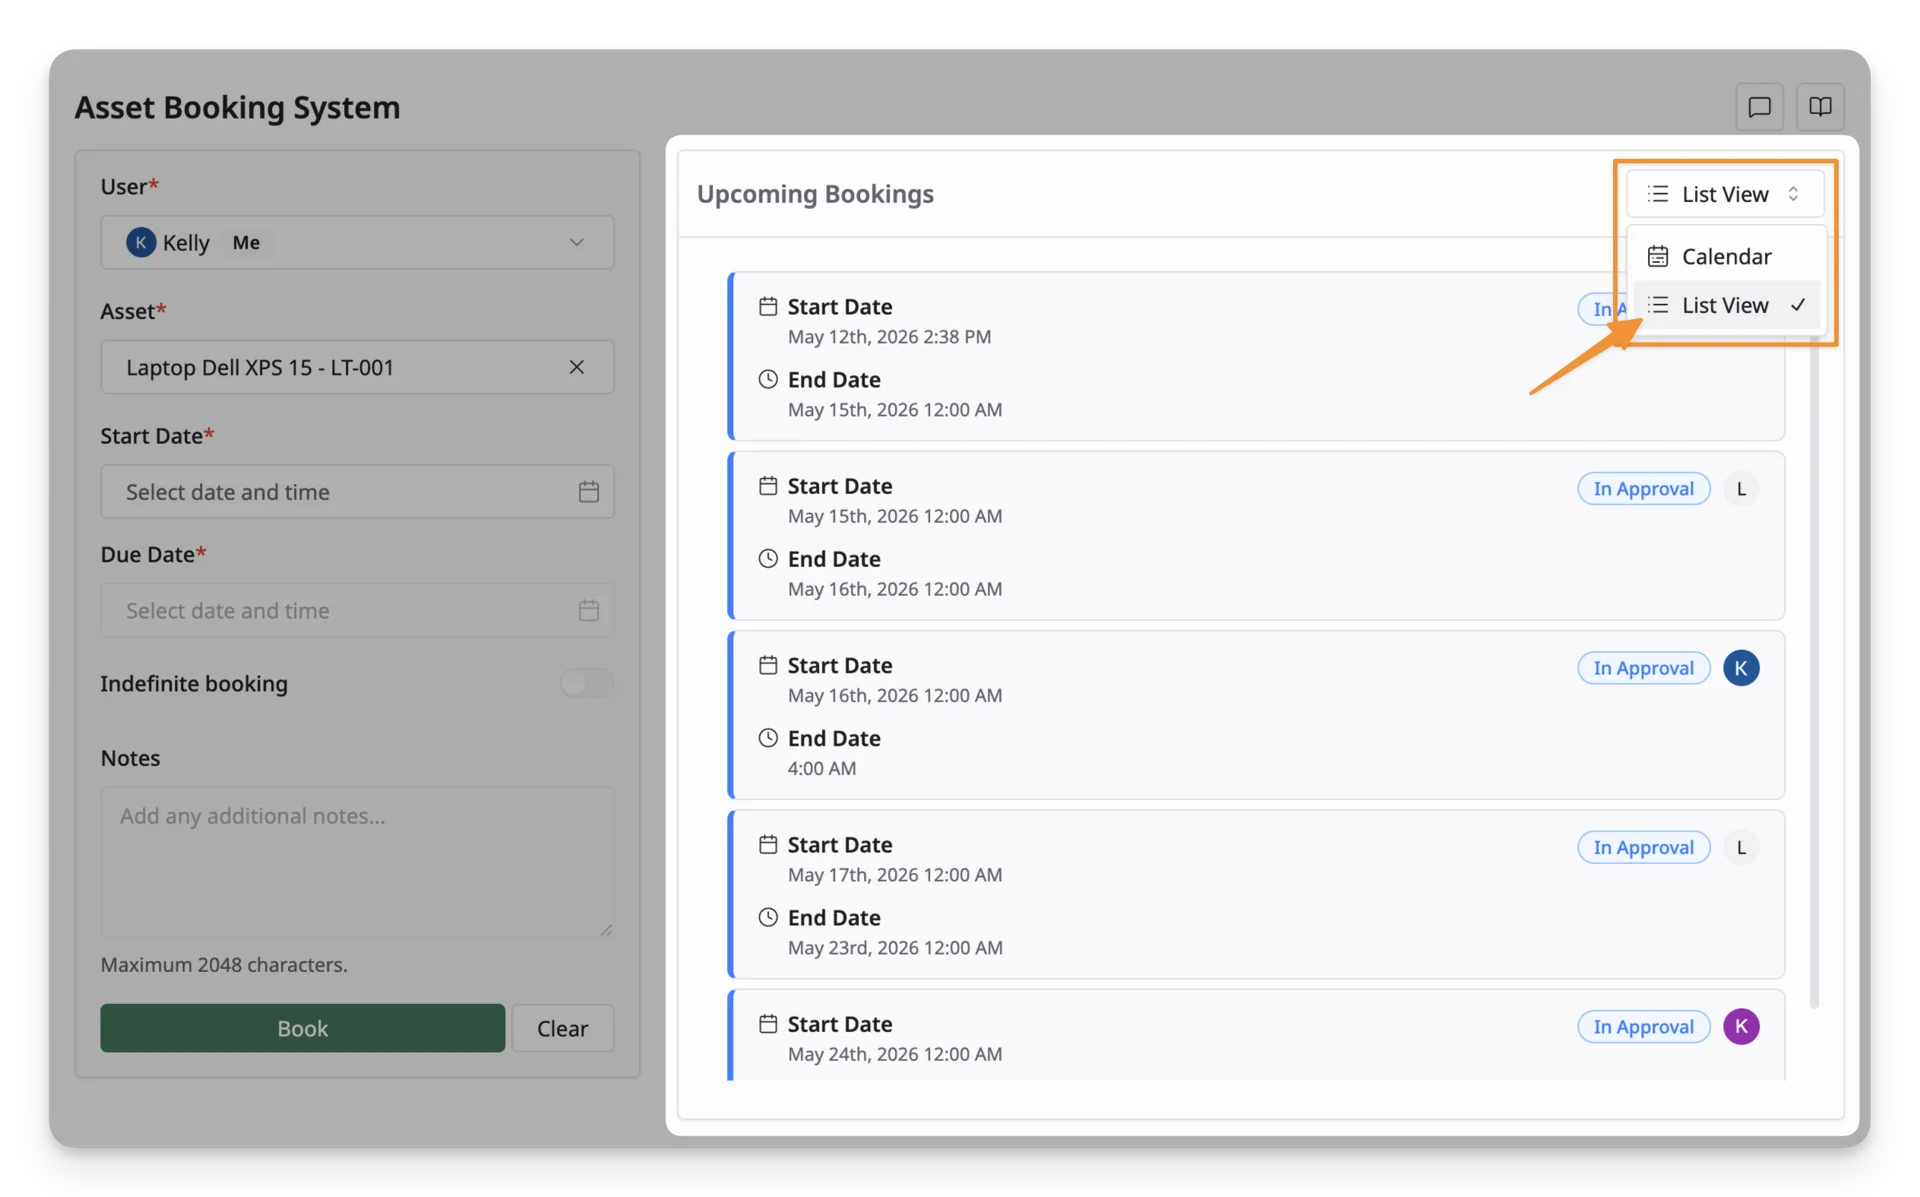
Each booking shows key information such as the start date, end date, and booking status.
Finish the Booking Request
After completing the booking details, click Book to submit the asset request.
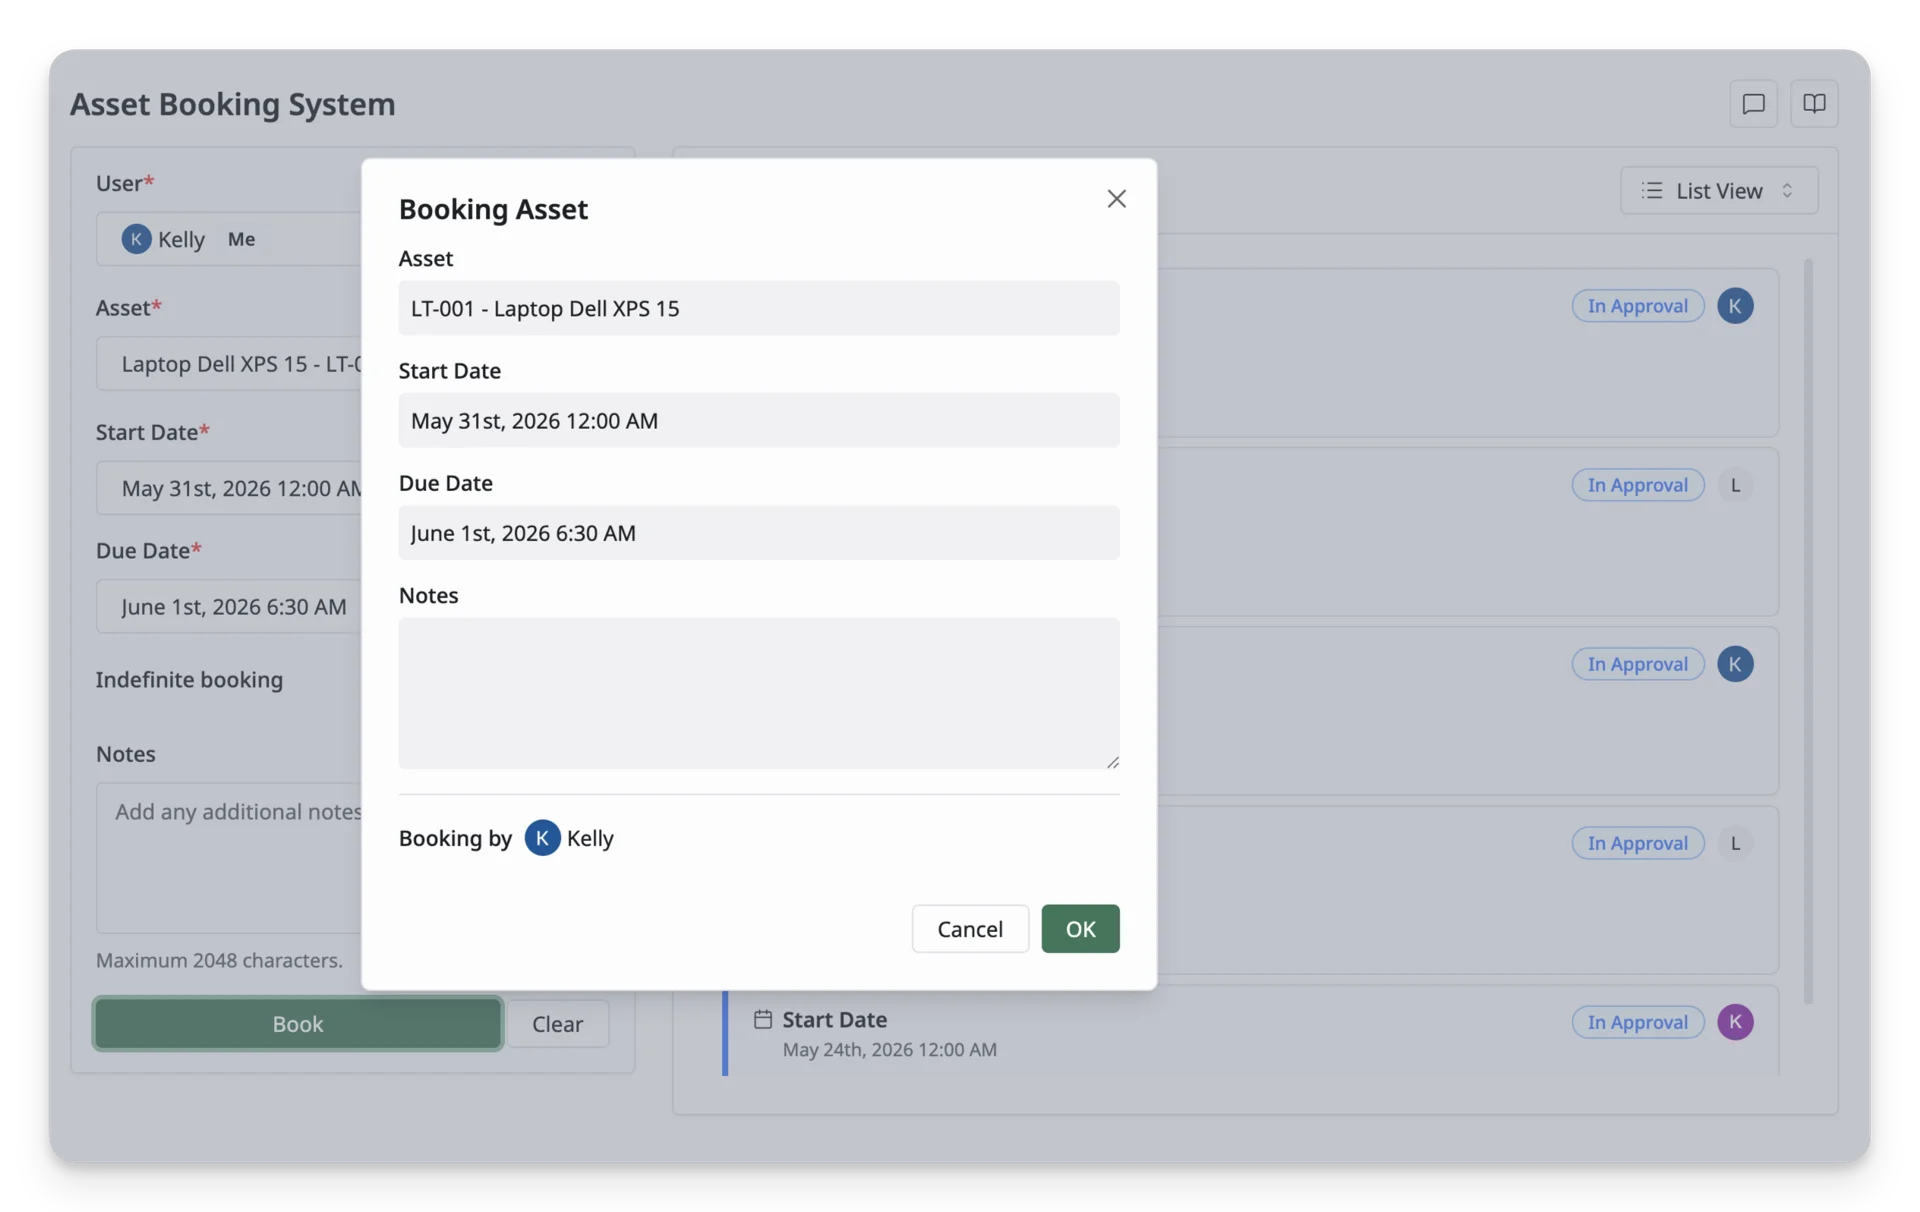
Once submitted, the booking request is sent to the Reservations section, where an admin can review it and decide whether to approve or reject the request.
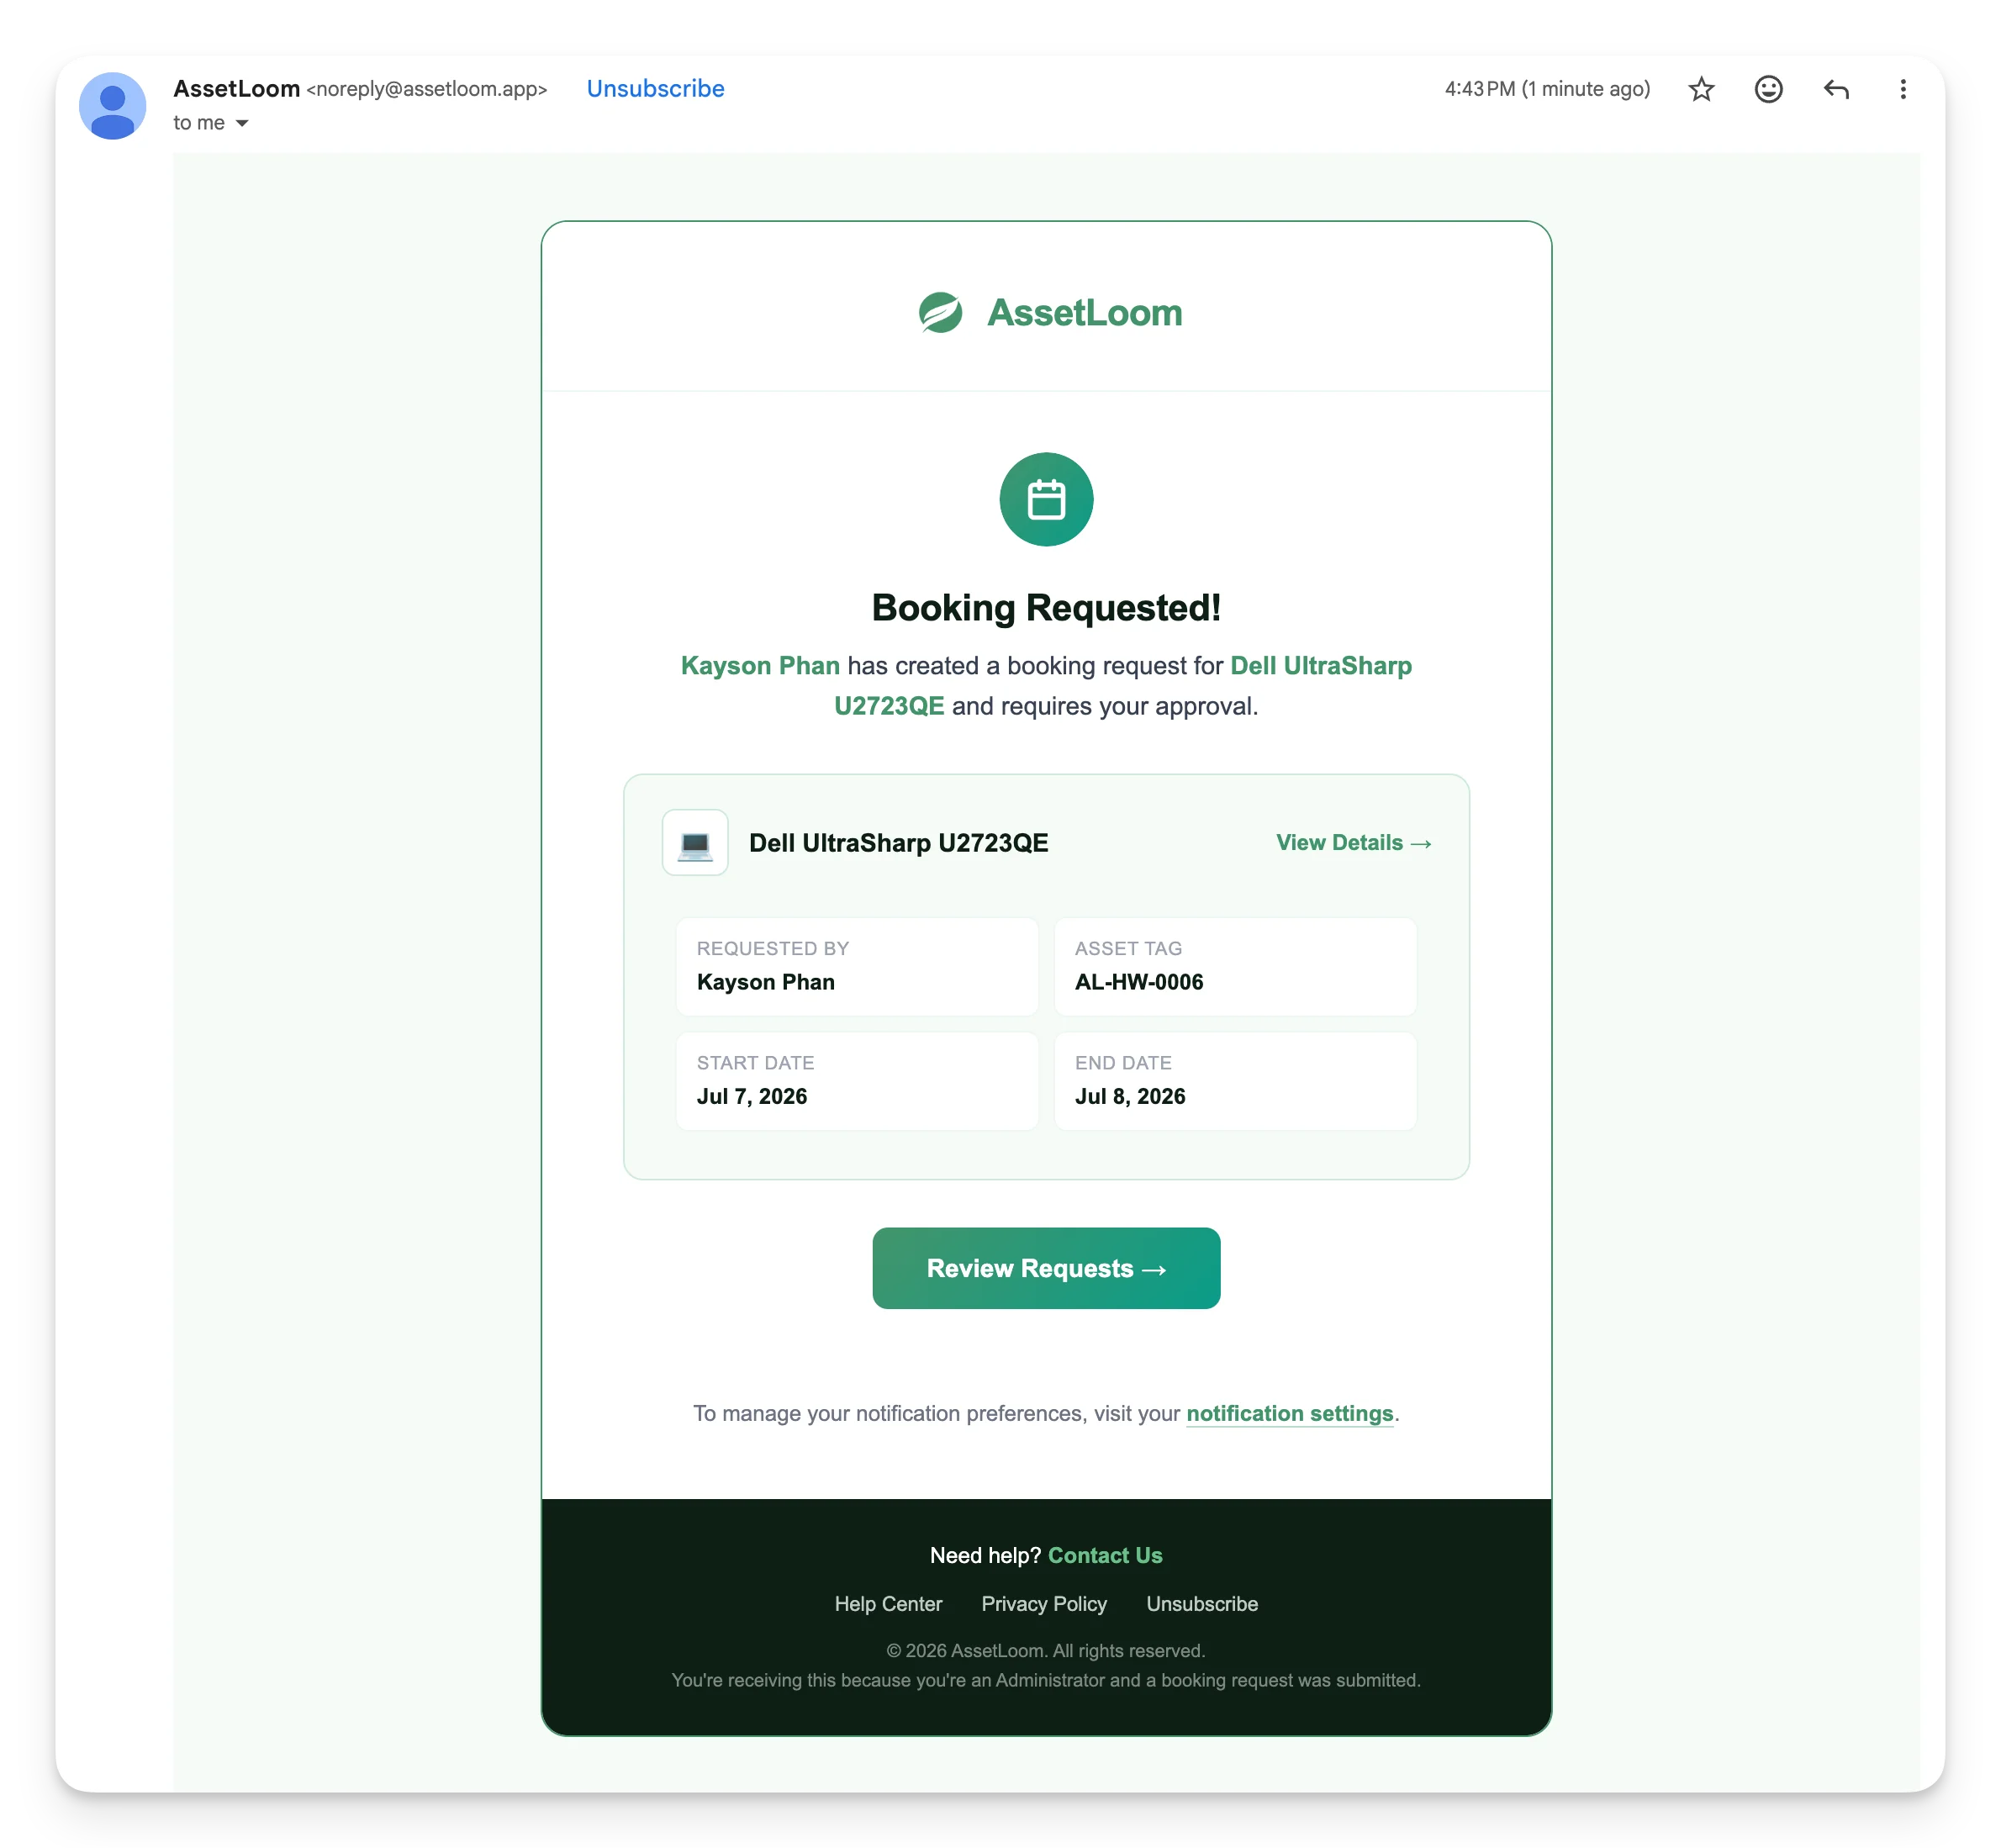
Users and admins or authorized users will receive an email notification about the new booking request. The email includes key asset details and a link to review the request.
Email notification preferences can be updated at any time in Notification Settings.
What’s Next?
- Manage Asset Reservations: Manage your team booking requests
- Manage Asset Loans: Track your asset loans via booking and checkout