How to Export Network Devices to CSV: A Practical Guide
Learn how to export network devices to CSV using a network discovery tool. Find devices, scan your network, save the results, and verify the data.
Learning how to export network devices to CSV gives you a simple way to turn scan results into a file you can review, share, and reuse. You can open it in Excel or Google Sheets, compare devices with your existing inventory, share the data with other teams, or import it into an IT asset management platform. Before you start, only scan networks and devices you own or are authorized to inspect.
TL;DR: How to Get Network Devices into One CSV
If you need all detected devices in one file, the process is:
- Choose a network scanning tool that can identify the devices you need and export a CSV.
- Connect or configure the tool for an authorized IP range.
- Run the scan and check the device data such as IP, MAC address, hostname, and device type.
- Save the results as a CSV and verify the file.
Not every scanner or network management tool supports CSV export. Check the supported output formats before choosing a tool.
Step 1: Evaluate the Capabilities of the Network Discovery Tool
Before you can learn how to export network devices to CSV, you need a source that can find or store those devices. A network scanner can inspect a selected IP range and collect information from devices that respond. The information available depends on the scanner, network setup, discovery methods, and device responses.
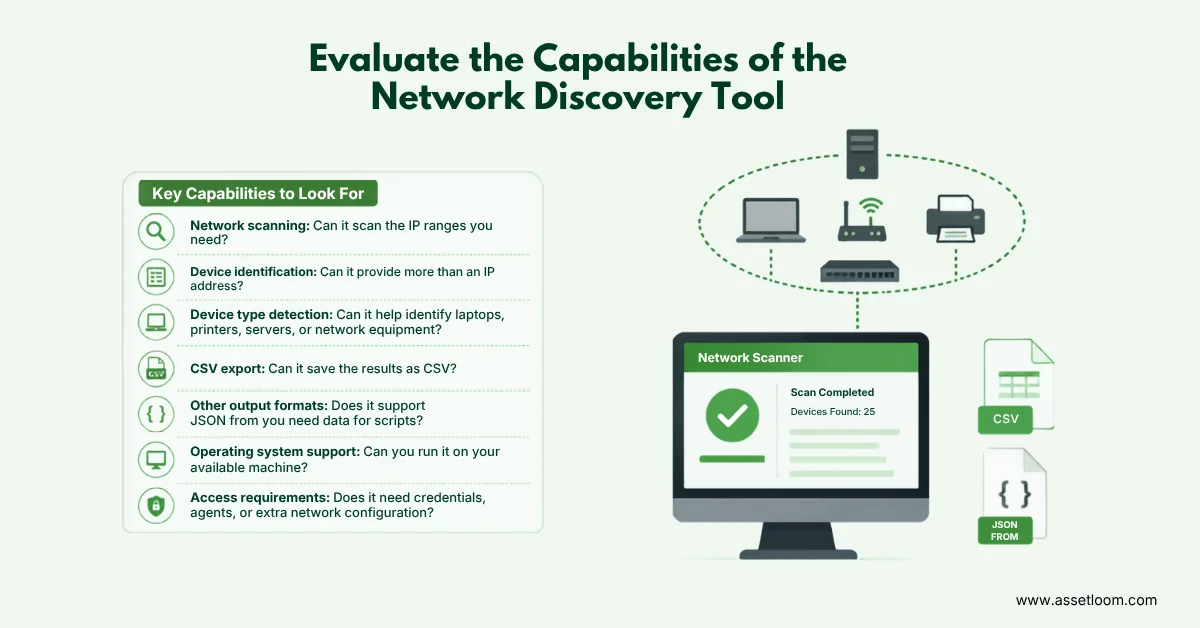
When choosing a tool, check these capabilities:
- Network scanning: Can it scan the IP ranges you need?
- Device identification: Can it provide more than an IP address?
- Device type detection: Can it help identify laptops, printers, servers, or network equipment?
- CSV export: Can it save the results as CSV?
- Other output formats: Does it support JSON if you need data for scripts?
- Operating system support: Can you run it on your available machine?
- Access requirements: Does it need credentials, agents, or extra network configuration?
Step 2: Connect the Discovery Tool to Your Network
For a more focused first scan, you can specify the network range you want to inspect. With many scanners, connecting does not mean installing software on every device. You may only need to run the scanner from a machine that has access to the network and provide the IP range you want to scan.
For example: 192.168.1.0/24
This range contains the IP addresses the scanner will inspect. Network discovery can help you understand what information a scanner can collect from devices within that range.
Depending on the tool and scan method, you may also need:
- Access to the target network.
- Firewall rules that allow the required traffic.
- Credentials for deeper device information.
- SNMP access for some network equipment.
- Windows access for certain Windows discovery methods.
For a first scan, we recommend starting with a small authorized range. This makes the results easier to review and helps you confirm that the scanner is configured correctly.
If the tool supports a dry run like AssetLoom, use it before the scan. A dry run can validate the target and scan setup without sending discovery packets.
Step 3: Scan the Network and Find Your Devices
After setting the target, run the scan. The scanner checks the selected addresses using the discovery methods it supports. These can include ICMP, ARP, TCP, DNS, and other methods, depending on the tool.
Read more about these methods: Basic Network Discovery Method
Check Which Devices Were Found
Before exporting, review the results. Make sure the scan covered the intended network range and the device count looks reasonable. You will usually find two types of results: devices with complete information and devices with some missing fields.
Look beyond the IP address
An IP address tells you where a device was found, but it does not always tell you what the device is. When deciding how to export network devices to CSV, check which device fields your scanner can collect. Below are some common fields that make the exported file much more useful.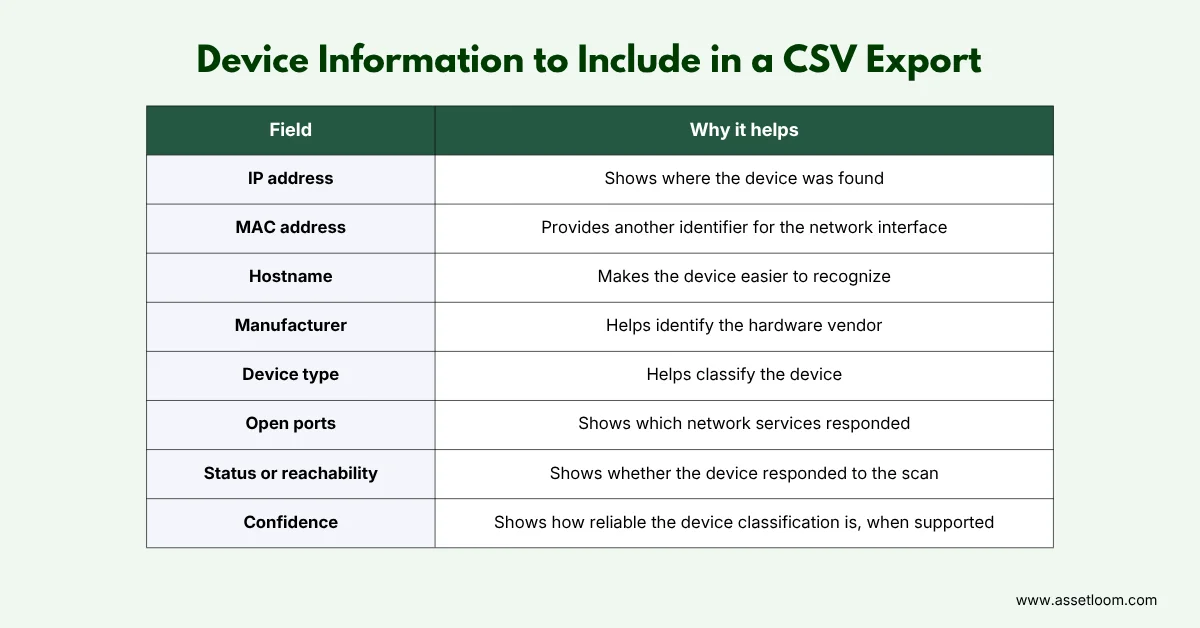
These fields give you more context than an IP address alone. The exact data depends on the scanner, discovery methods, and information available from each device.
Devices With Complete Information
If a device has all the expected fields, check its confidence level if your tool provides one. Device types are often inferred from network information such as MAC vendor data or open ports, so a low confidence result may need another check.
If the information looks reliable, you can keep and export the record.
Devices With Missing Information
Missing hostnames, MAC addresses, or device types do not always mean the scan failed. The device may not expose the information, or the discovery method may not collect it.
If your scanner supports additional discovery methods, you can try a deeper scan for those devices. Keep incomplete records for review instead of removing them. A device with missing information is still a device your scan found.
Step 4: How to Export Network Devices to CSV
Once the scan is complete, you can save the results. The way to export network devices to CSV depends on the tool. A graphical scanner may provide an Export CSV or Download CSV button. A command-line scanner may save the results directly to a file through a command option.
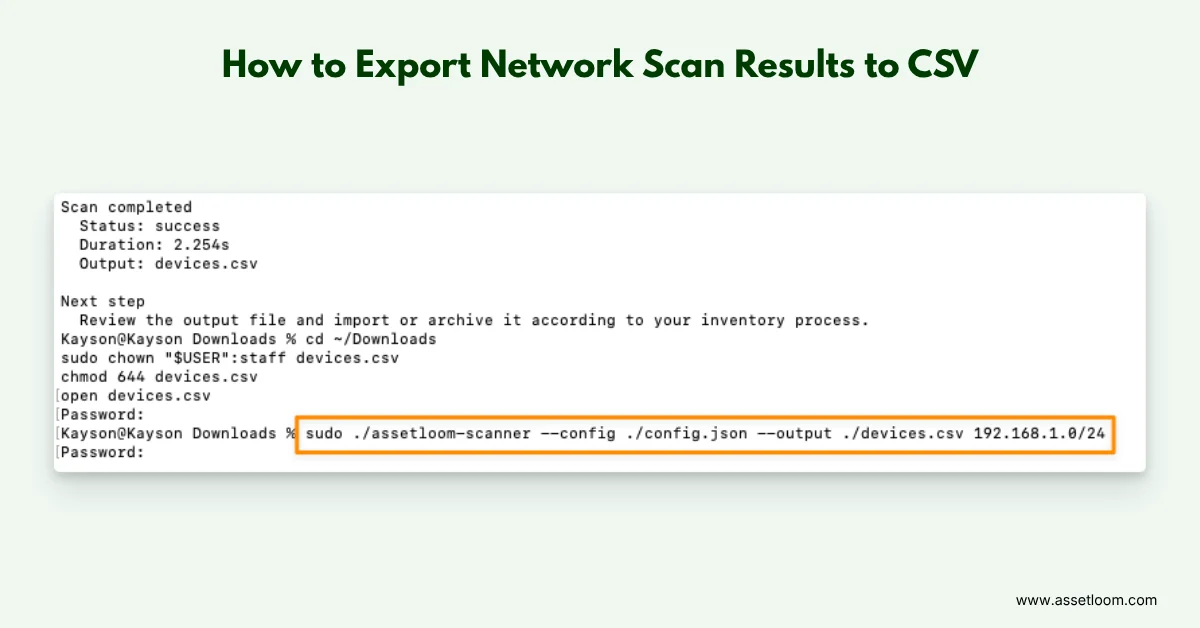
For terminal-based tools, the output file is often specified as part of the scan command. For example, AssetLoom Free Network Scanner uses the --output option:
For macOS and Linux:
sudo ./assetloom-scanner --config ./config.json --output ./devices.csv target
For Windows:
.\assetloom-scanner.exe --config .\config.json --output .\devices.csv target
When the scan finishes, the results are saved to the specified CSV file.
Export Network Devices with AssetLoom Free Network Scanner
AssetLoom Free Network Scanner brings discovery, scanning, and CSV export into one agentless tool. You run it from your own Windows, macOS, or Linux machine without installing software on the devices you scan.
Here is how AssetLoom fits into the workflow for exporting network devices to CSV:
- Discovery: The scanner can identify device type, manufacturer, open ports, and discovery confidence, along with network identifiers.
- Connect: Set your authorized IPv4 range as the scan target. You can run a dry run first to check the target before sending discovery packets.
- Export: Use the
--outputoption to save the results as CSV or JSON. The output file is created when the scan finishes.
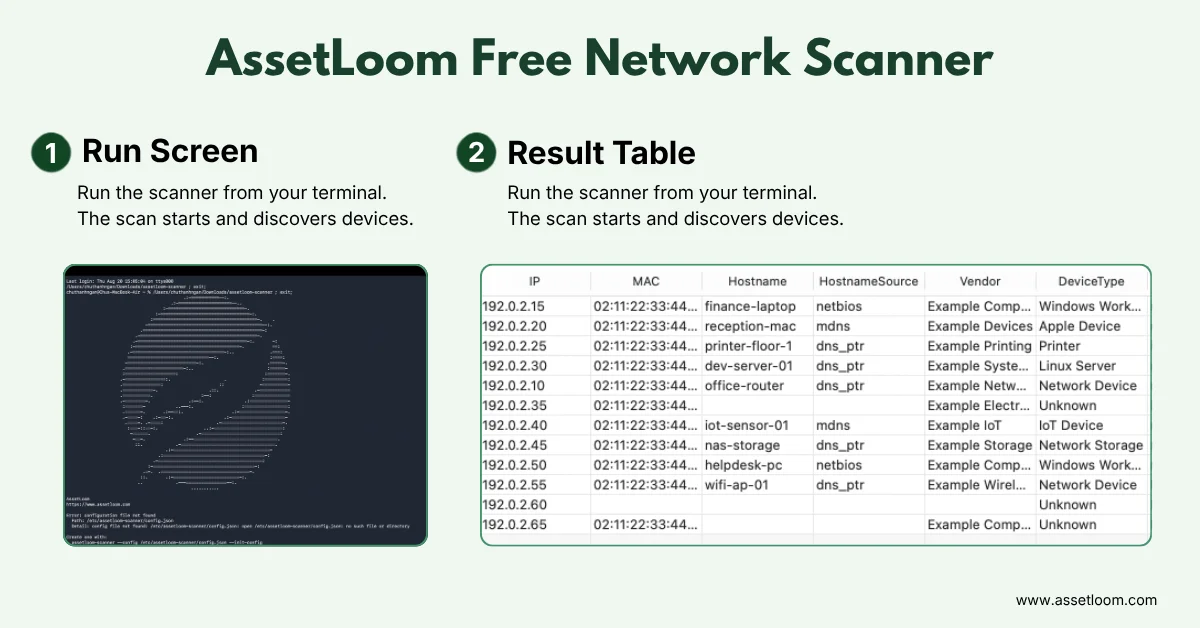
The scanner is free and requires no credit card. Results stay local unless you choose to move them to another location, such as a spreadsheet, ticketing system, or IT asset management platform.
This makes AssetLoom a practical choice when you need a quick network snapshot without installing agents on devices or setting up a separate scanning server.
Conclusion
Understanding how to export network devices to CSV starts with choosing the right discovery tool, scanning the correct network range, checking the device data, and saving the results in a usable format. Taking these steps helps you create a cleaner device list that you can review, share, or use for inventory work.
With AssetLoom Free Network Scanner, you can scan an authorized IPv4 range, discover connected devices, and save the results as CSV or JSON for your next workflow.
Need a quick list of devices connected to your network? Try AssetLoom Free Network Scanner!
FAQs
1. Can I export network devices to CSV without installing an agent?
Yes. An agentless scanner, including AssetLoom Free Network Scanner, can collect network-level information without installing software on each target device. The amount of information available depends on the scan methods and device responses.
2. Can I scan an entire private IP range?
You can scan an authorized private IP range when your scanner and network configuration support it. Starting with a smaller range can make the first scan easier to review.
3. Can I import the CSV into an IT asset management system?
Often, yes. The destination system determines the required fields and mapping. Before importing, check for duplicates, missing values, and unsupported formats.
4. Does a network scan create a complete IT asset inventory?
No. A network scan only shows the devices the scanner can find at the time of the scan. A complete asset record may also include ownership, location, lifecycle, warranty, software, and financial details. For this broader information, you can use an IT asset management platform like AssetLoom.
5. Why is my device missing from the CSV?
The device may be offline, outside the scanned range, blocked by a firewall, or not responding to the discovery methods used. Check the target range and scan configuration first.