5 Best Automated Network Scanning Tools for IT Asset Discovery
Automated network scanning tools help find out what devices are on your network, how they are set up, and where potential risks are hiding.
When managing a modern IT environment, visibility is everything. Without knowing what devices, applications, and services are running on your network, it’s nearly impossible to keep things secure and organized. This is where network scanning comes in. It’s the process that gives you that visibility by detecting what’s on your network, how it’s configured, and where potential risks might be hiding.
In this article, we’ll explain what network scanning is, why it matters, the benefits of using automated network scanning tools, and we’ll wrap up with a list of the top 5 automated network scanning tools that organizations rely on today.
What Is Network Scanning?
Network scanning is the process of discovering devices and systems connected to a network and collecting information about them. A scanner checks a range of IP addresses to find devices on the network. It identifies which devices are reachable and collects available details about them. This can include IP addresses, MAC addresses, hostnames, device types, and open ports.
Network scanning provides a faster way to understand what is actually connected to the network without checking every device manually. It can also help uncover new, unknown, or unmanaged devices that may be missing from the IT asset inventory.
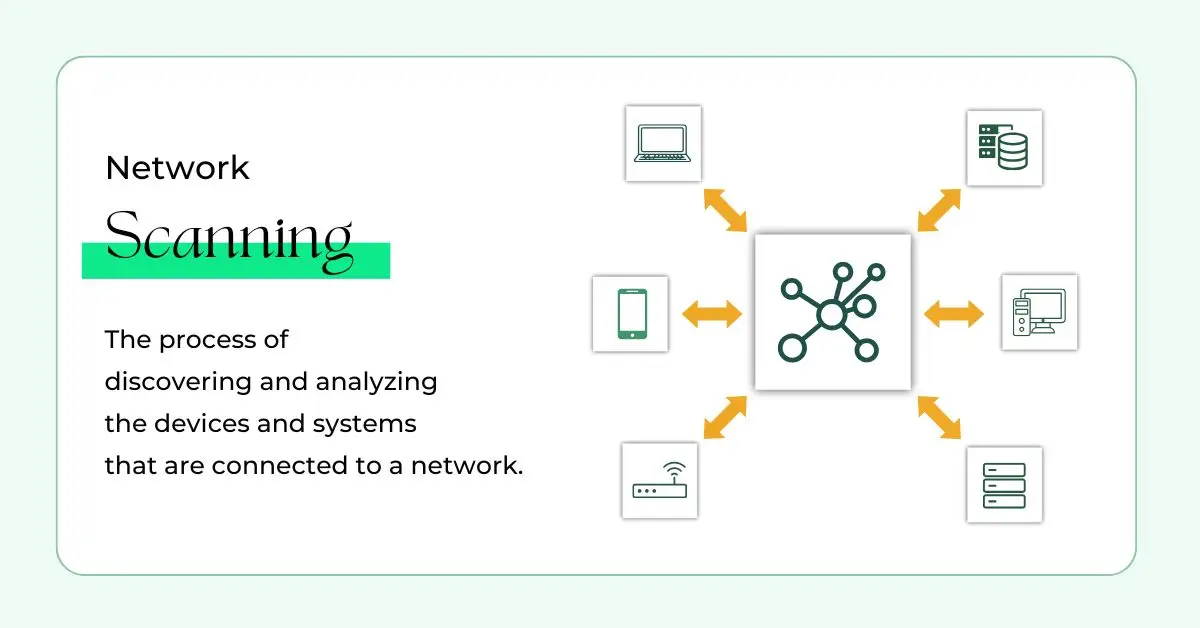
A typical scan can tell you:
- Which devices are active on your network (PCs, servers, routers, printers, IoT devices, etc.)
- What operating systems and software they’re running
- Which ports and services are open
- Hardware details like CPU, memory, and storage
- Configuration details, patch levels, and more
Think of it as taking an X-ray of your network. You can’t manage what you can’t see, and without scanning, there’s always a risk that something critical is going unnoticed.
How Does It Work?
Network scanning tools follow a structured process to detect, identify, and analyze devices on a network. While the exact techniques vary by tool, most follow these steps:
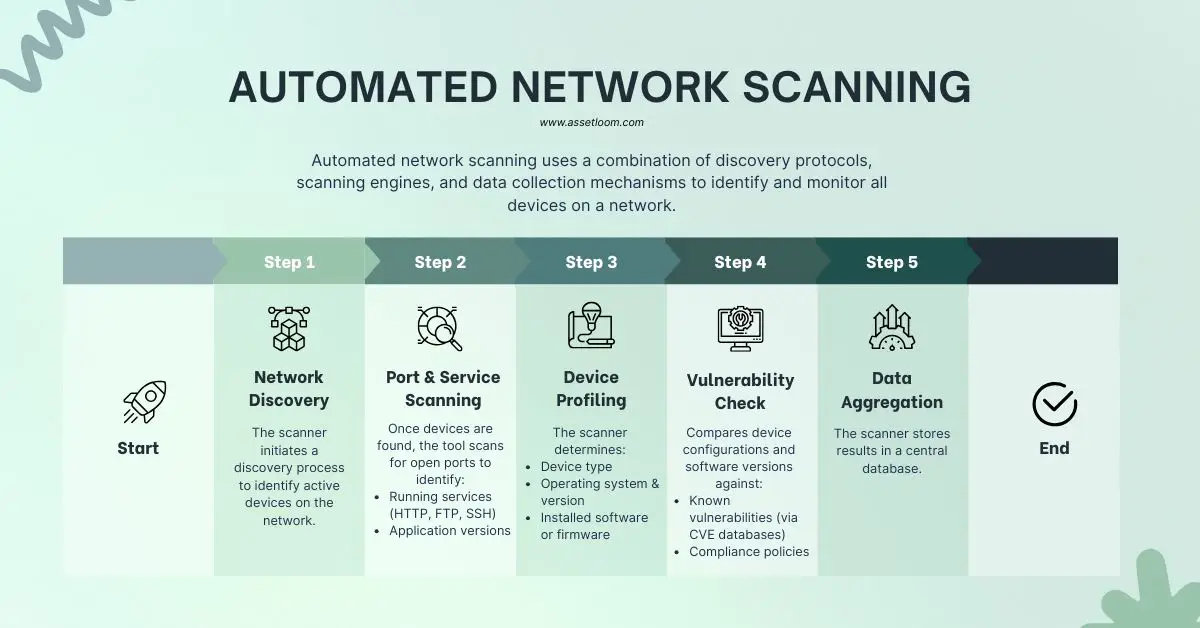
1. IP Range Discovery
The first step in any network scan is to identify which IP addresses are active. This usually involves:
- ICMP Ping Sweeps: The tool sends ICMP “echo request” packets to IP addresses in a given range. If a device responds with an “echo reply,” it’s considered alive.
- ARP Requests: Within local subnets, Address Resolution Protocol (ARP) requests can reveal active devices even if they block ICMP.
- TCP or UDP Probes: If ICMP is blocked, some scanners send TCP SYN packets or UDP datagrams to common ports (e.g., 80, 443) to check for a response.
2. Host Identification
Once active IP addresses are detected, the scanner identifies the devices:
- Reverse DNS Lookups: Queries DNS to resolve IPs to hostnames.
- NetBIOS / LLMNR: For Windows-based systems, these protocols help identify the machine name and sometimes the logged-in user.
- SNMP Probing: If Simple Network Management Protocol (SNMP) is enabled, scanners can retrieve detailed device information like vendor, model, and uptime.
3. Port and Service Scanning
Next, the tool checks which ports are open on each device. This provides insight into what services are running:
- TCP Connect or SYN Scan: Determines if ports like 22 (SSH), 80 (HTTP), or 443 (HTTPS) are open.
- Service Fingerprinting: By examining responses, the scanner guesses which application and version is running (e.g., Apache 2.4.6 on port 80).
4. OS and Device Fingerprinting
Scanners use multiple techniques to identify operating systems and device types:
- TCP/IP Stack Fingerprinting: Every OS has a unique way of responding to certain network packets. By analyzing these responses, the tool can infer whether the device is running Windows, Linux, macOS, etc.
- SNMP Details: Many network devices like routers and printers share vendor and model info via SNMP.
- HTTP Headers and Banners: Web servers often reveal OS details in HTTP headers.
5. Hardware and Software Inventory
Advanced scanners go beyond basic identification to collect:
- CPU, memory, and disk specifications
- Installed operating system versions and patch levels
- Installed software lists (via WMI for Windows or SSH for Linux)
This is essential for IT asset management and compliance reporting.
6. Vulnerability Assessment (Optional)
Some tools include vulnerability scanning:
- Compare detected software versions against known vulnerability databases (like CVE).
- Highlight outdated firmware or missing patches.
7. Data Aggregation and Reporting
Finally, the results are compiled into:
- Asset Inventories: A structured list of all discovered devices.
- Topology Maps: Visual diagrams showing network relationships.
- Reports and Dashboards: For compliance, audits, and security monitoring.
Manual scanning involves running scripts or command-line tools one at a time, which is inefficient for large environments. Automated tools perform these steps continuously or on a schedule, integrate with CMDB discovery, and alert you when something changes.
Why Is Automated Network Scanning Important?
Networks today are dynamic. Devices join and leave all the time, laptops, virtual machines, IoT sensors, and even containers in the cloud. Without proper scanning, unknown or unauthorized devices can easily slip through, posing security and compliance risks.
Some key reasons why scanning is critical:
- Security: Detect unknown or rogue devices before they become threats.
- Compliance: Many regulations require accurate asset inventories.
- Troubleshooting: Quickly locate devices and their configurations when resolving issues.
- Change Management: Understand what changed on the network and when.
- Capacity Planning: See where resources are under or over-utilized.
Learn more: Top 10 Tools for CMDB Automated Discovery
Benefits of Automated Network Scanning Tools
Manual scanning is slow, error-prone, and simply not practical for modern environments. That’s why automated network scanning tools are the standard today. Here are the main benefits:
1. Real-Time Visibility
Automated tools run continuously or on a schedule, so your asset inventory is always up-to-date.
2. Time Savings
Instead of manually pinging devices or running scripts, automated tools handle the entire process in the background.
3. Improved Security
They can detect new or unauthorized devices immediately, reducing the attack surface.
4. Detailed Asset Information
They provide deep insights into hardware, software, and configurations, which helps with patching and compliance.
5. Integration with Other Systems
Many tools integrate with CMDB (Configuration Management Database), ticketing systems, and monitoring platforms, making the entire IT management process more streamlined.
6. Change Detection
Automated scanners track changes in device configurations, helping IT teams identify unauthorized changes or misconfigurations.
Top 5 Automated Network Scanning Tools
There are many tools on the market, but here are five well-known and widely used automated network scanning tools:
1. Nmap
Overview:
Nmap (short for Network Mapper) is an open-source tool that’s widely used for network discovery and security auditing. It’s popular with system administrators and security professionals because of its flexibility and ability to scan large networks efficiently.
Key Features:
- Host discovery and port scanning
- Service and OS detection
- Scriptable with NSE (Nmap Scripting Engine)
- Free and open-source
Best For: Organizations that need a powerful, flexible tool for security scanning and network mapping.
2. SolarWinds Network Performance Monitor
Overview:
SolarWinds NPM is a comprehensive network monitoring tool that also includes automated discovery and scanning features. It’s designed for enterprises that need detailed network performance data along with asset discovery.
Key Features:
- Automated network discovery
- Real-time performance monitoring
- Customizable dashboards
- Advanced reporting
Best For: Enterprises looking for a full network performance and asset management solution.
3. ManageEngine OpUtils
Overview:
OpUtils is a network monitoring and IP address management tool by ManageEngine. It includes automated scanning features to detect devices and monitor IP address usage.
Key Features:
- IP address and switch port management
- Network discovery and scanning
- SNMP-based device details
- Integrated with other ManageEngine products
Best For: IT teams needing IP management along with device discovery.
4. Paessler PRTG Network Monitor
Overview:
PRTG is a well-known network monitoring solution that includes device discovery and automated scanning as part of its setup process. It’s suitable for small to large networks.
Key Features:
- Auto-discovery of network devices
- Performance monitoring with sensors
- Alerting and reporting
- Scales for different network sizes
Best For: Organizations that want network monitoring and asset discovery in one platform.
5. AssetLoom
Overview:
AssetLoom is an IT asset management platform with a free network scanner for discovering devices connected to your network. Scan results can be exported and imported into AssetLoom. Discovered devices can then be turned into trackable assets. You can manage their ownership, lifecycle, and cost information in one place.
How It Works:
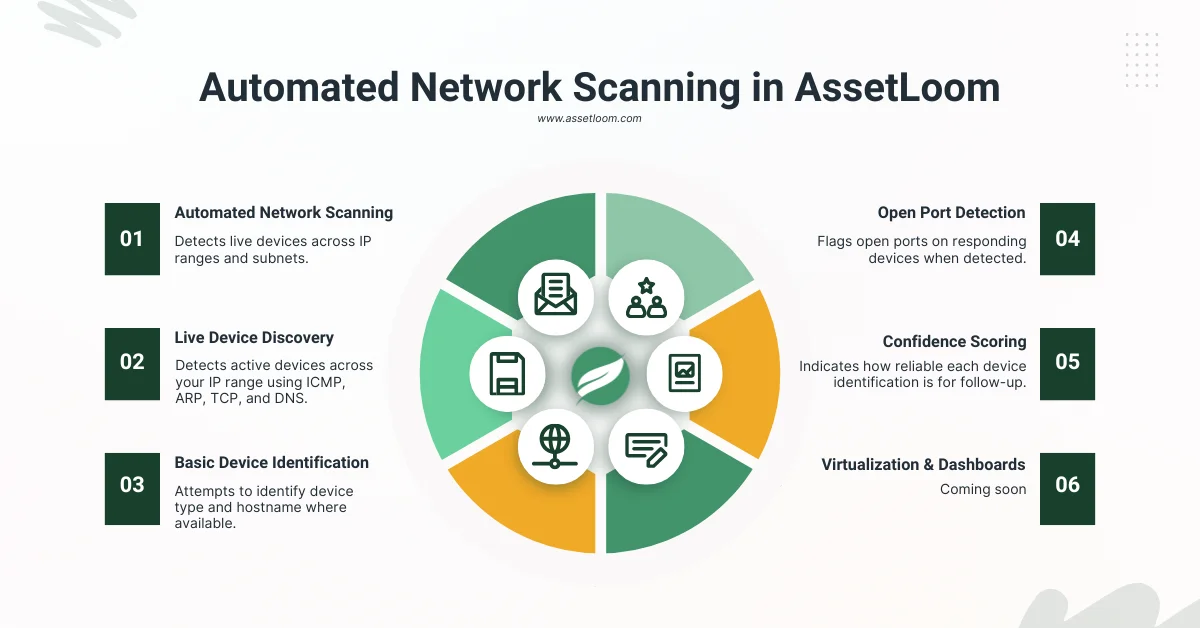
AssetLoom Free Network Scanner runs directly on your network and checks the IP range you choose. It looks for devices that are reachable and records the ones that respond.
For each discovered device, the scanner collects available details such as its IP address, MAC address, device type, and more. The amount of information can vary from one device to another depending on what it exposes on the network.
Some devices may provide enough information to identify them clearly. Others may only confirm that they are present, so they can appear as Unknown in the scan results.
The scanner is agentless, which means you do not need to install software on the devices being scanned. Once the scan is complete, the results are compiled into a list that you can review and export as CSV or JSON.
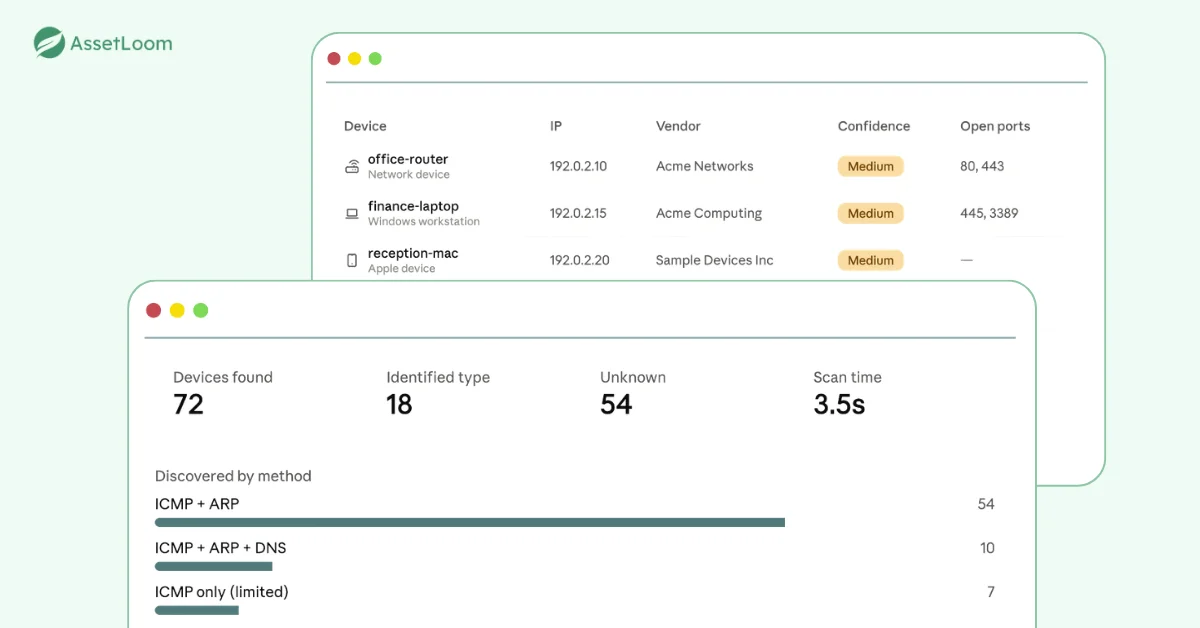
Key Features (Planned):
- Automated Network Scanning: Detects live devices across IP ranges and subnets.
- Live Device Discovery: Detects active devices across your IP range using ICMP, ARP, TCP, and DNS.
- Basic Device Identification: Attempts to identify device type (e.g., Mac, Apple Device) and hostname where available.
- Open Port Detection: Flags open ports on responding devices when detected.
- Confidence Scoring: Indicates how reliable each device identification is, so you know what needs manual follow-up.
- Virtualization & Container Awareness: Discovers VMs and future support for containerized environments (coming soon).
- Dashboards & Reporting: Visual summaries and customizable reports (coming soon)
Best For: Businesses that need cost-effective IT asset management combined with free network scanning in one solution.
From Network Scan to Asset Management
A network scan helps you understand what devices are connected. The next step is turning that discovery data into an asset inventory that can be maintained over time.
After exporting scan results to CSV, you can import them into ITAM tools, such as AssetLoom, and continue managing the discovered devices as assets. This makes it easier to add the context that a network scan alone cannot provide, such as:
- Ownership: who is responsible for or using each device
- Lifecycle stage: whether an asset is in use, under maintenance, or ready for retirement
- Cost information: purchase cost, depreciation, repairs, and other asset-related expenses
- Asset condition: identify aging, underused, or replacement-ready devices
The network scan provides the discovery layer. Asset management adds the operational context needed to keep the inventory useful after the scan is complete.
How to Choose the Right Automated Network Scanning Tools
When deciding which tool to use, consider:
- Size and complexity of your network
- Budget (some tools are free, others are enterprise-grade and costly)
- Integration needs (e.g., with CMDB, helpdesk, security tools)
- Reporting and compliance requirements
- Cloud and virtualization support
Final Thoughts
Automated network scanning tools have become an essential part of IT operations. They provide the visibility you need to manage assets, secure your environment, and stay compliant with industry standards. Whether you choose an open-source tool like Nmap, an enterprise solution like SolarWinds, or an upcoming platform like AssetLoom, the key is to ensure your scanning strategy fits your organization’s size, complexity, and security needs.